Payments
Payments lets an approved agent hand off from conversation into a real checkout step, then bring the payment result back into the same conversation.
This is useful when the next step should happen only after the user pays, such as a consultation fee, deposit, or other approved service charge.
When to use Payments
Use Payments when all of the following are already true:
- the service, price, and next step are already approved by your team
- the user is ready to pay in order to continue
- the team wants the payment request and result to stay visible in the conversation history
Do not use Payments to improvise offers
The payment step should collect an already approved charge. It is not the place for the agent to invent new prices, bundles, or guarantees on the fly.
Before you turn it on
Two setup steps need to happen before an agent can use Payments well:
- A workspace owner or admin sets up the workspace payment account.
- The agent owner adds the
Paymenttool inEditor.
If either step is missing, stop there first and fix the setup before you test with real users.
Set up the workspace payment account
The payment account is configured per workspace.
- Open
Workspacesand enter the workspace that will receive payments. - Open the
Paymentstab. - Enter the
Merchant ID,Hash Key, andHash IVfor that workspace's Newebpay account. - Click
Save.
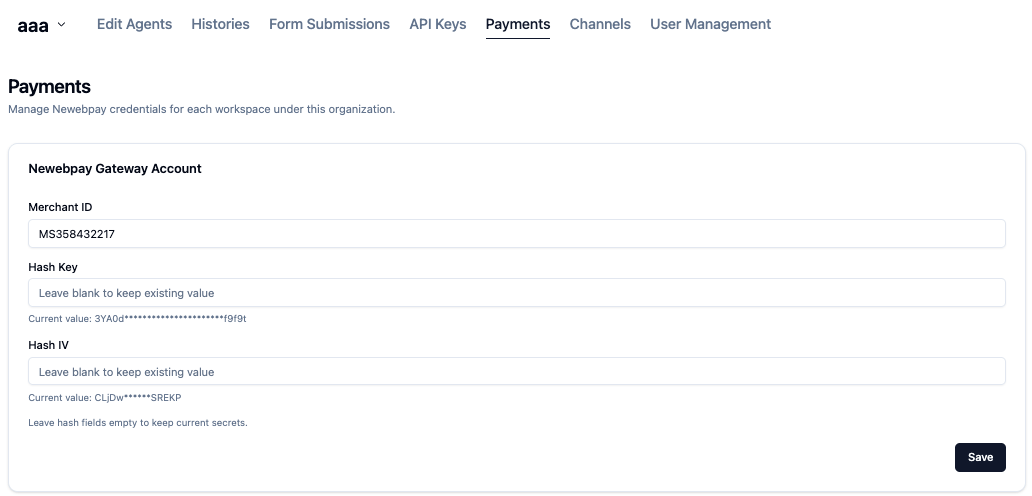
If your team runs multiple workspaces, set up each one separately so the right agent uses the right payment account.
Add the Payment tool to the agent
After the workspace payment account is ready:
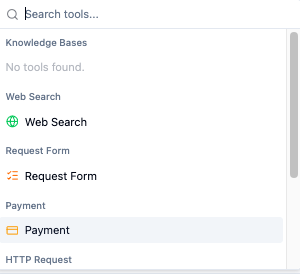
- Open the agent in
Editor. - Scroll to
Toolsand clickAdd Tool. - Choose
Payment. - Add a short
When to Useinstruction so the agent knows exactly when payment is allowed.
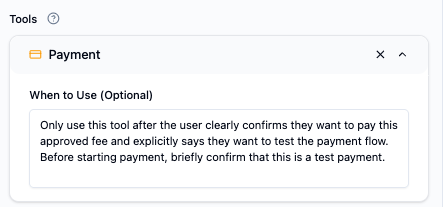
A strong instruction usually sounds like this:
Use this tool only after the user has confirmed the approved service and fee, and payment must be completed before the next step can continue.
What the user sees in chat
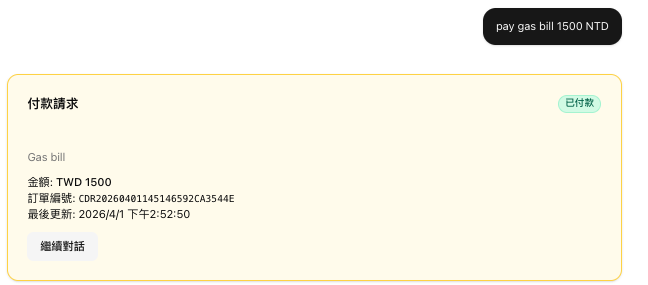
When the agent triggers Payments, the conversation shows a payment card instead of asking the user to figure out the next step alone.
The user can then:
- review the payment amount and order number
- click
Open Checkoutto complete payment - return to the conversation and see the latest status
- click
Refresh Statusif the result has not updated yet - cancel the payment while it is still waiting to be paid
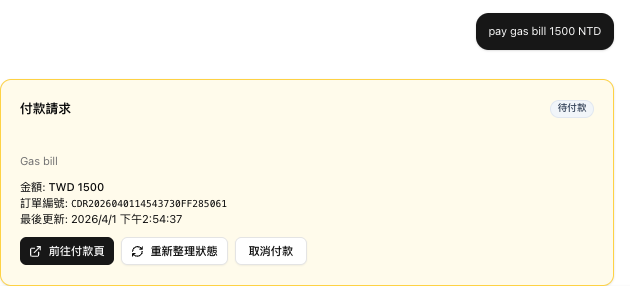
Once the payment reaches a final result, the user can continue the conversation with that outcome visible to both the user and the agent.
Payment statuses users may see
| Status | What it means |
|---|---|
pending |
The payment request was created and is waiting for payment. |
processing |
The user has entered checkout and the final result is still being confirmed. |
succeeded |
Payment completed successfully. |
failed |
Payment did not complete successfully. |
cancelled |
The user cancelled before payment was completed. |
expired |
The payment request was left too long and is no longer usable. |
What stays in conversation history
Payment requests do not disappear after checkout.
Codeer keeps a payment summary in the conversation so operators can still see the request number, amount, and latest status later in Histories or when the conversation continues.
Review payment requests in the workspace
The Payments tab is also the operational queue for payment requests.
Operators with payment-request access can:
- filter requests by request number or external user, agent, date range, and whether guest requests are included
- open a request to review amount, status, payment method, trade number, and timestamps
- add an internal note for reconciliation or follow-up
Use Histories for the conversation context and Payments for reconciliation and operations follow-up.
Recommended rollout pattern
- Set up the workspace payment account before operators start editing agent behavior.
- Keep the agent instruction narrow so payment only appears at the approved moment.
- Test the full flow in a controlled environment before you expose it to live users.
- Make sure the conversation explains what happens after successful payment, not just how to pay.