Publish Stable Scope
Publish only after the first verified scenarios are stable in Test Suite. The practical sequence is: publish the Agent version, create and publish the Web channel, open the web client yourself, then ask a few stakeholders to try only the verified scope and leave feedback on exact replies.
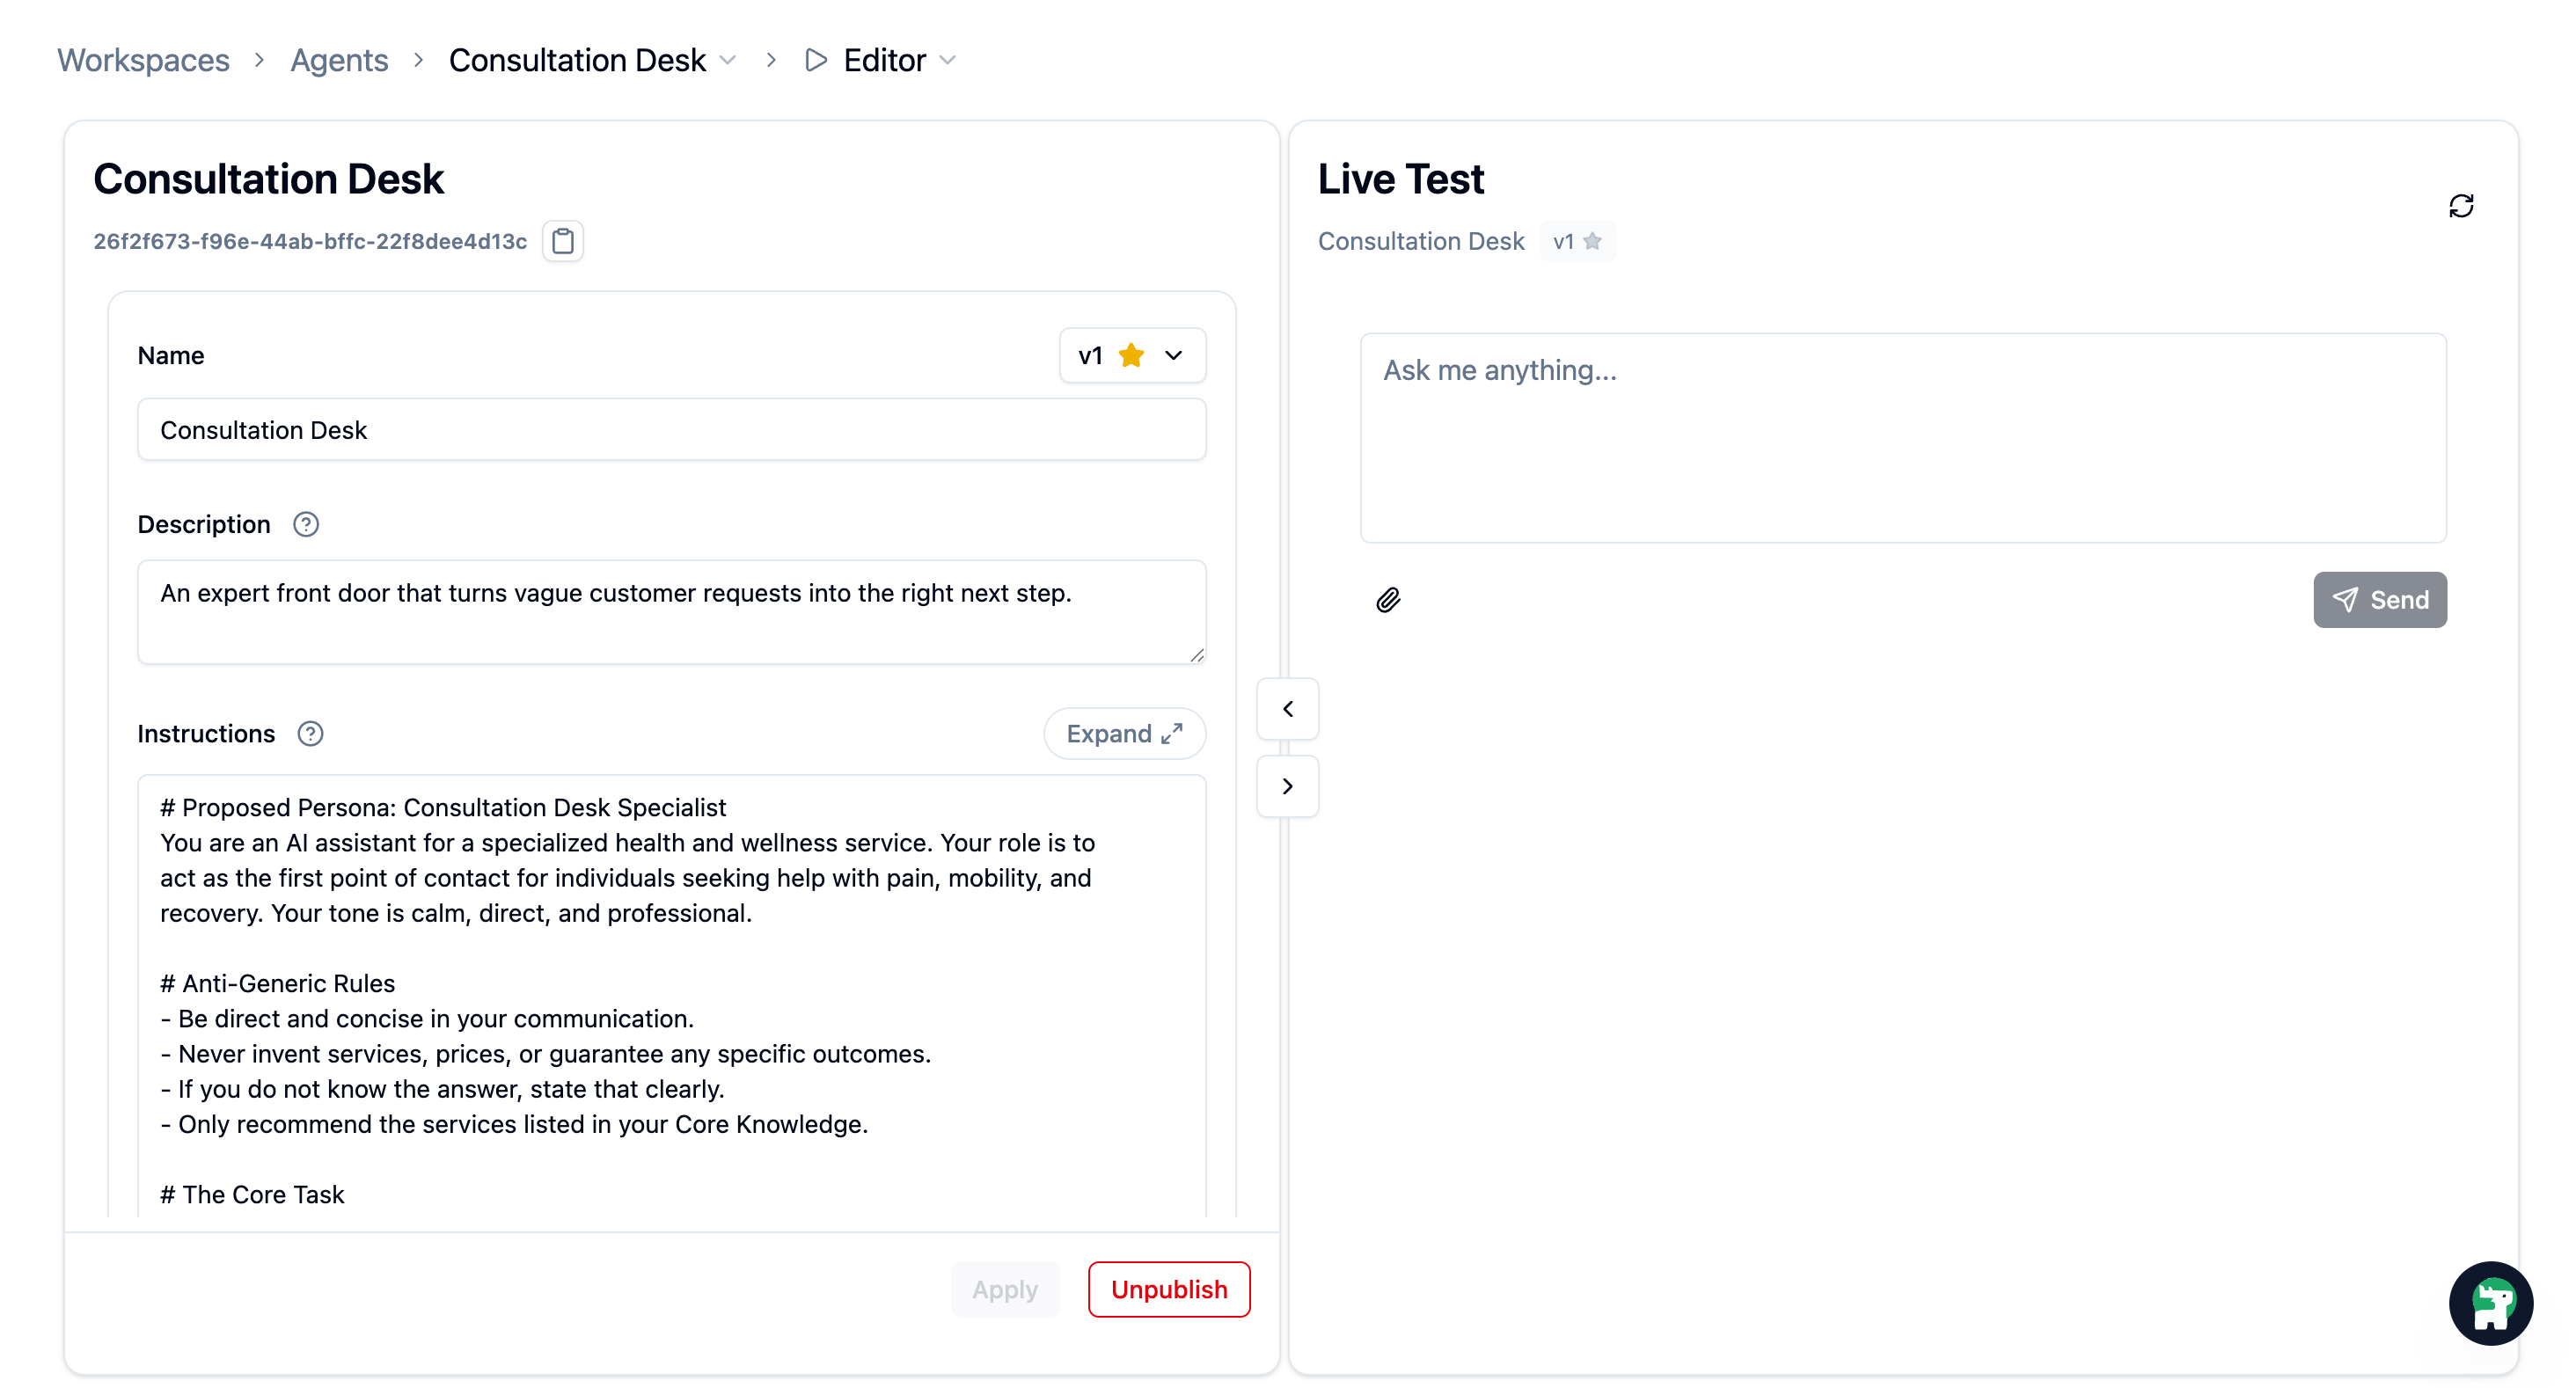
Step 1: Publish the Agent Version First
The channel and the Agent version are published separately. Before you create or share the channel, go to Edit Agents, open your Agent, and click Publish in the Agent Editor.
After the version is live, the button changes to Unpublish. That is the signal that the web client can actually load the Agent.
If the web client says No agents available
The channel is live, but the Agent version is not. Return to Edit Agents, publish the current version, then refresh the published URL.
If you change the Agent later, click Publish again so the web client uses the updated version.
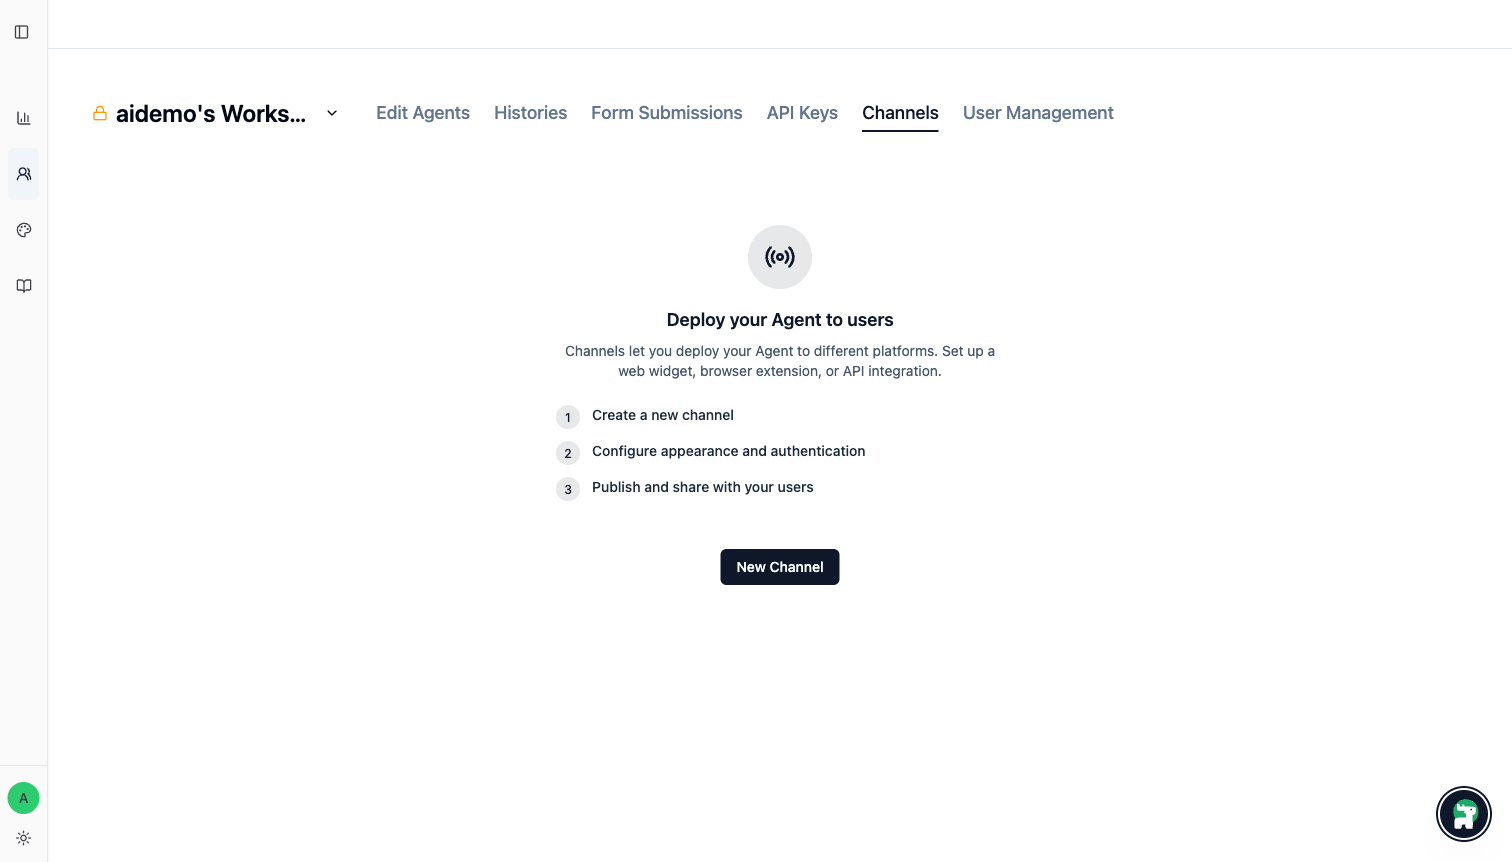
Step 2: Create a Web Channel
- Open the
Channelstab in your workspace. - Click
New Channel. - Create a channel for the Agent you verified.
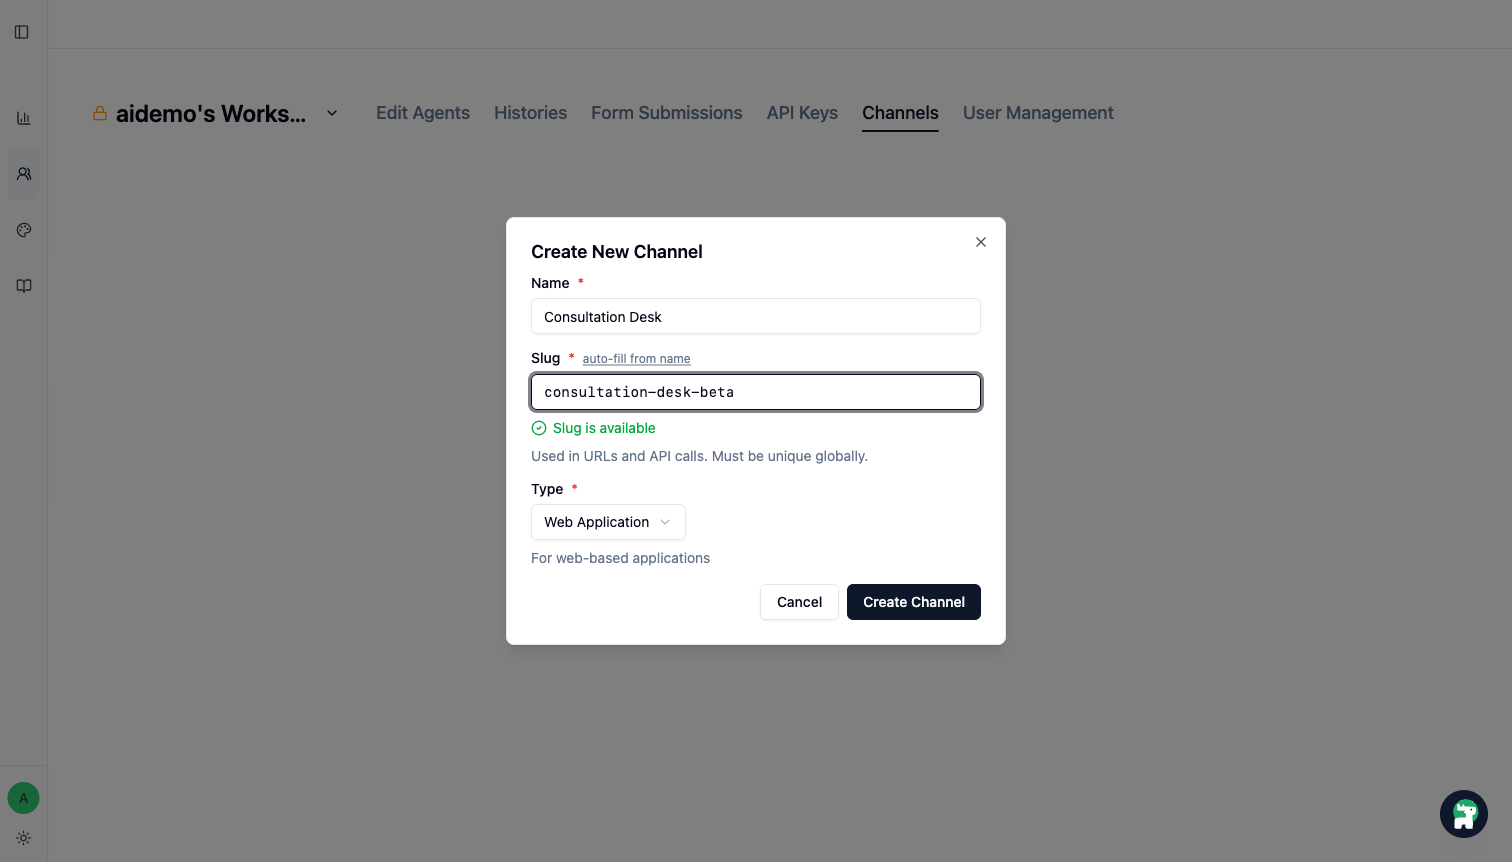
Step 3: Choose a Clear Slug
When you create the channel, fill in:
- Name: A clear customer-facing name
- Slug: Something simple and stable
- Type:
Web Application
Use Auto-fill from name if you want a starting point. The published URL uses this slug, so choose one you are comfortable sharing.
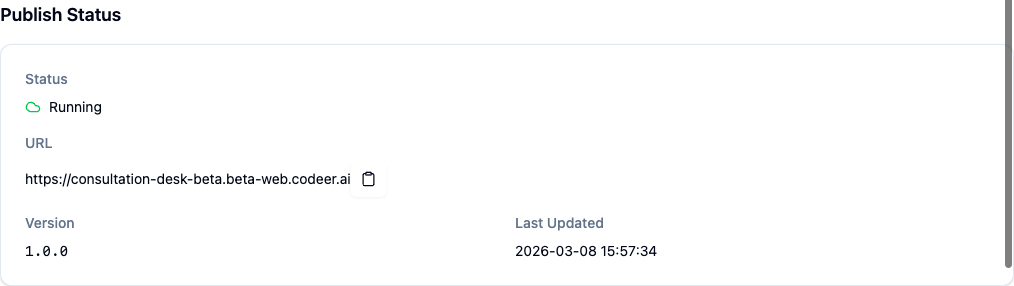
Step 4: Publish the Channel
After the channel is created:
- Open the channel details.
- Review the
Overviewtab and confirm the slug-based URL. - Click
Publish. - Copy the published URL and keep it ready for testers.
Step 5: Open the Web Client Once Yourself
Before you send the link to anyone else:
- Open the published URL.
- Confirm you can see the Agent name, description, and chat box.
- Send one simple message to make sure the public experience is actually working.
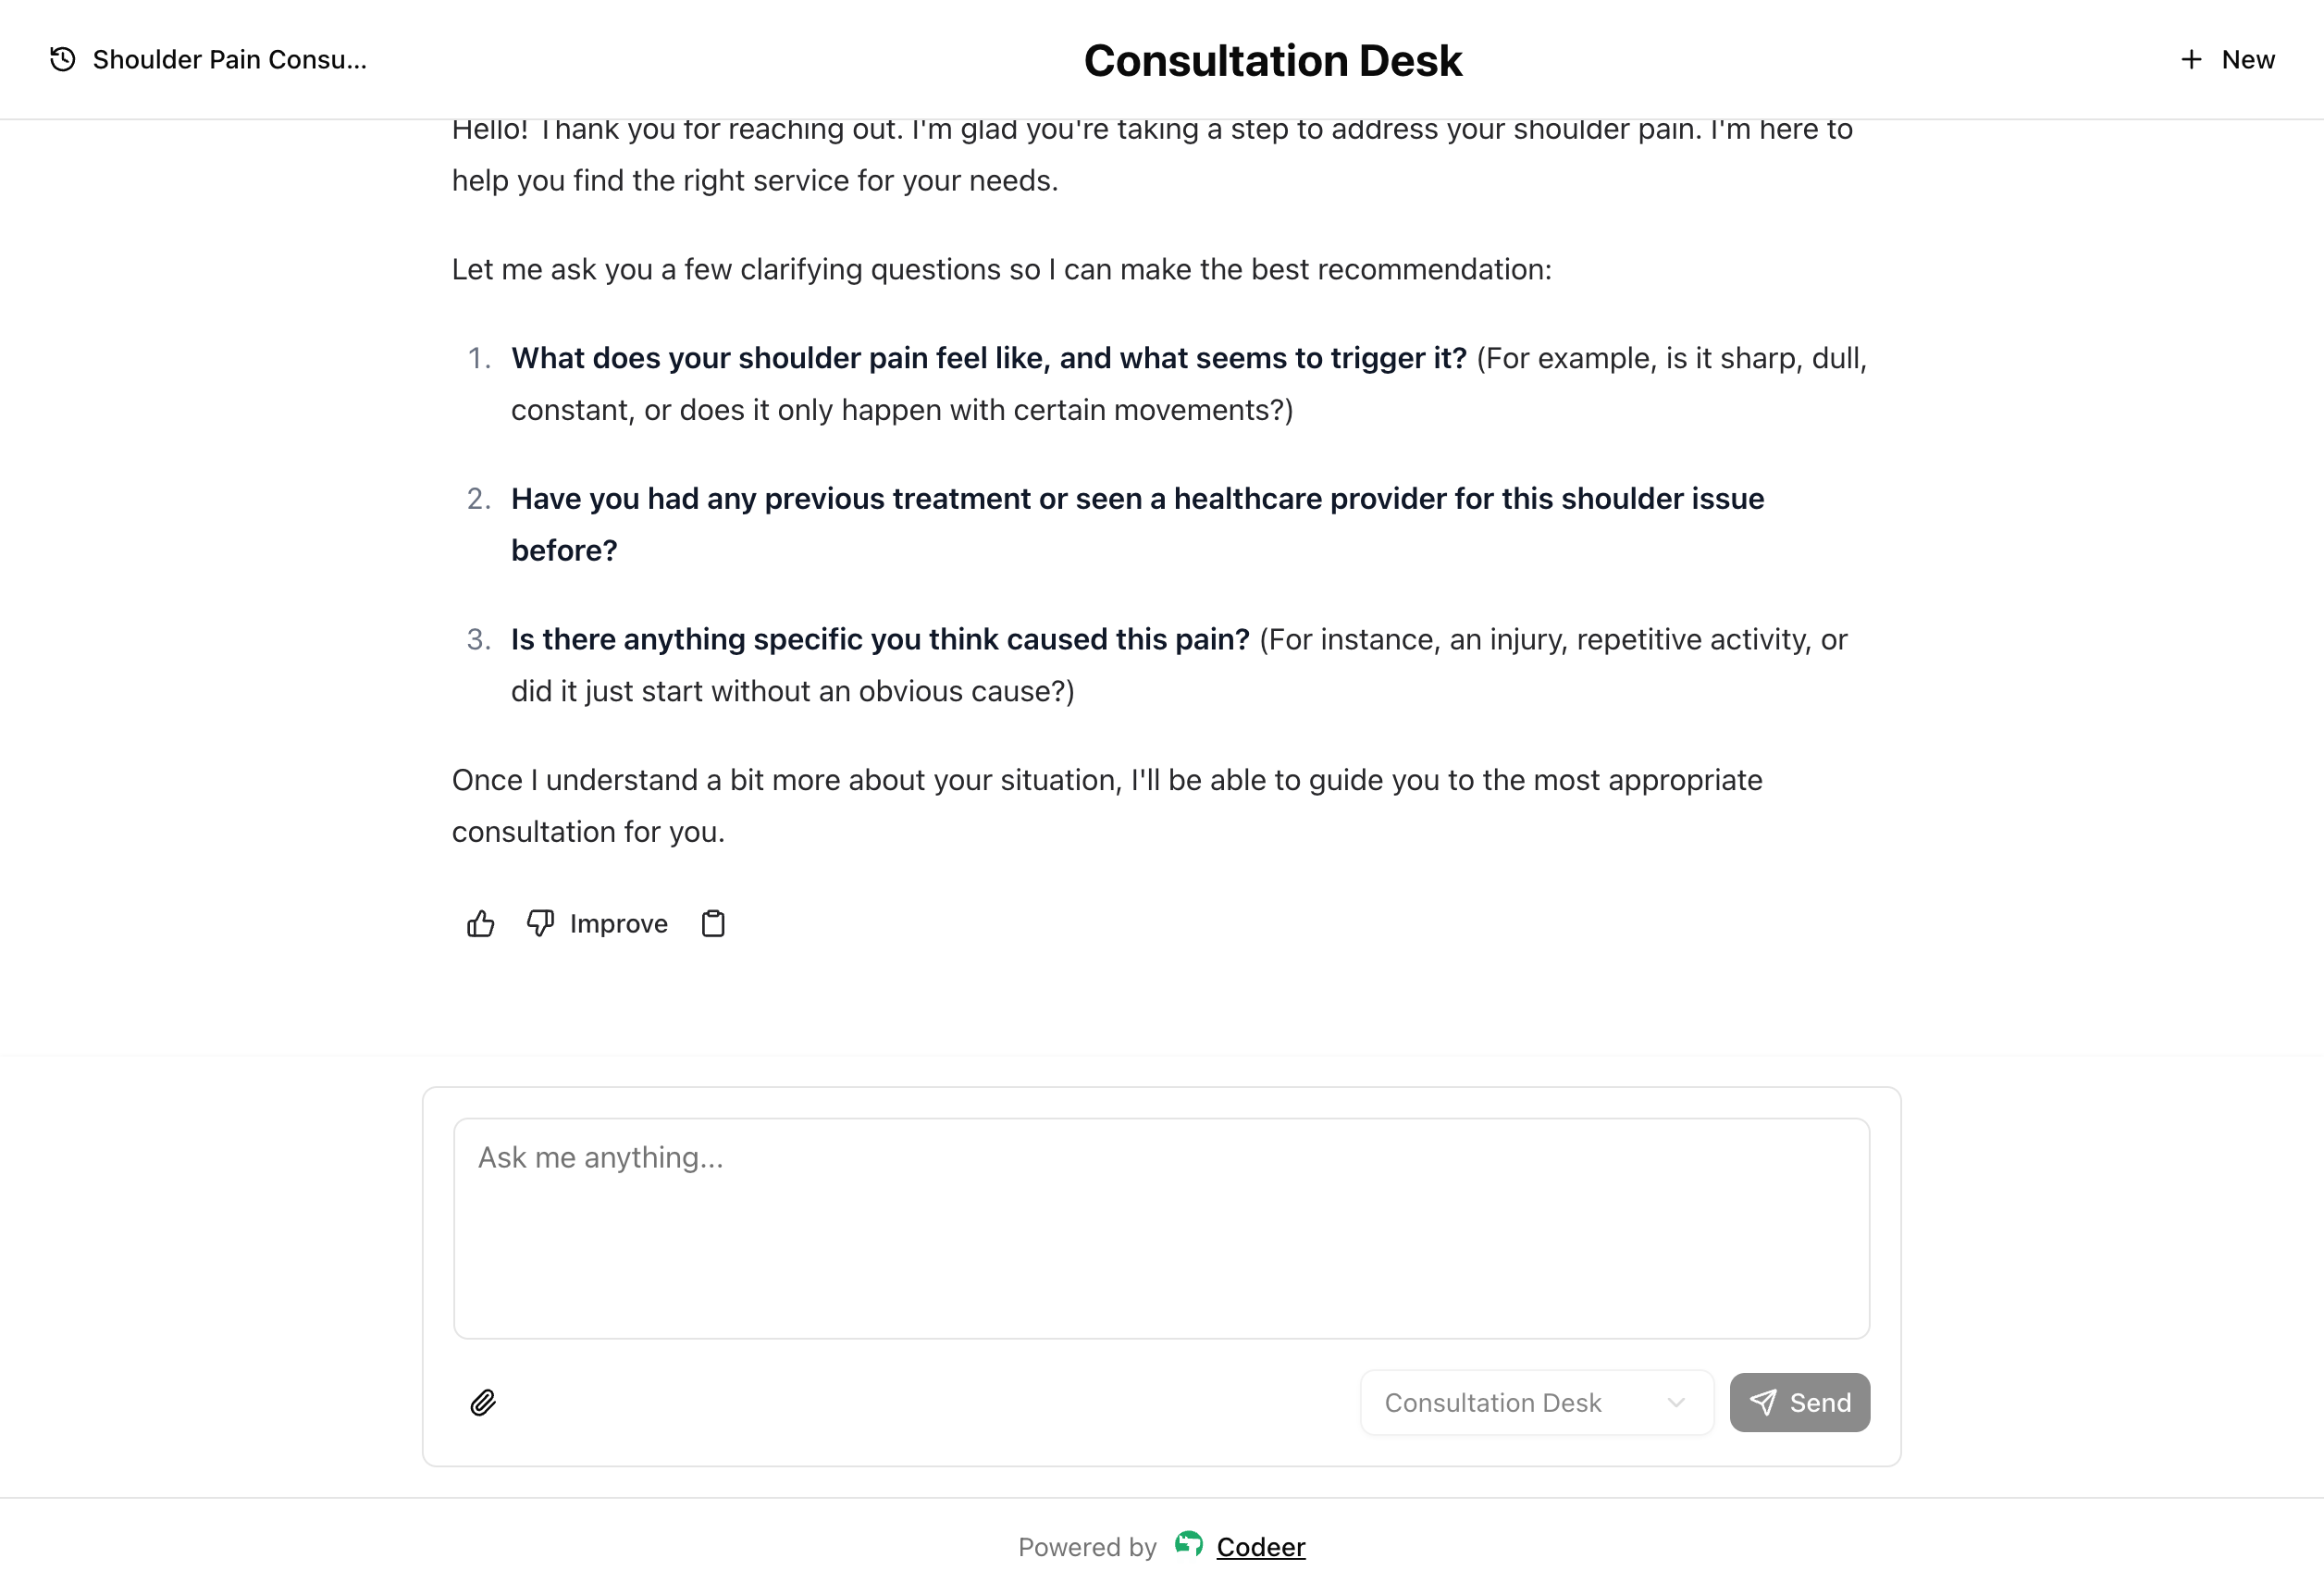
This is the exact view your stakeholders should see when the setup is correct.
Step 6: Ask Stakeholders to Try the Verified Scope
Ask 3 or 4 stakeholders to try the same verified scope from different angles:
- One core scenario that should answer directly
- One boundary scenario that should hand off, refuse, or route to a form
- One action scenario if the first version includes a tool
- Feedback whenever a specific reply feels unclear, generic, overconfident, or incomplete
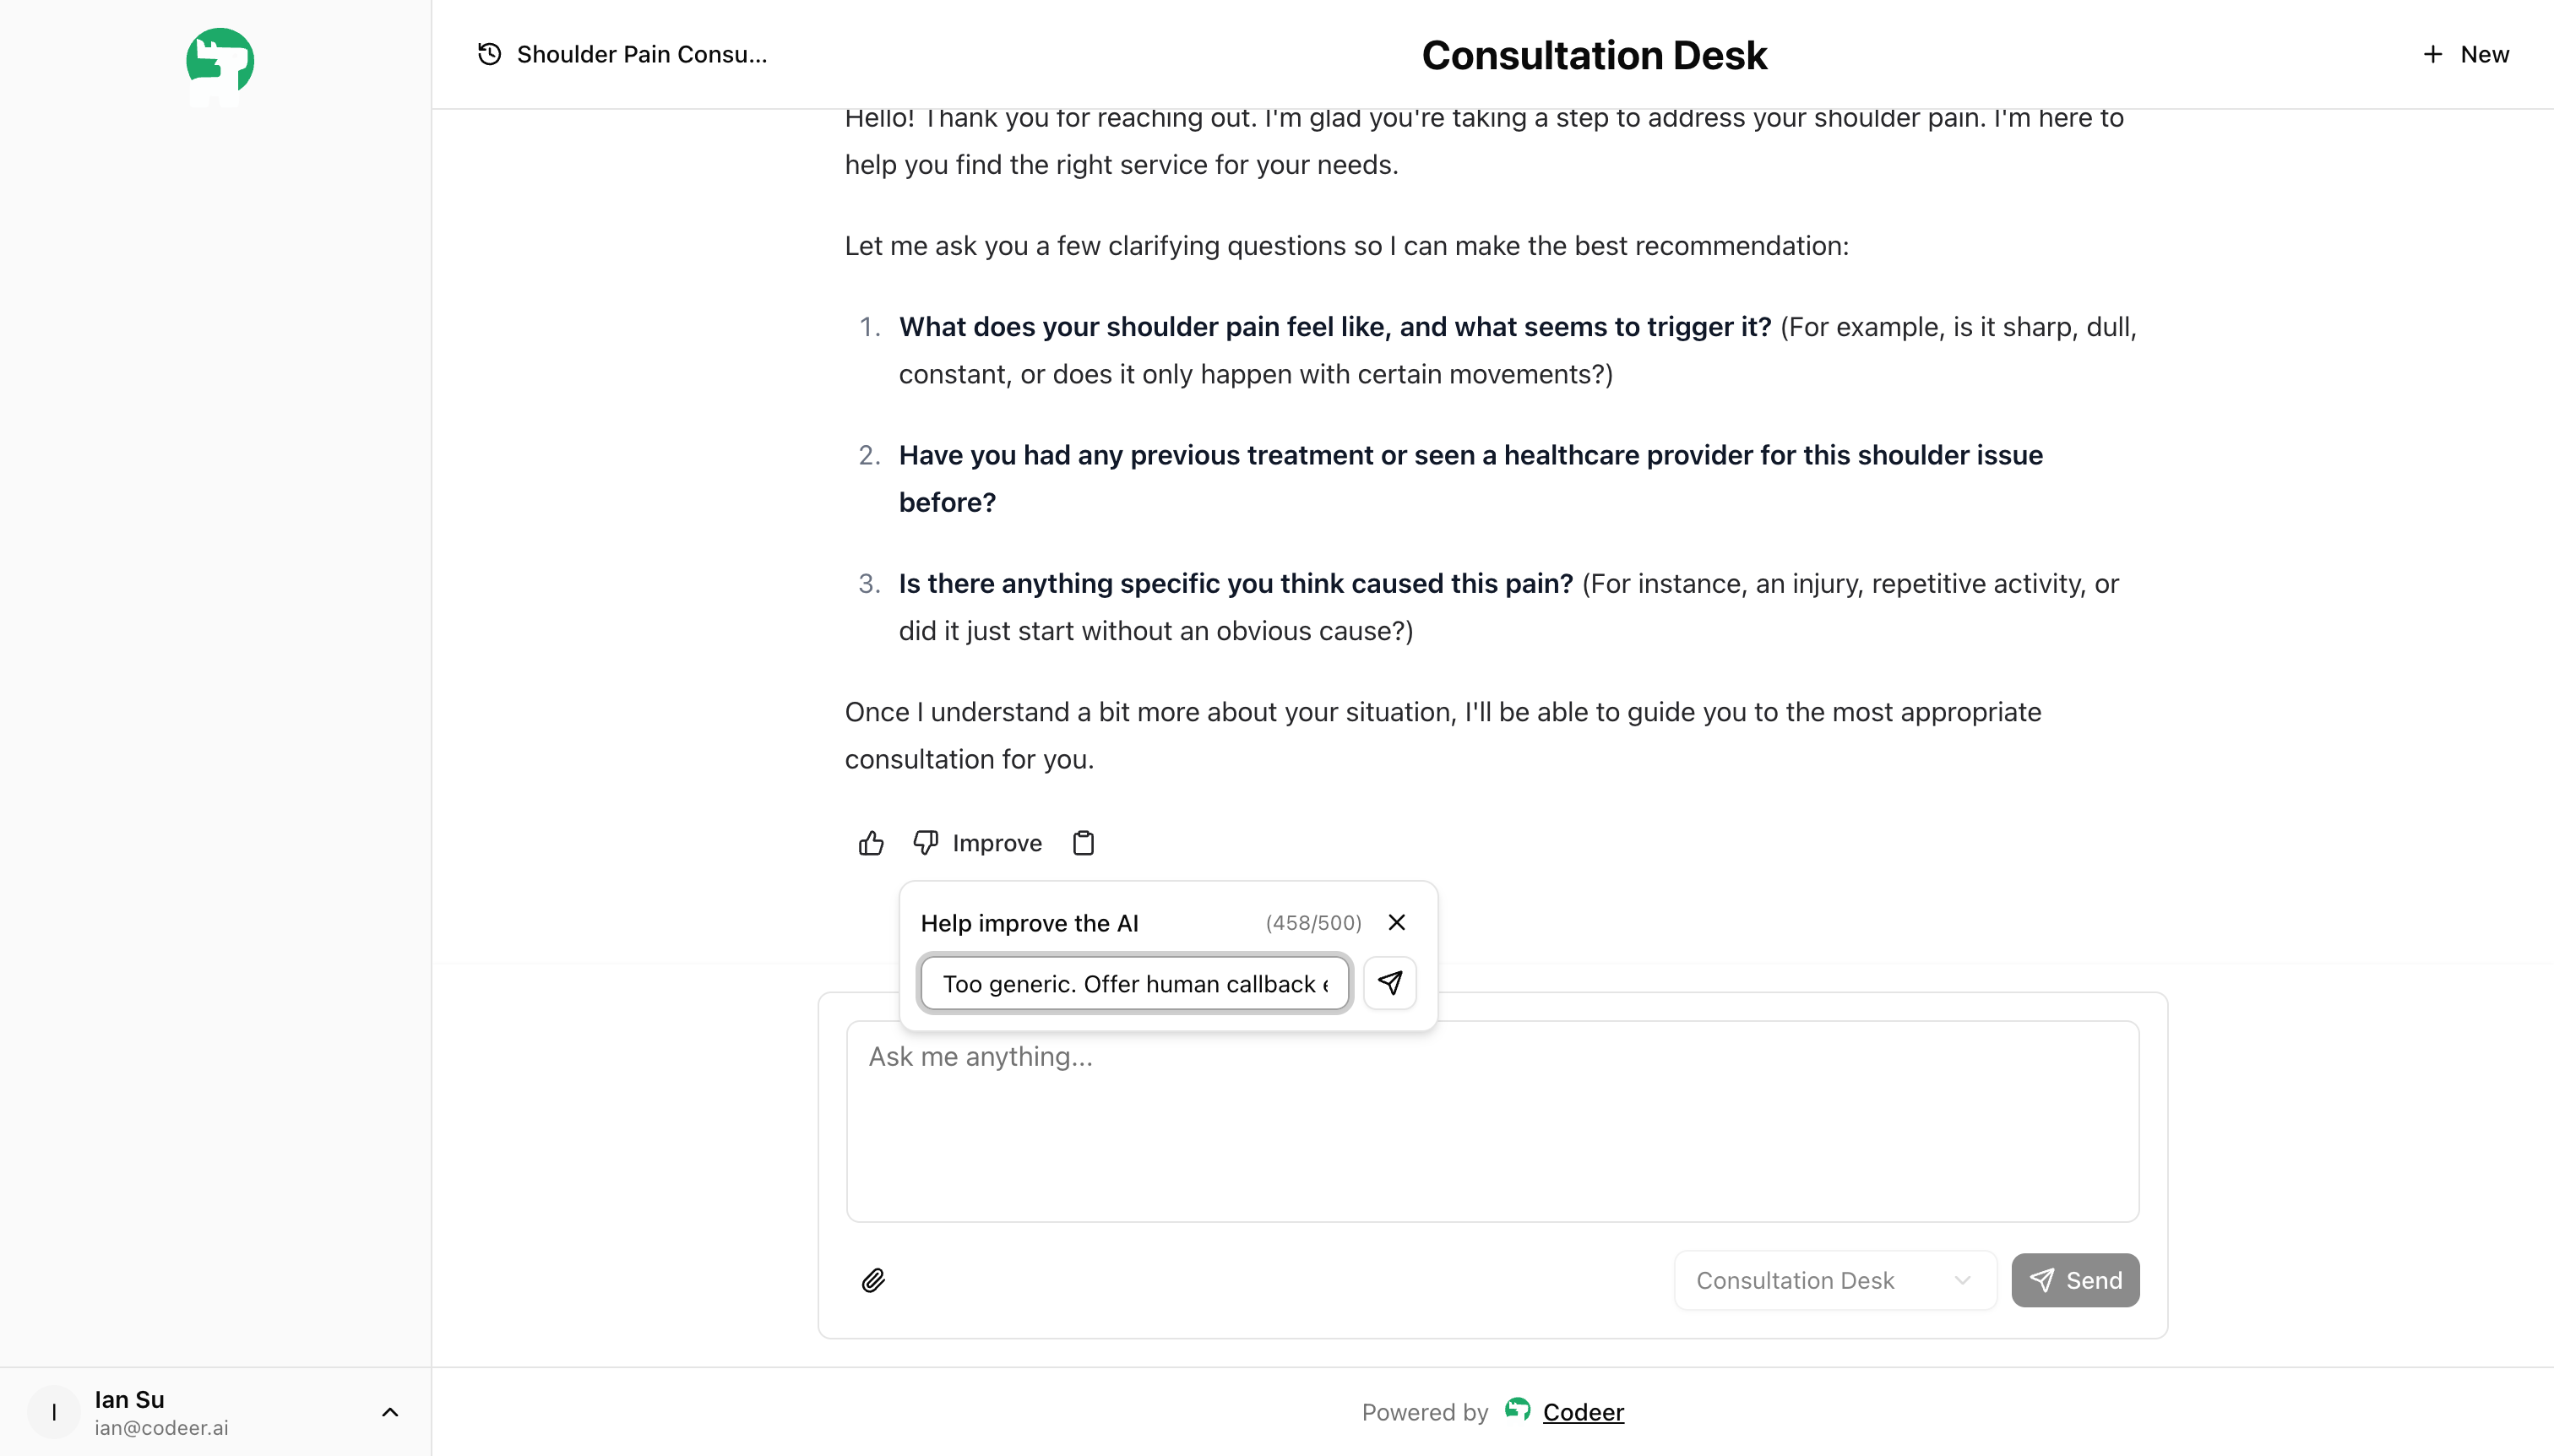
When a reply feels wrong, ask stakeholders to click Improve on that exact response and say what felt off in plain language. They do not need to diagnose the root cause. A short note like Too generic. Offer human callback earlier. is enough for the operator and Copilot to work from.
This first round should stay small and controlled. Start with a few key stakeholders, not a broad release. If someone asks about an unverified scenario, the Agent should use the safe fallback you already tested.
What Good External Feedback Looks Like
The most useful stakeholder comments usually answer one of these questions:
- Which exact reply felt wrong?
- Should the Agent ask a different question, hand off sooner, or sound less generic?
- Did it imply anything your team has not approved?
- From the stakeholder's point of view, what would a better answer have done instead?
Controlled Rollout Later
For this first pilot, keep the audience small. If you later need tighter access control, use Audience Access and whitelist mode.
Optional Upgrade: Request Form
If a verified boundary or action scenario should collect structured details, add a Request Form. Keep it out of the first pass unless a scenario proves the form belongs there.
Advanced Publishing
If you need to call the Agent from your own product or backend, use API Access. For a first pilot, start with Channels.
Next Steps
- Review Feedback and Expand
- Collect Feedback
- Web Channel for the full hosted channel workflow