Invite Members
Adding a teammate usually has two steps:
- add them to the organization
- give them access to the workspace they should operate
Step 1: Add them at the organization level
Open Settings and go to Organization → Users, then click Invite User.
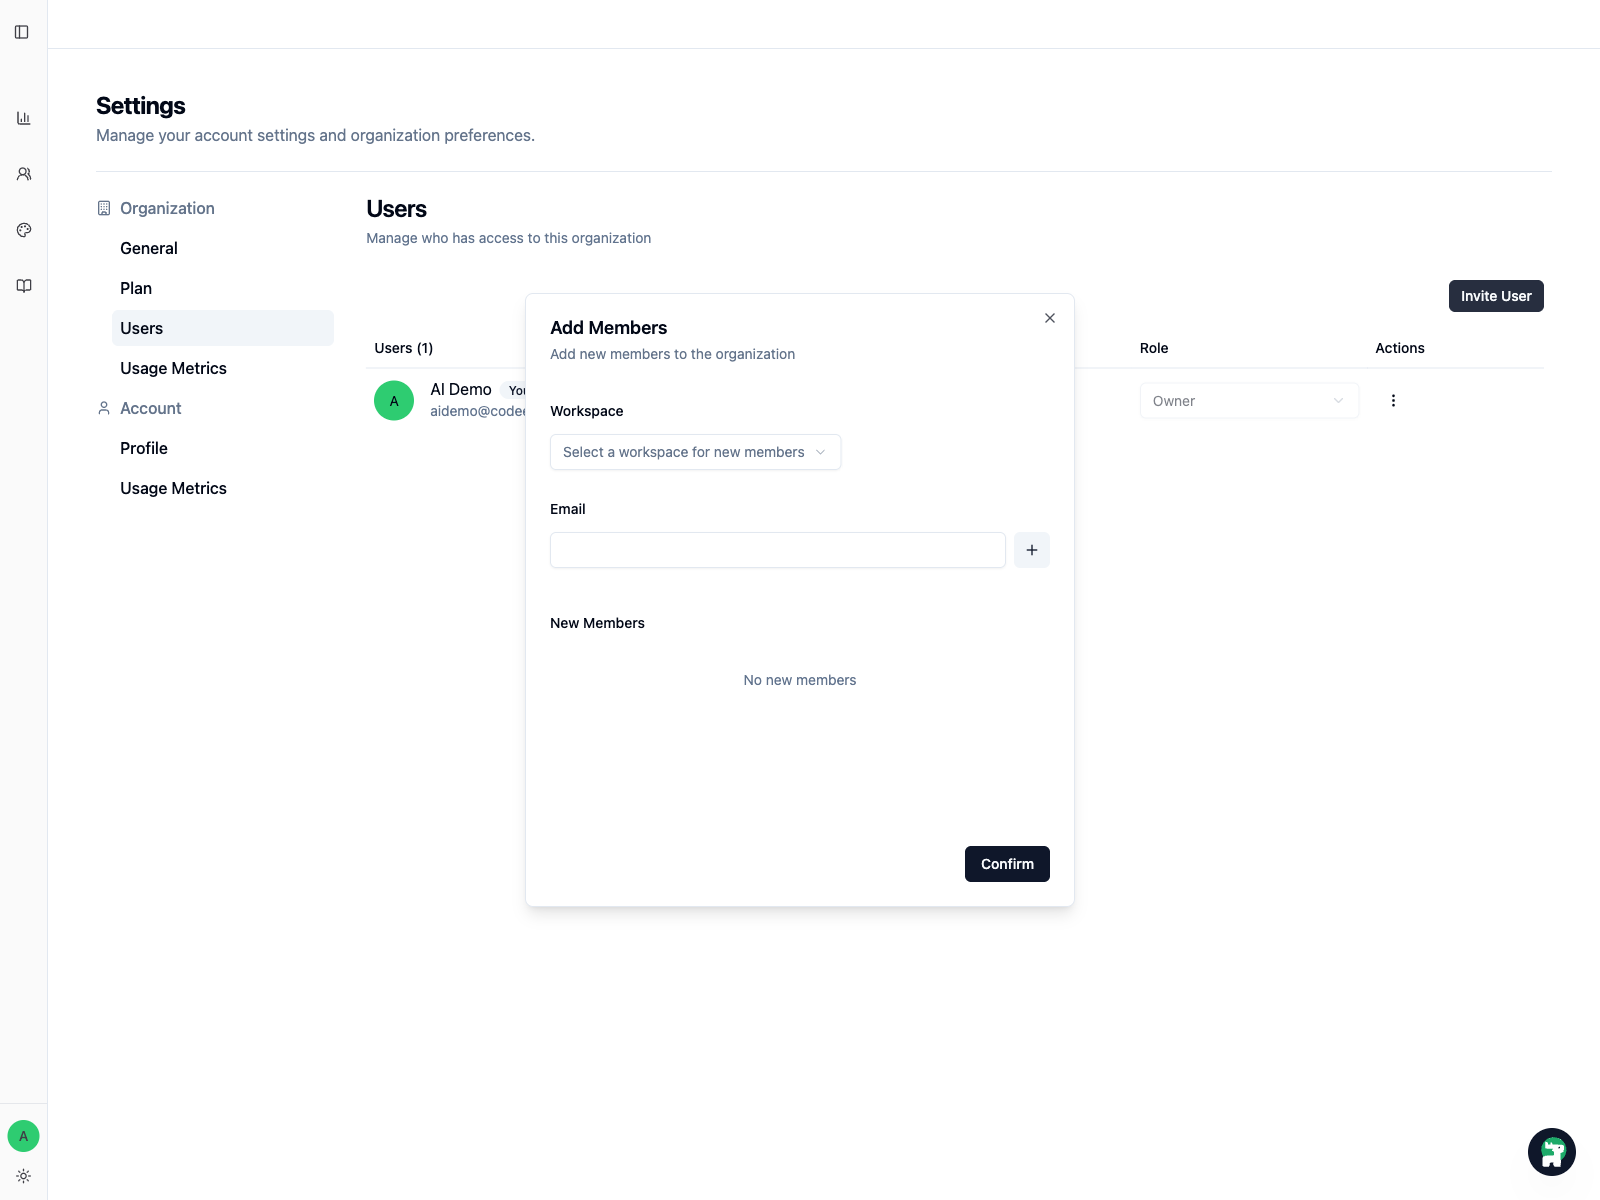
This is where you decide:
- who is joining the organization
- which workspace they should enter first
Step 2: Confirm workspace access
After the teammate exists at organization scope, open the target workspace, open the workspace menu, and click Members.
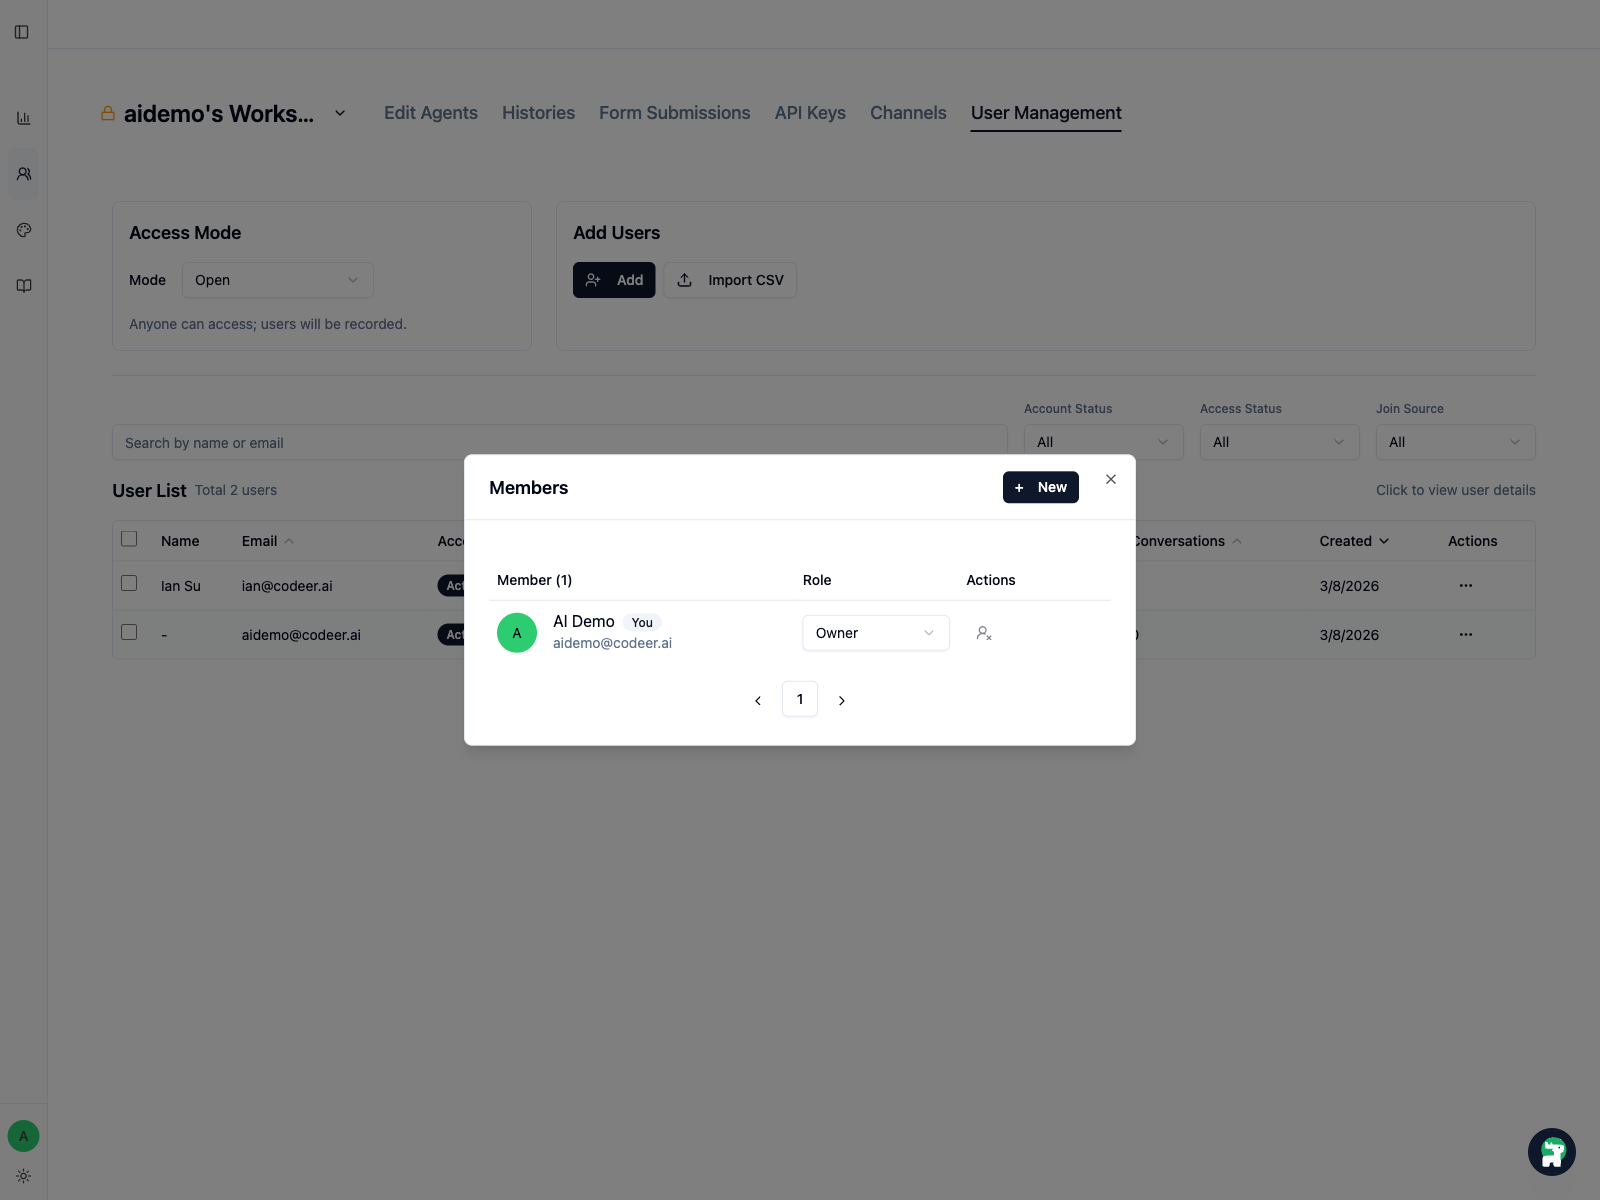
This is the place to:
- confirm they can enter the workspace
- set or adjust the workspace role
- remove access later if responsibilities change
If the person does not appear in the workspace list
Usually one of these is true:
- they have not been added at the organization level yet
- they were invited, but not assigned to the intended workspace
Start from Organization → Users, then return to workspace Members.
A simple rollout habit
Invite only the people who need to act on the current phase:
- early pilot: owner, operator, and one or two expert reviewers
- wider rollout: add support, operations, or product stakeholders as needed