Line Channel
Use a LINE channel when the real audience already lives in LINE and you want onboarding to happen inside LINE itself.
For Codeer, the important live endpoints are Webhook URL and LIFF Entry URL. A LINE publish mostly turns message intake on or off. The bound agent still answers with its current published version.
What you need before you start
- One agent with at least one published version
- Permission to edit channels in the workspace
- Access to:
- LINE Official Account Manager
- LINE Developers Console
- A public HTTPS Codeer environment
- A working email inbox for the first verification test
Why public HTTPS matters
LINE only accepts webhook and LIFF endpoints over public HTTPS with a browser-trusted certificate. If the Webhook URL or LIFF Entry URL from Codeer is not publicly reachable, the LINE setup will fail at the verify step.
What you will create in LINE
-
A
LINE Official Account -
Messaging APIenabled on that official account -
A
Messaging API channelin LINE Developers Console -
A
LINE Login channelunder the same Provider -
A
LIFF appon that LINE Login channel
Use the same Provider for Messaging API and LINE Login
Codeer expects the Messaging API channel, the LINE Login channel, and the LIFF app to belong to the same LINE Provider. LINE also keeps user IDs provider-scoped, and channels cannot be moved to another provider later.
Codeer currently expects the LINE Login plus LIFF path
LINE now recommends creating many new LIFF apps as a LINE MINI App. Codeer's current LINE integration still asks for LIFF ID and LINE Login Channel ID, so the supported setup for now is a LINE Login channel with a LIFF app attached to it.
Full setup flow
-
Create the Codeer LINE channel and copy the two Codeer URLs
- In Codeer, publish the target agent from
Editorfirst. - Open
Channels. - Click
New Channel. - Choose
LINE Bot. - Give the channel a stable
NameandSlug. - In the LINE channel
Configuration, copy:Webhook URLLIFF Entry URL
- Do not publish the Codeer LINE channel yet. First finish the LINE-side setup and paste the LINE credentials back into Codeer.
- In Codeer, publish the target agent from
-
Create the LINE Official Account and enable Messaging API
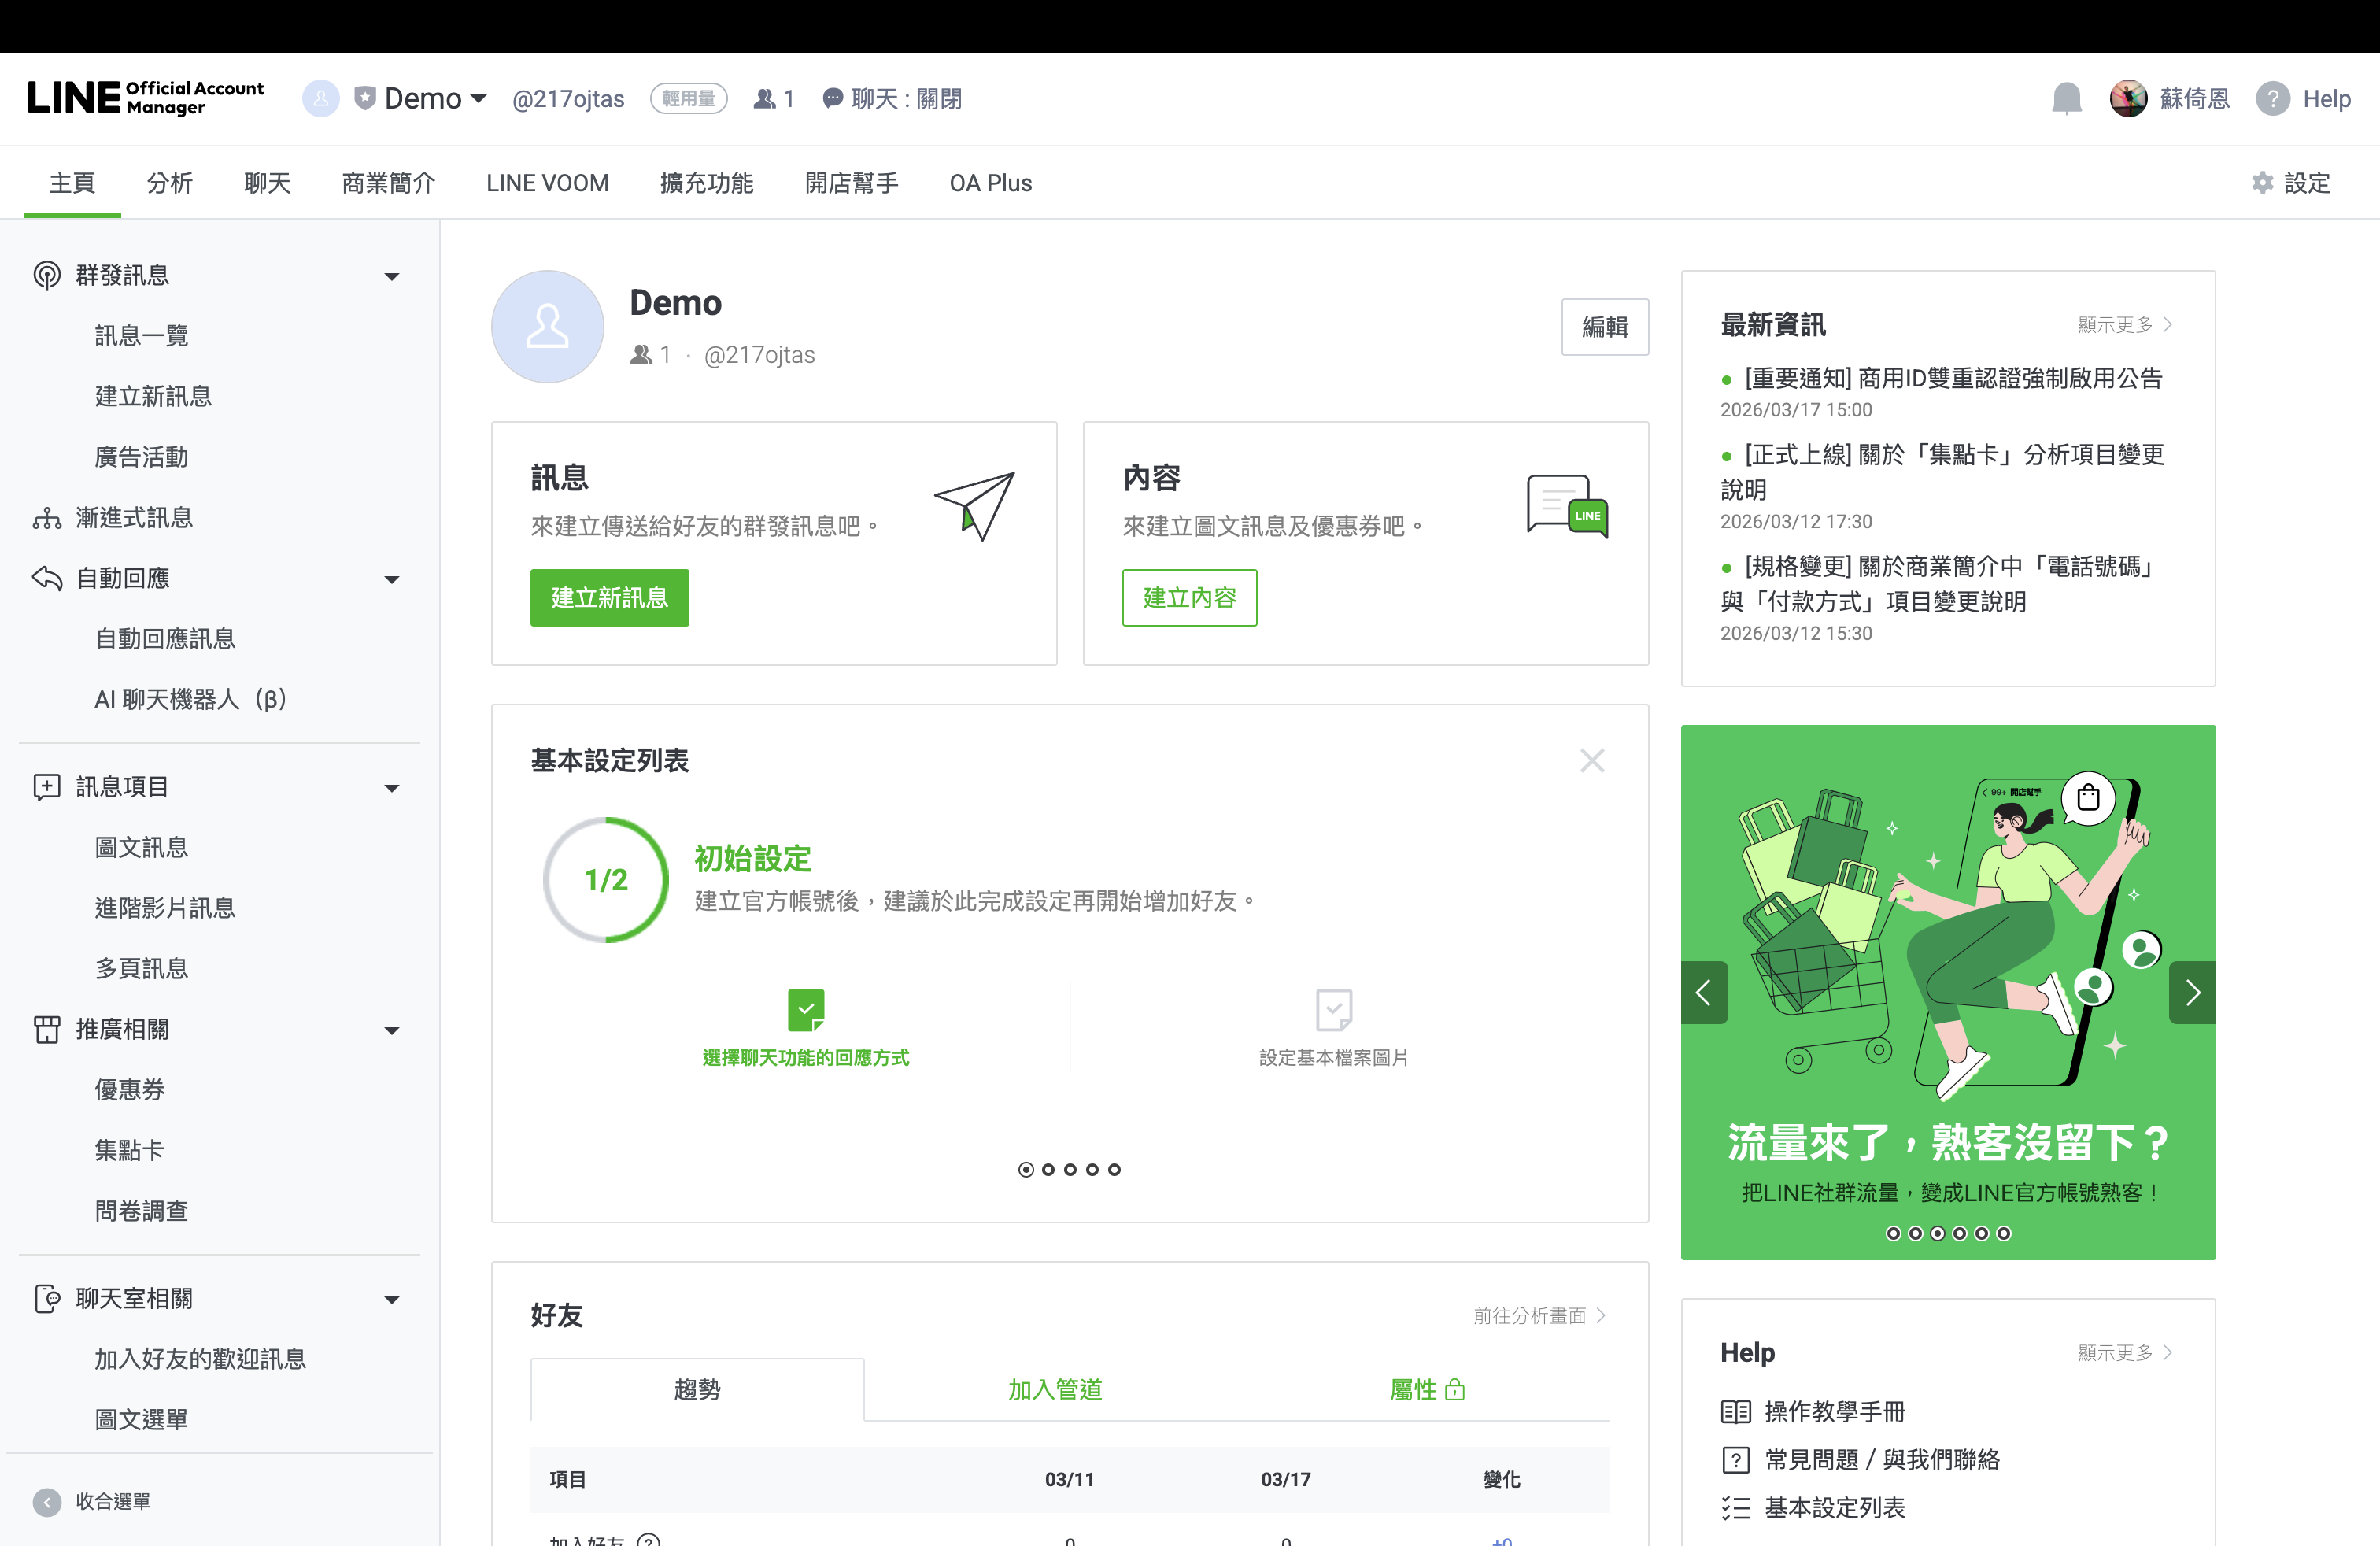
- Open the official account home
- Sign in to LINE Official Account Manager with the LINE Business account that owns the bot.
- Open the official account you want end users to add as a friend and message.
- You should land on the account home dashboard, not the settings screen yet.
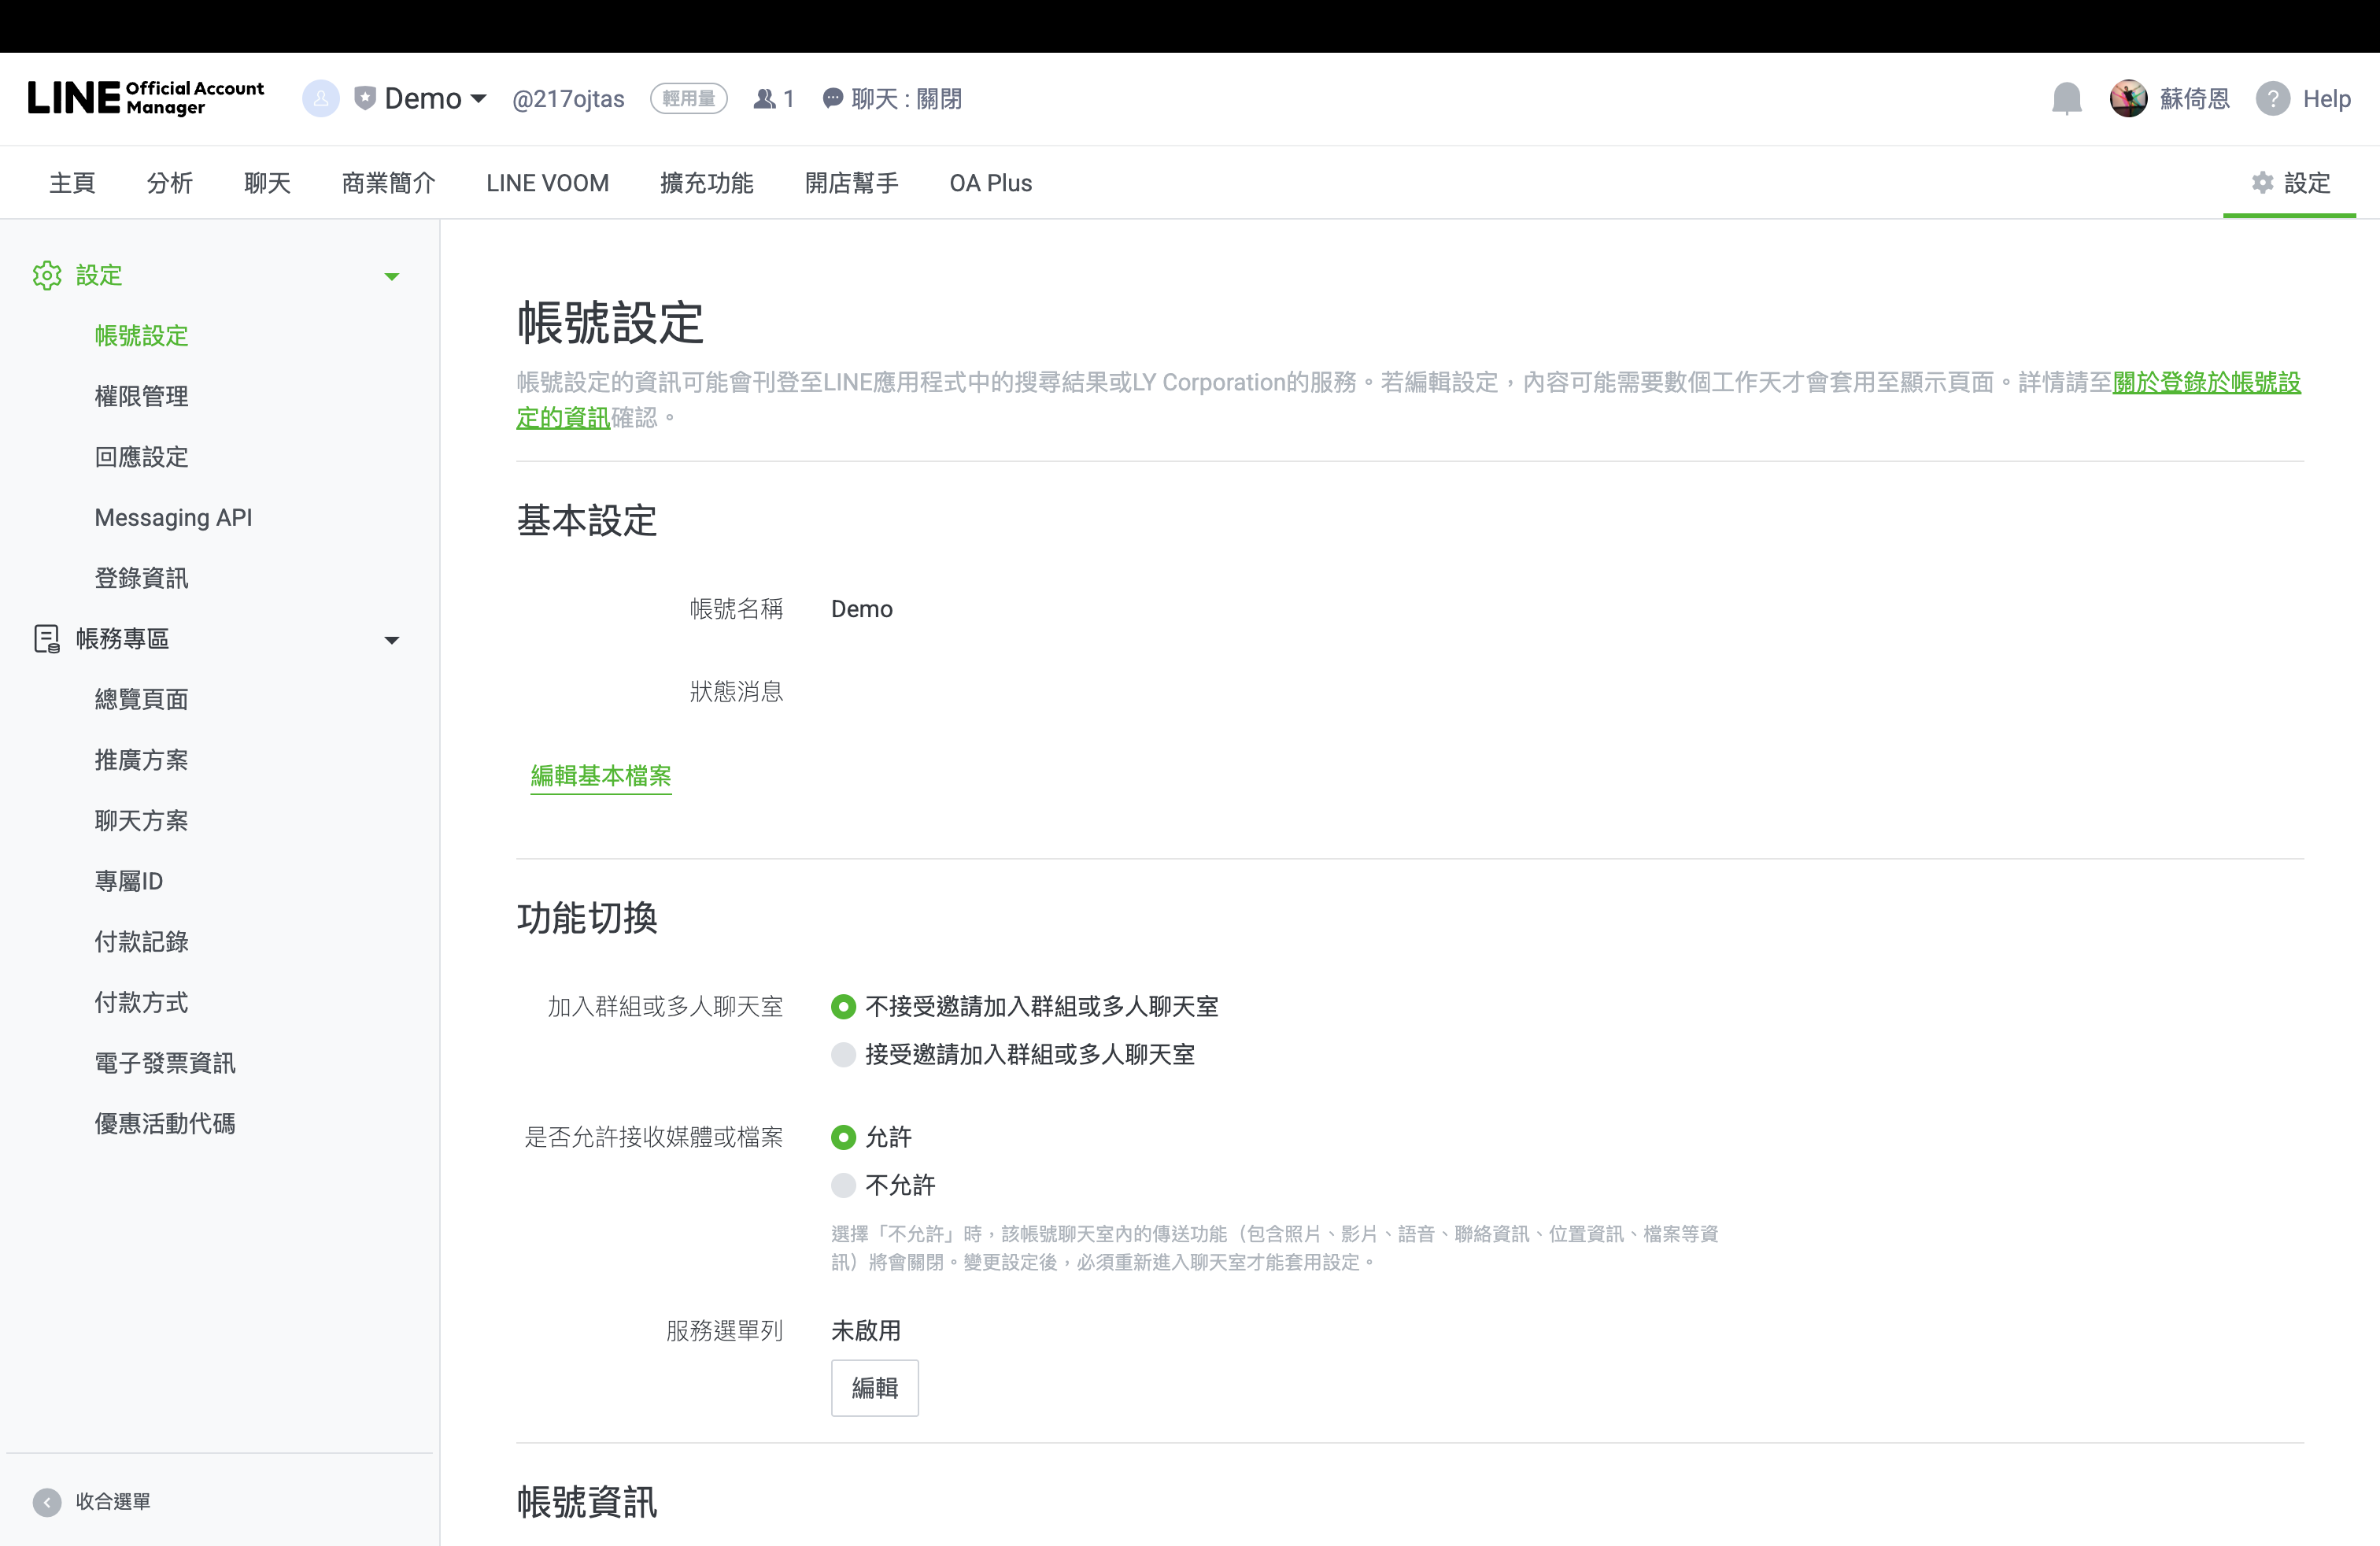
- Open account settings
- Click
Settingsin the upper-right corner. - The page should change to
Account settings.
- Click
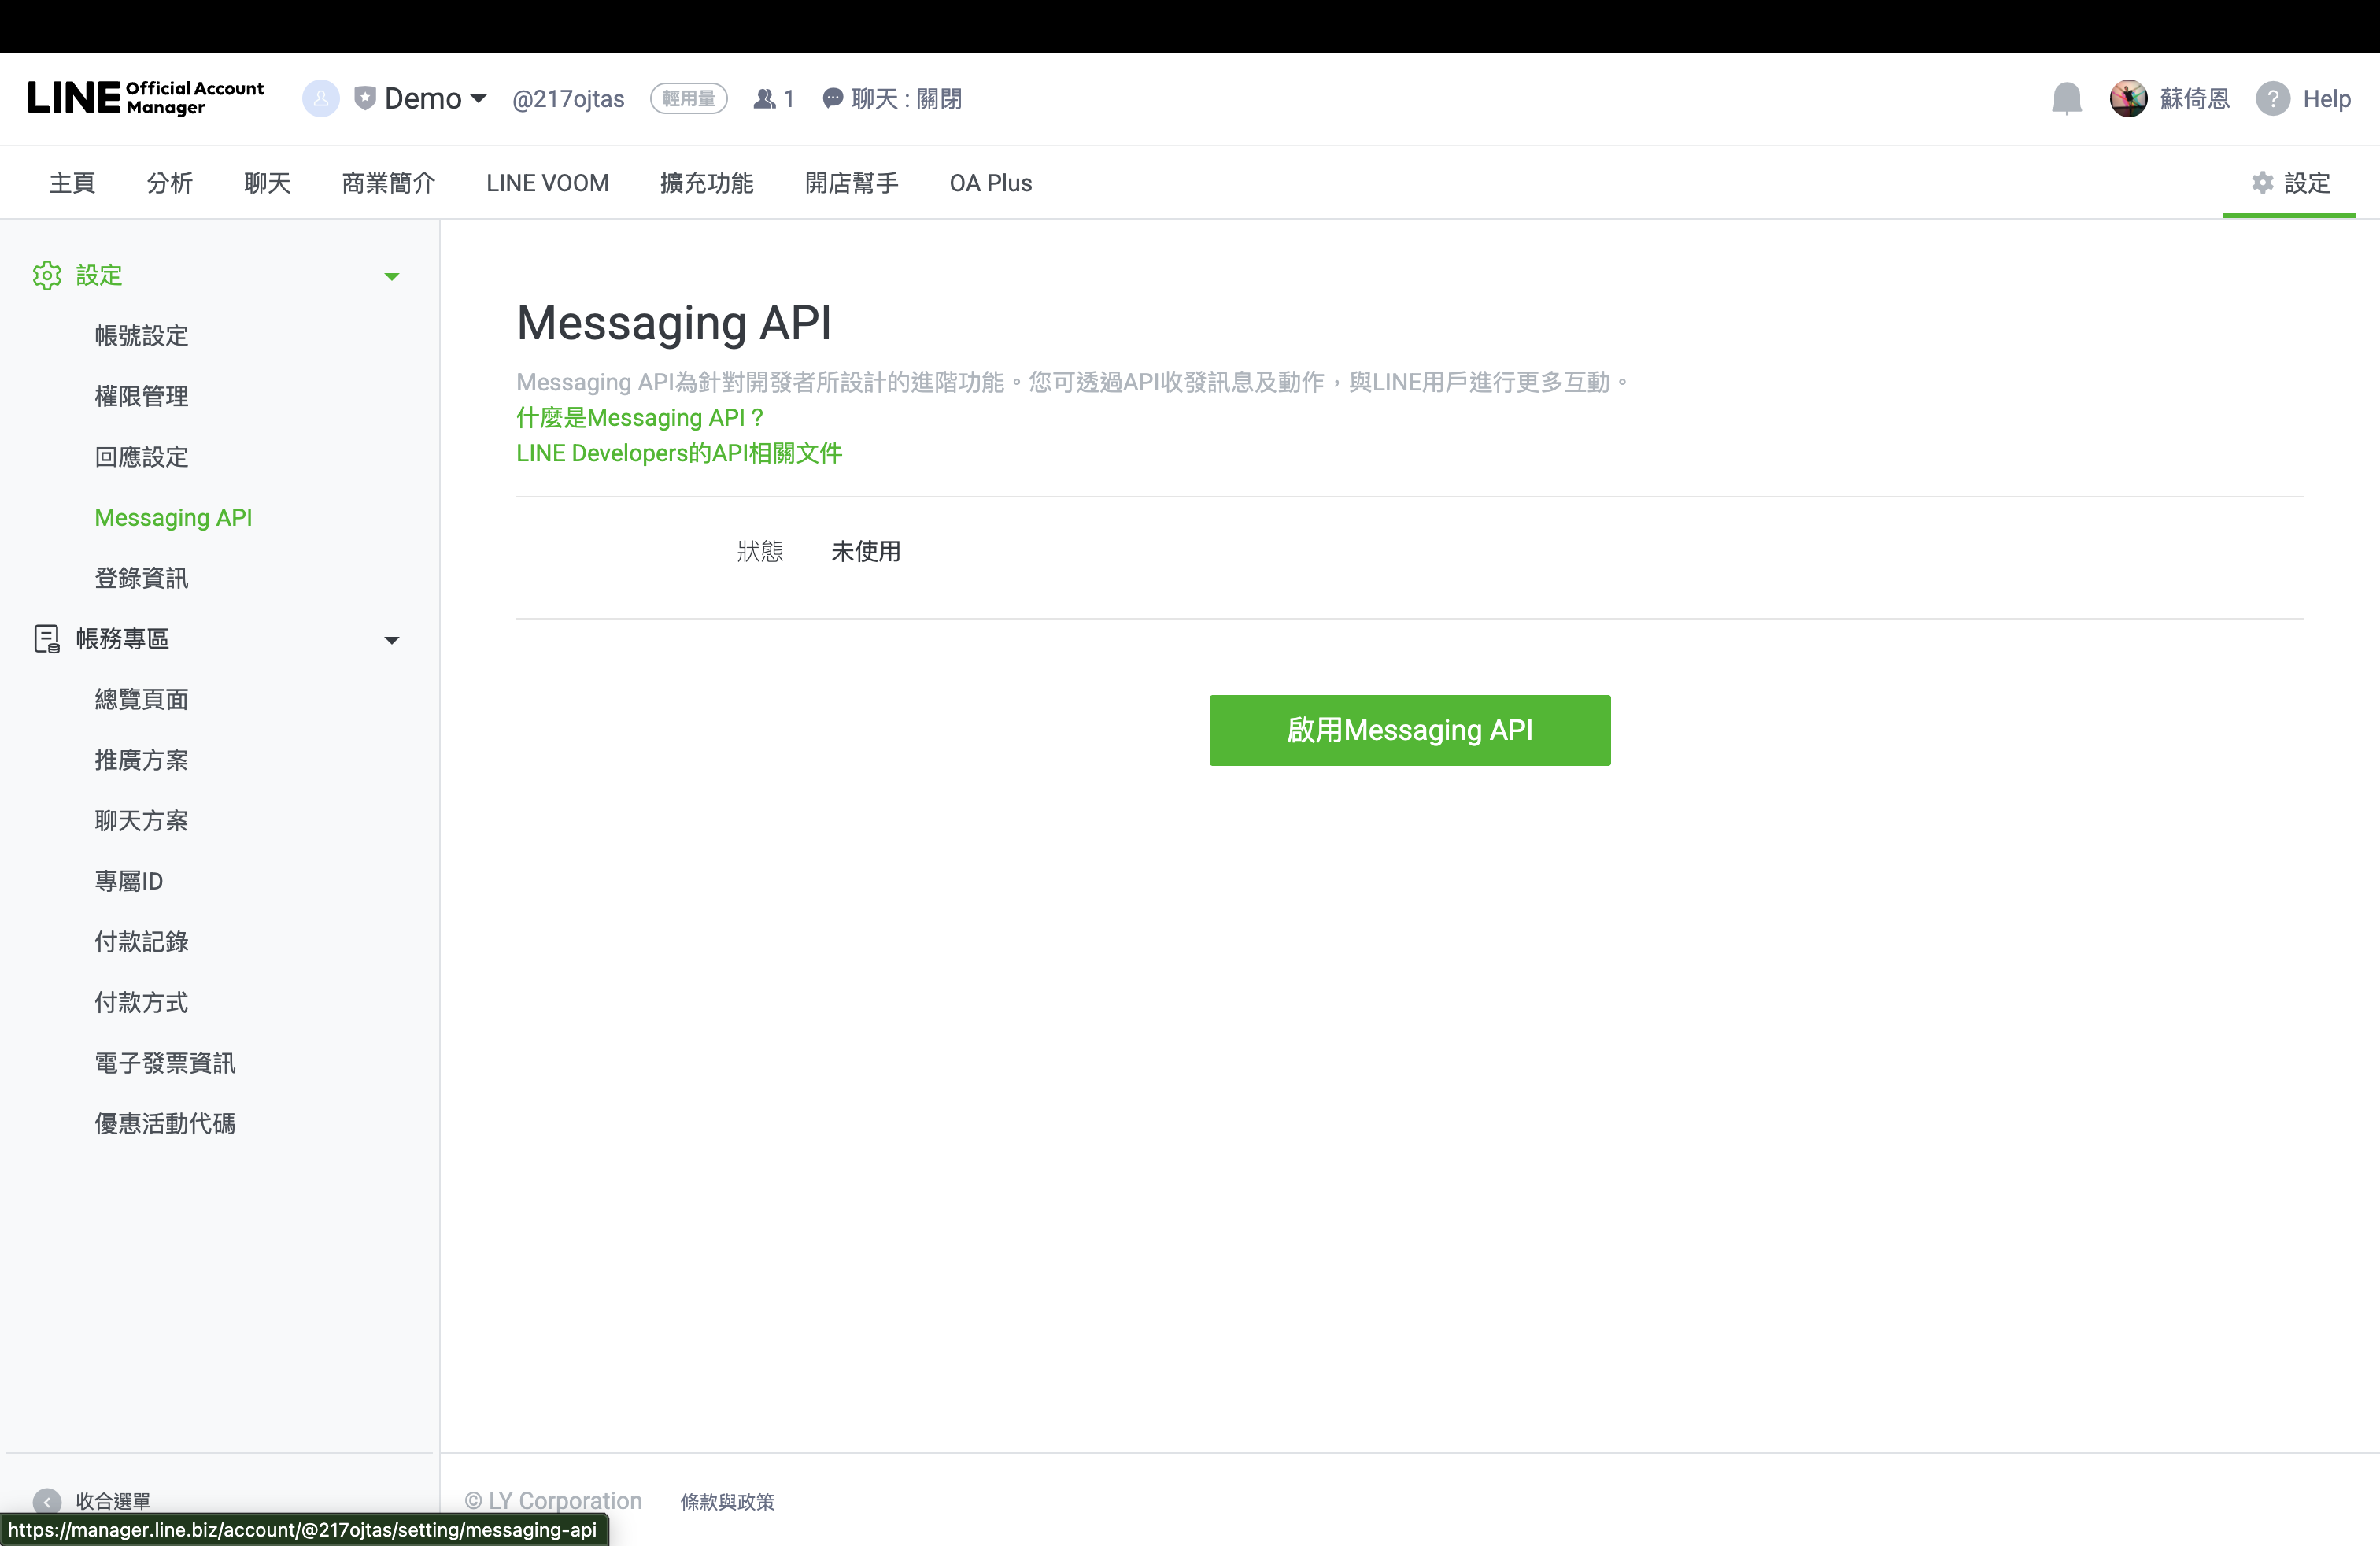
- Open the Messaging API page
- In the left sidebar under settings, click
Messaging API. - If Messaging API has not been enabled yet, the page shows status
Unusedand a greenEnable Messaging APIbutton.
- In the left sidebar under settings, click
-
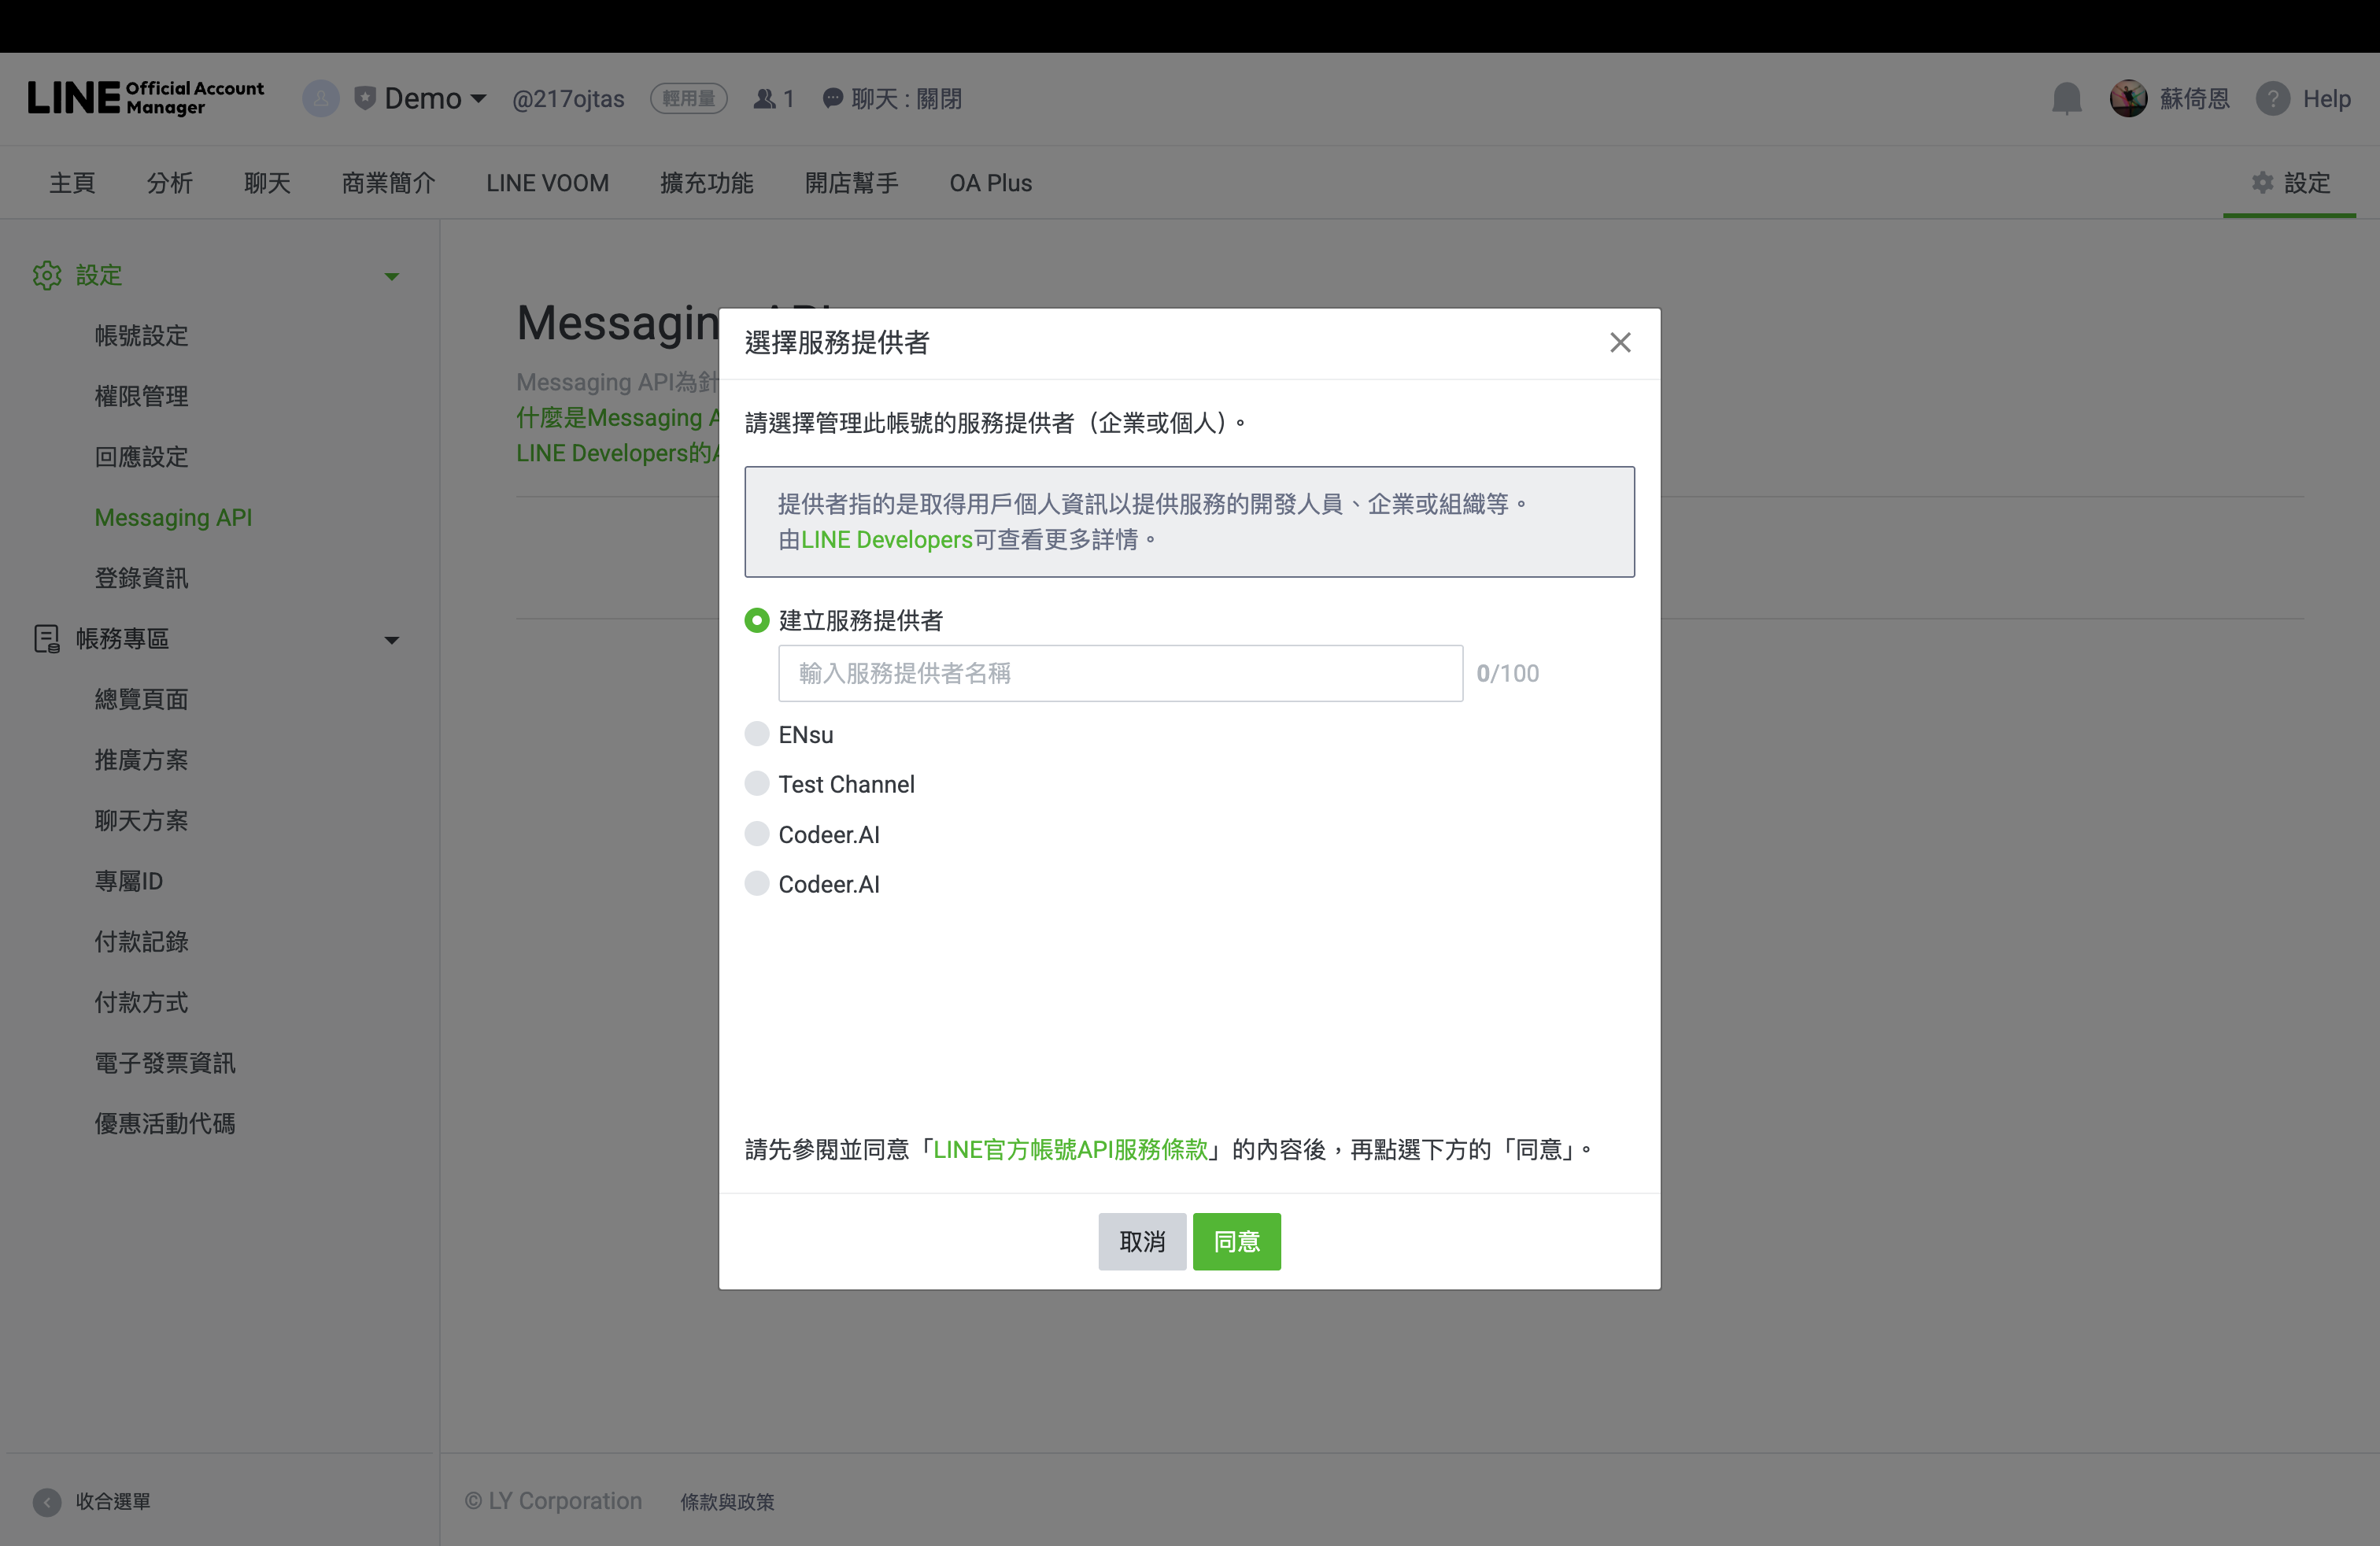
Start Messaging API activation
- Click
Enable Messaging API. - A provider selection dialog opens.
- Click
-
Choose the Provider carefully
- Either create a new provider or choose an existing one.
- If this bot belongs to your own team, the provider name is mainly for internal organization. Use any clear name.
- If you already know which Provider will also hold the
LINE Loginchannel, choose that same Provider now. - Click
Agreeto continue.
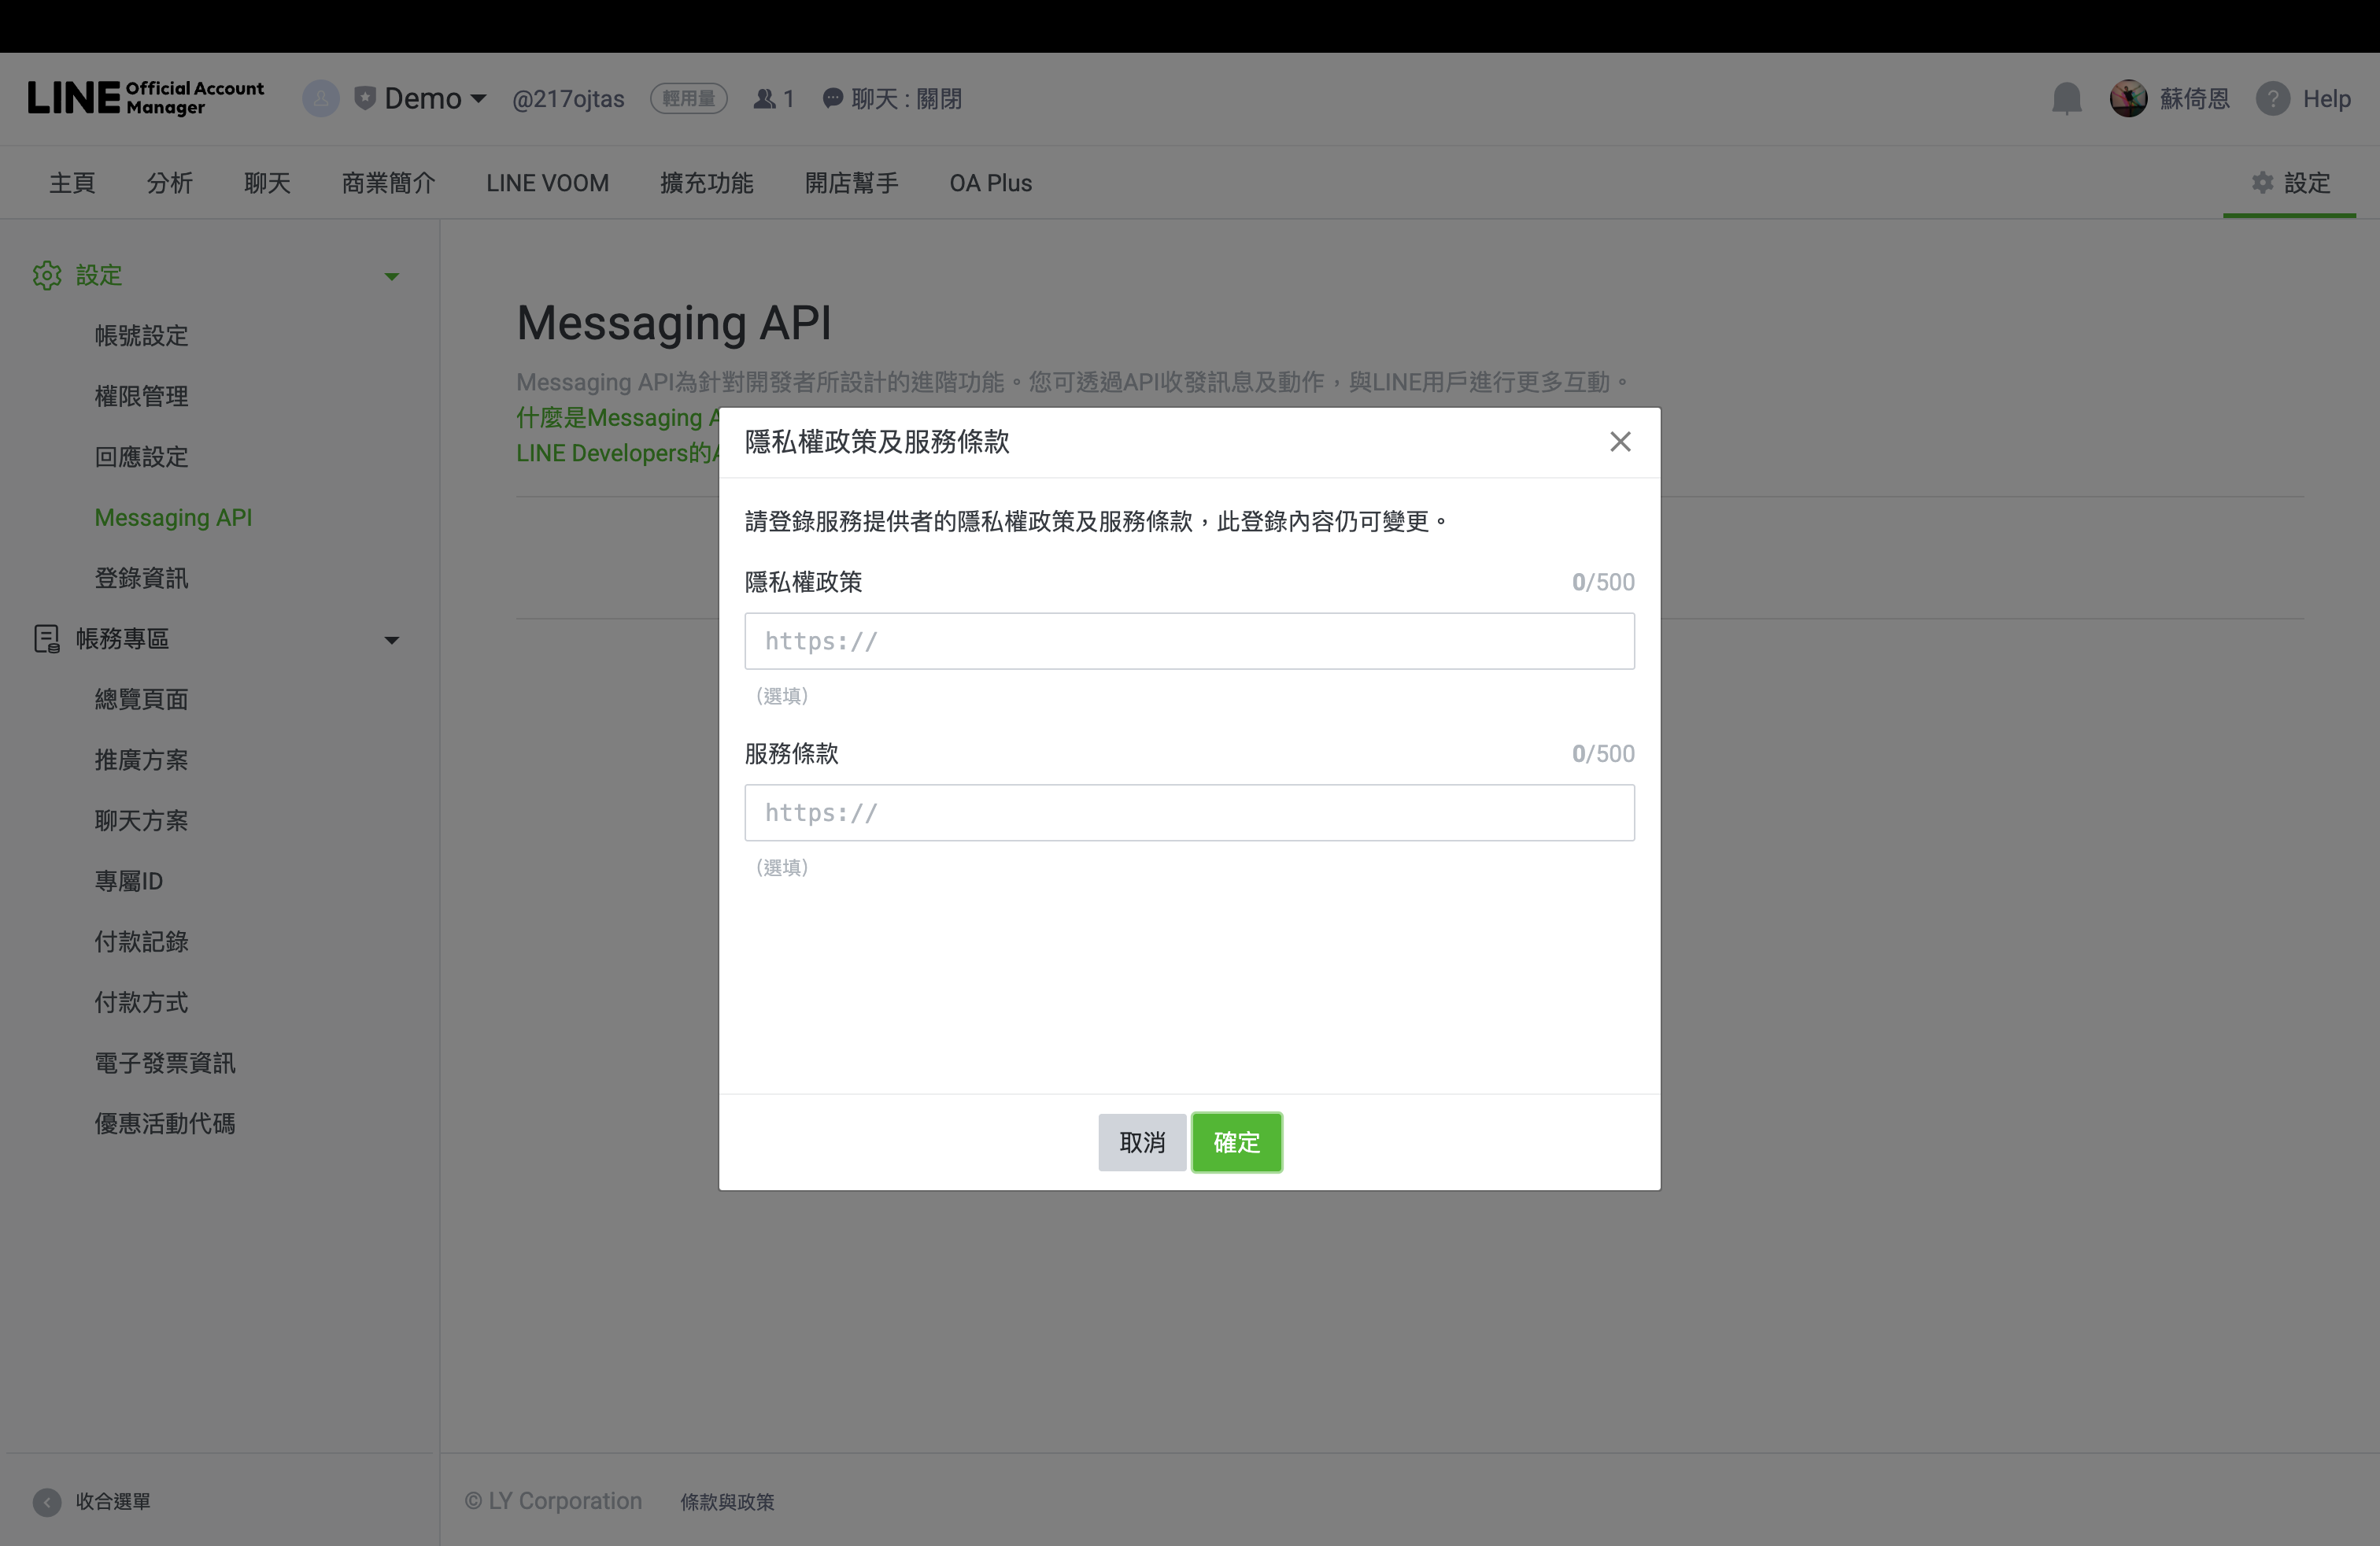
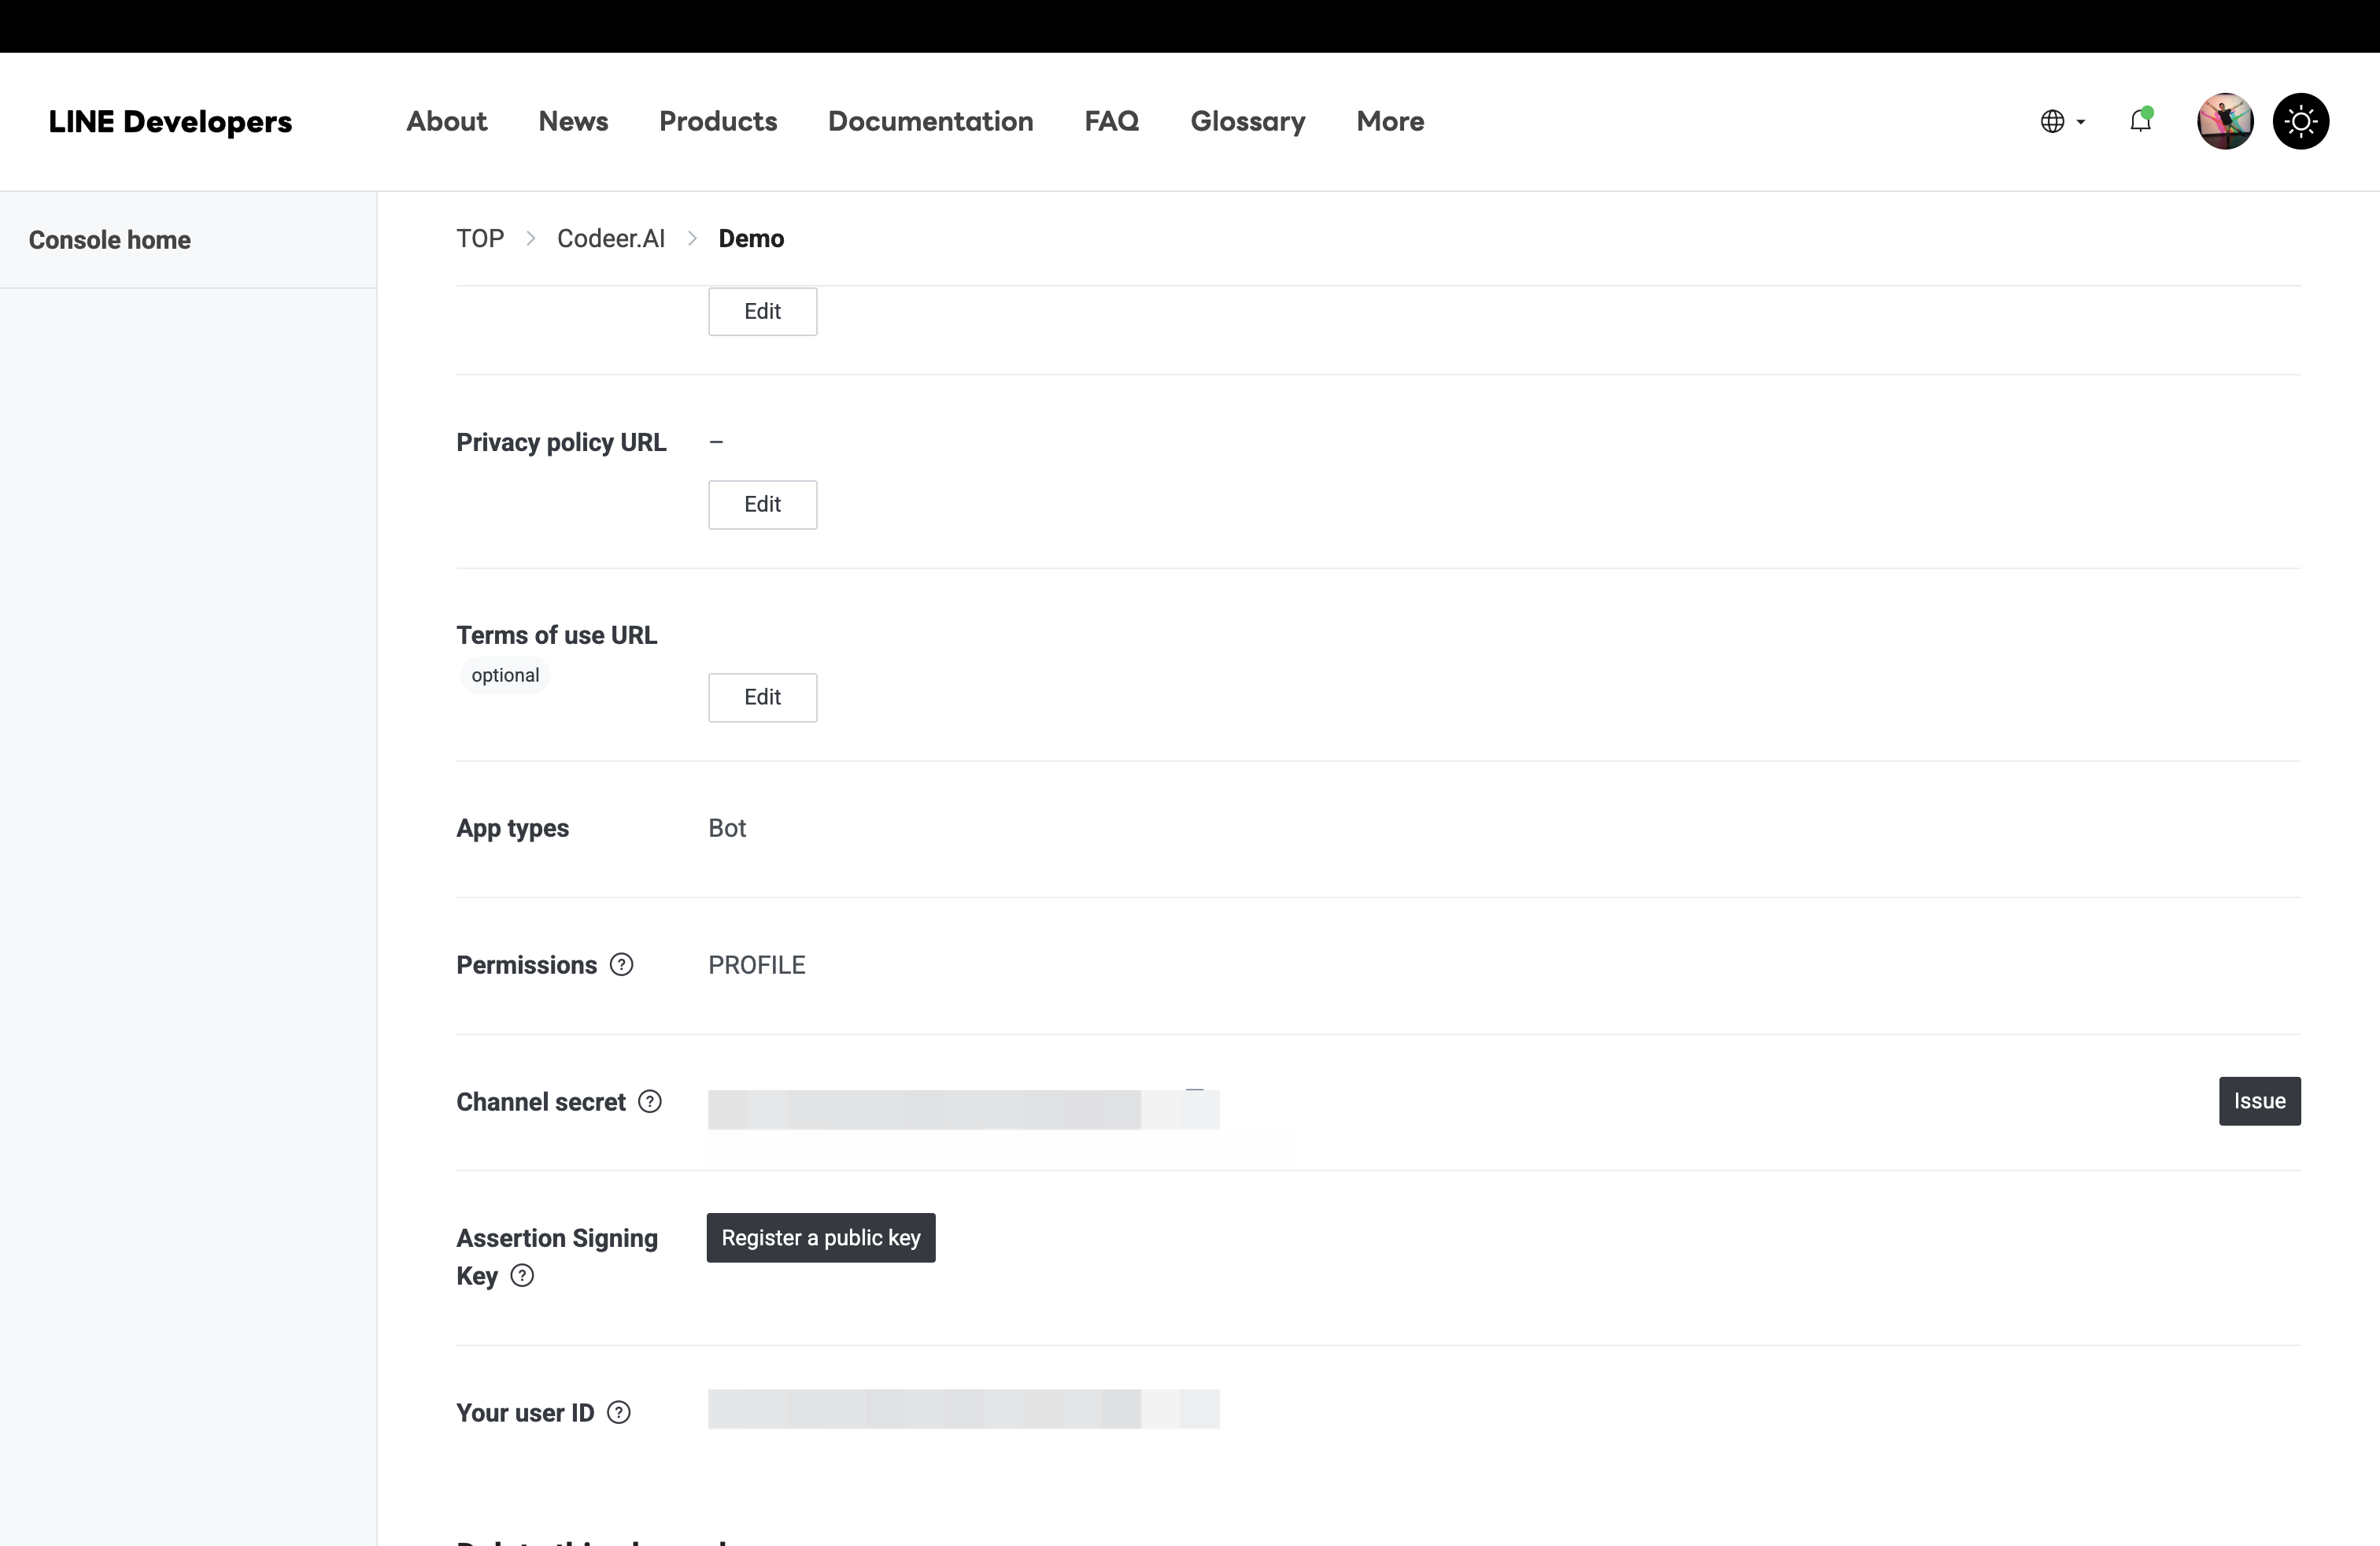
- Skip policy URLs for now if needed
- LINE then asks for
Privacy policy URLandService terms URL. - If you do not have those pages yet, leave both fields empty for now.
- These fields are optional at this stage and can be edited later.
- Click
Confirm.
- LINE then asks for
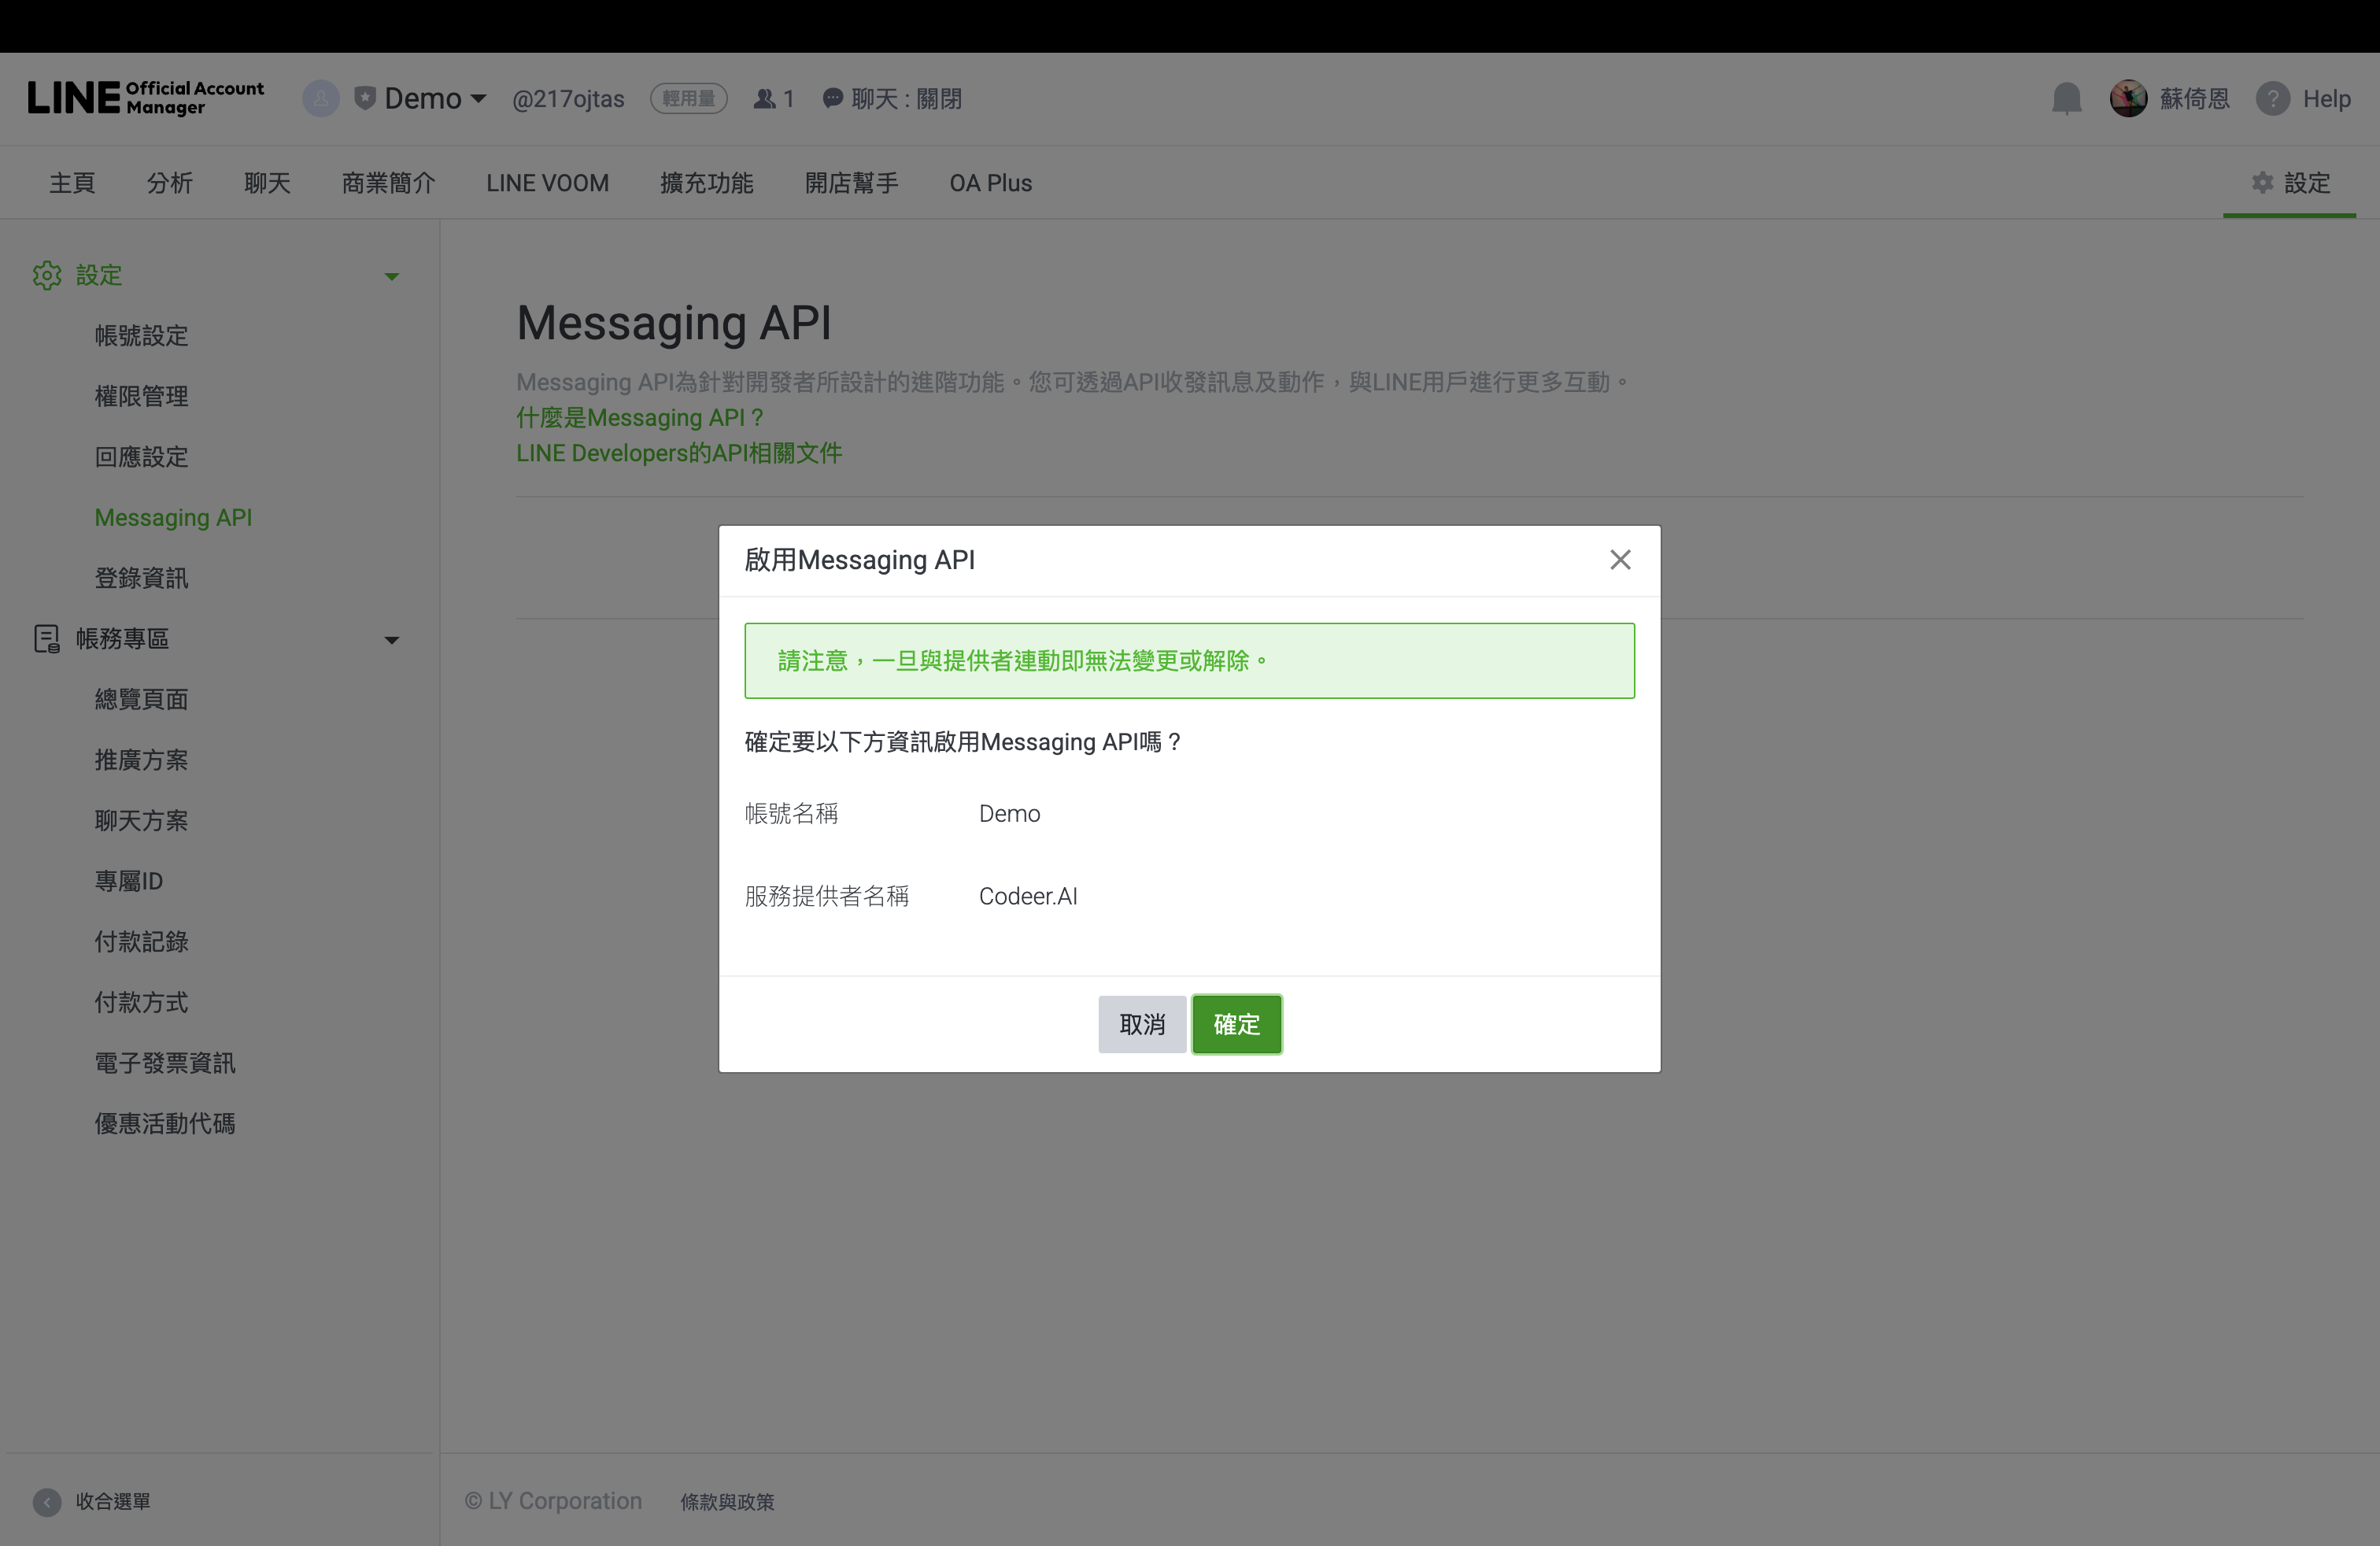
- Confirm Messaging API activation
- LINE shows a final confirmation dialog with the official account name and provider name.
- Review the provider carefully before confirming.
- Click
Confirmagain to finish enabling Messaging API.
-
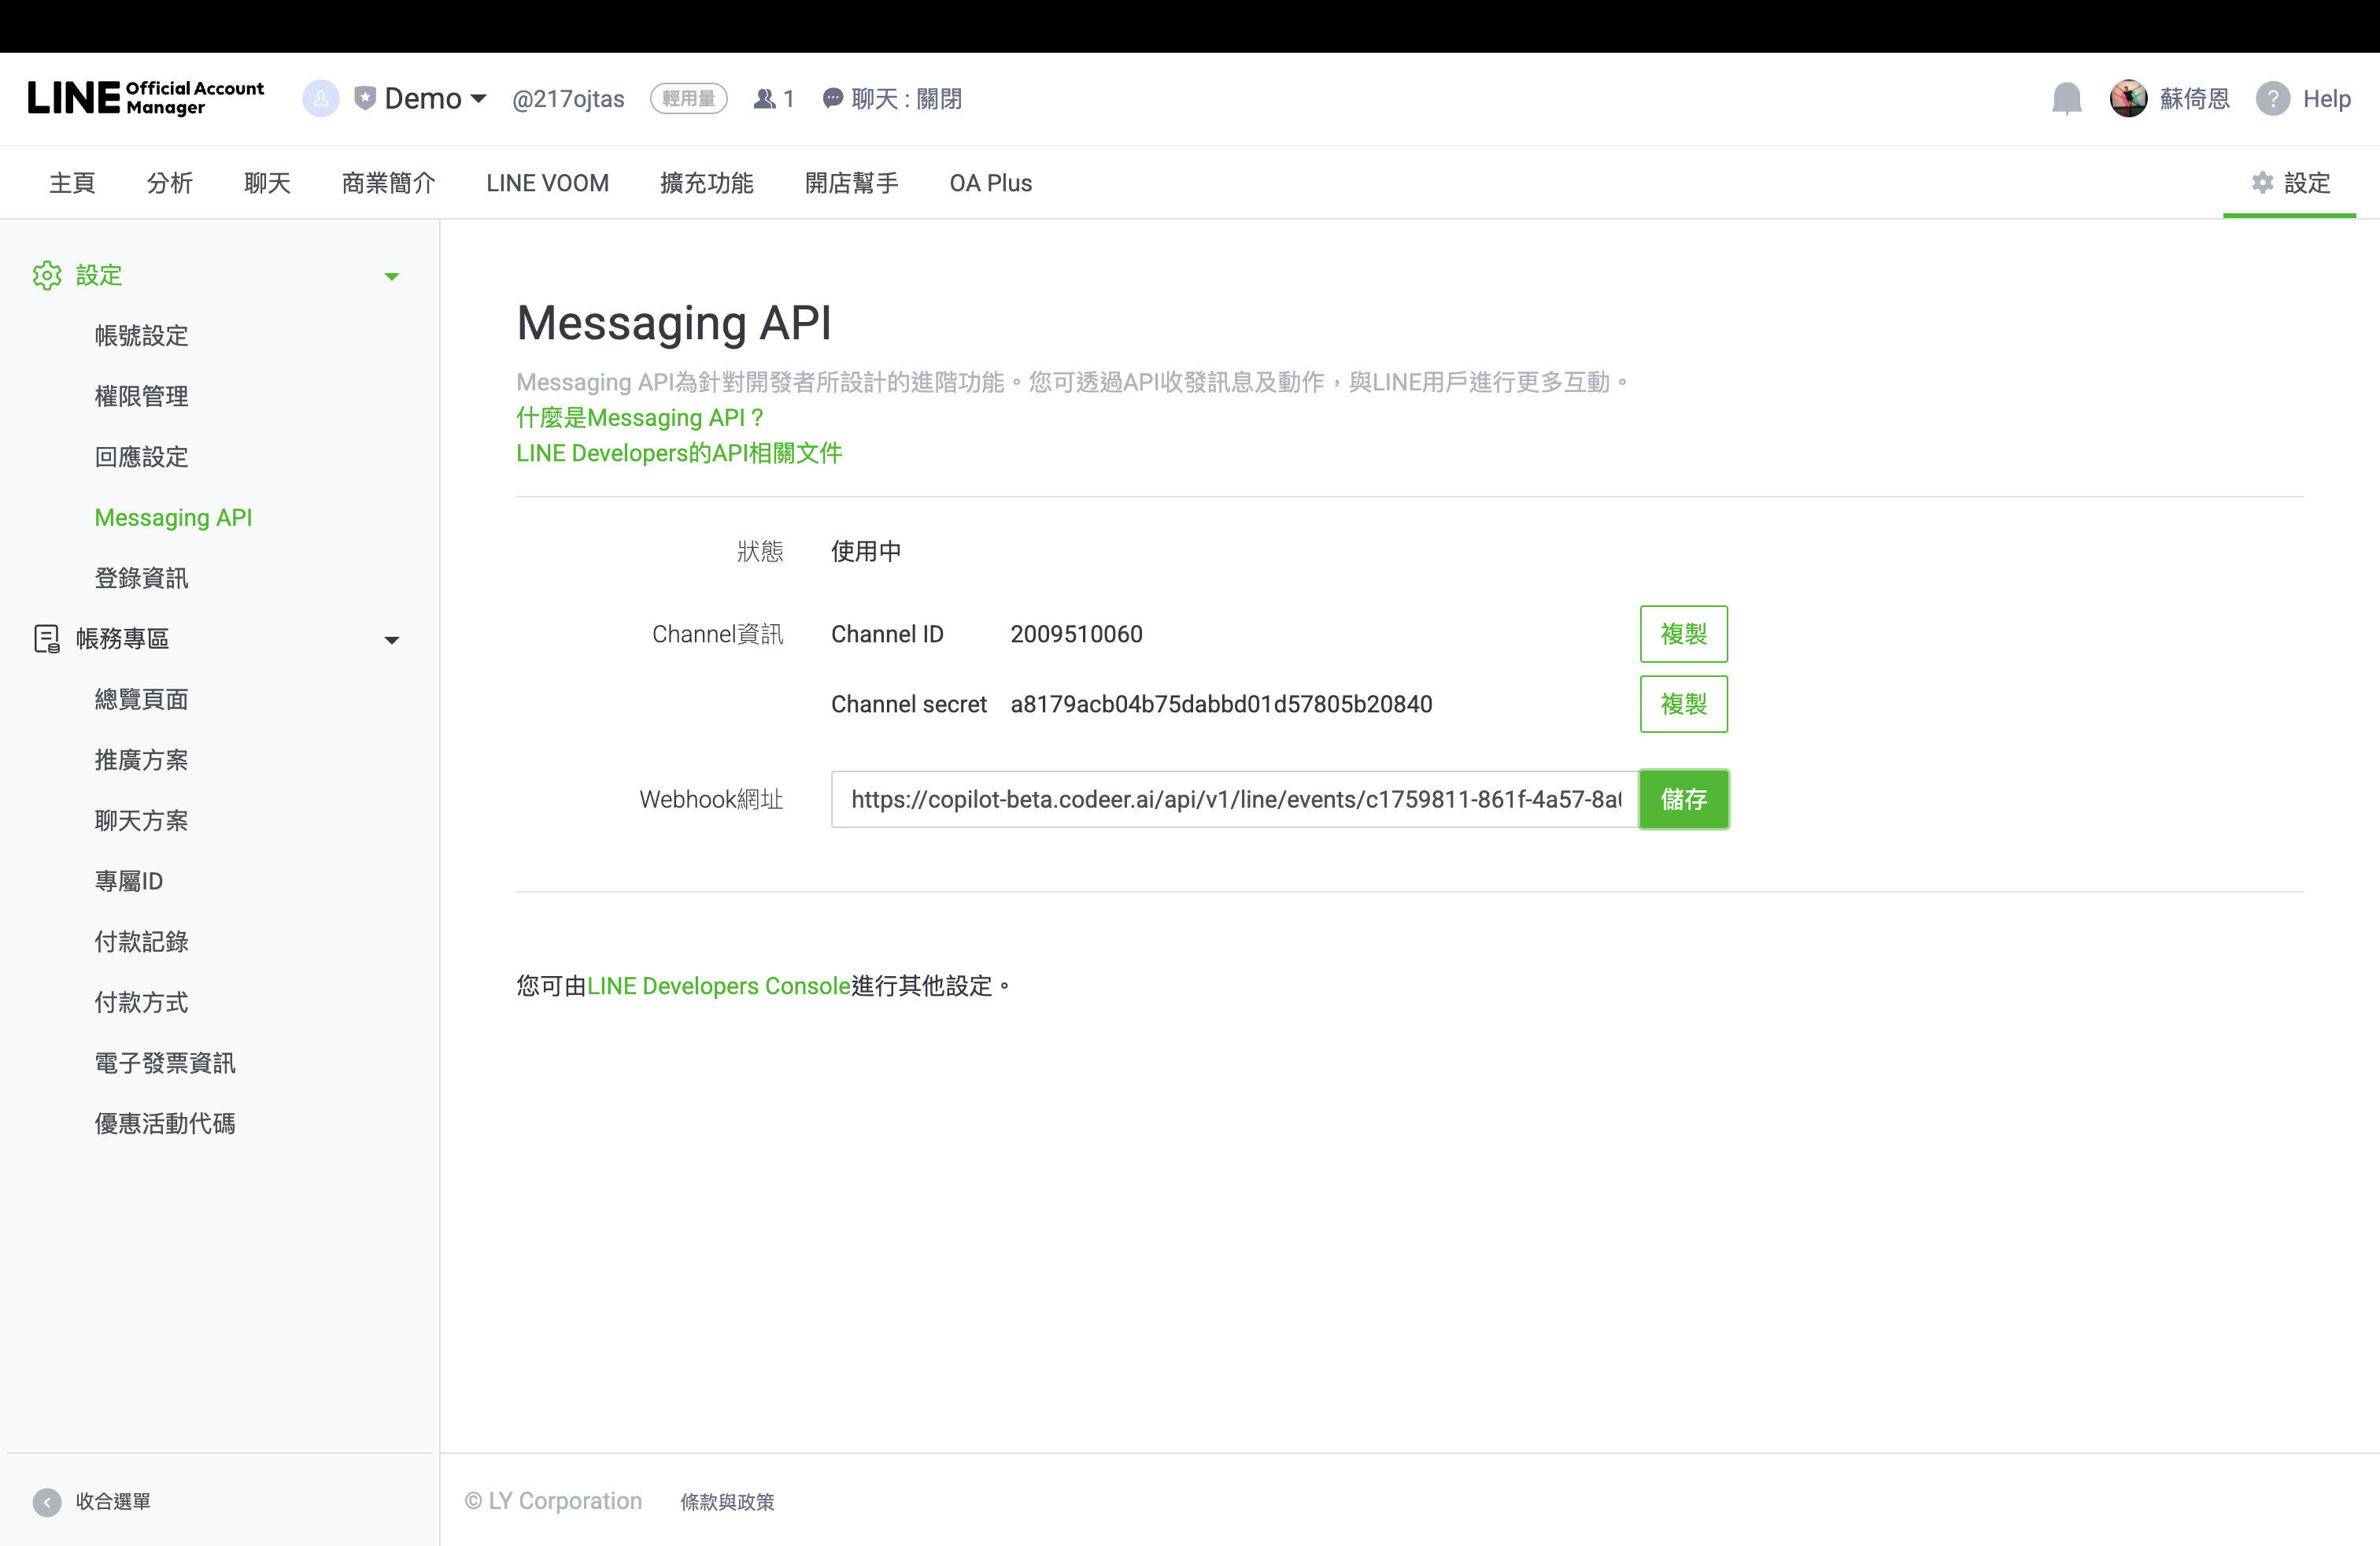
Paste and save the Codeer webhook
- After activation, the same
Messaging APIpage changes fromUnusedtoIn use. - You should now see:
Channel IDChannel secret- a
Webhook URLfield - a
LINE Developers Consolelink near the bottom
- Paste Codeer's
Webhook URLinto the webhook field. - Click
Save.
- After activation, the same
-
Continue to LINE Developers Console
- Click the
LINE Developers Consolelink on that page. - Confirm that a
Messaging API channelwas created for the same Provider. - Keep using that same Provider for the later
LINE Loginchannel and LIFF setup.
- Click the
This flow changed on September 4, 2024
Messaging API channels are no longer created directly in LINE Developers Console. The current flow starts in LINE Official Account Manager, then continues in LINE Developers Console.
- Open the official account home
-
Open the matching Messaging API channel in LINE Developers Console
- Open the same Provider
- In LINE Developers Console, stay inside the same Provider that was selected when you enabled Messaging API.
- On the
Channelstab, find theMessaging APIcard whose display name matches the LINE Official Account you just enabled. - Do not pick a different Messaging API card just because it sits under the same Provider. The
Channel Secret, access token, webhook, and LINE Official Account must all belong to the same channel.

- Copy the Messaging API
Channel Secret- Click the matching
Messaging APIchannel card. - Open
Basic settings. - Scroll to
Channel secret. - Copy
Channel secret. You will paste this into Codeer later.
- Click the matching
- Open the same Provider
-
Configure the Messaging API channel
- Open the
Messaging APItab and finish webhook setup- Return to the same Messaging API channel in LINE Developers Console.
- Open the
Messaging APItab. - In
Webhook settings, paste the CodeerWebhook URLif it is not already there. - Turn on
Use webhook. - Turn on
Webhook redelivery. - Turn on
Error statistics aggregation.
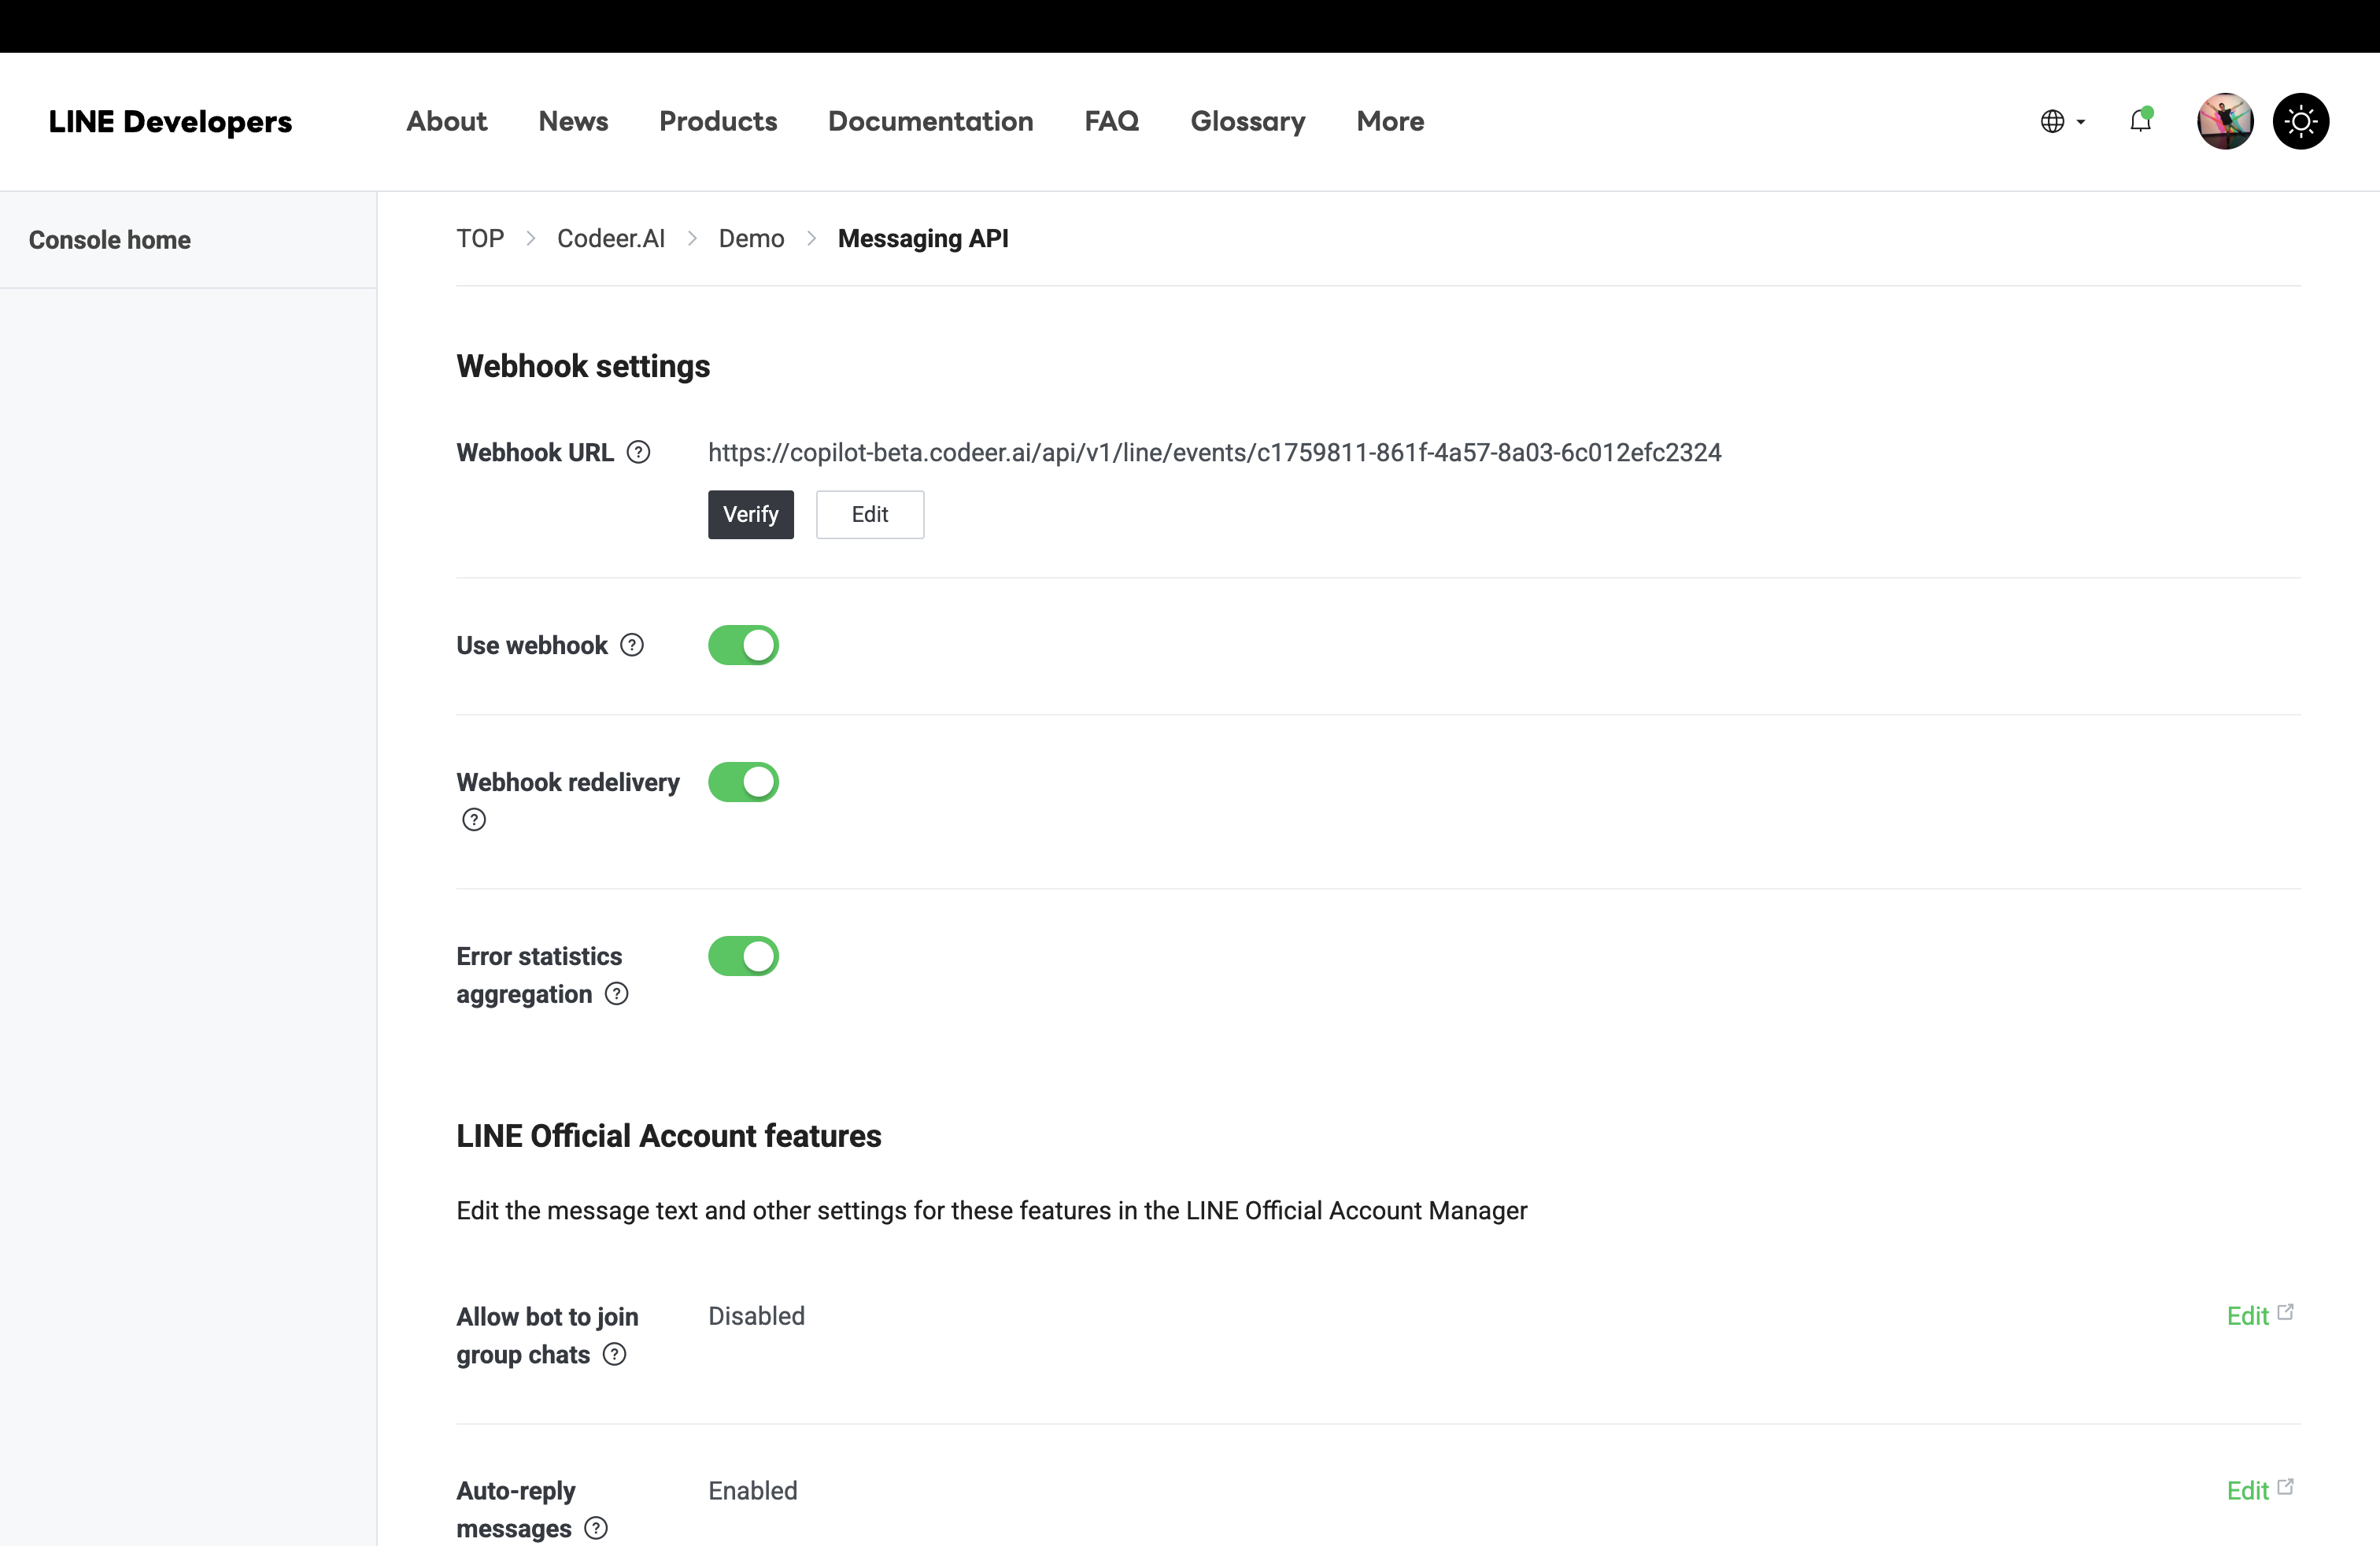
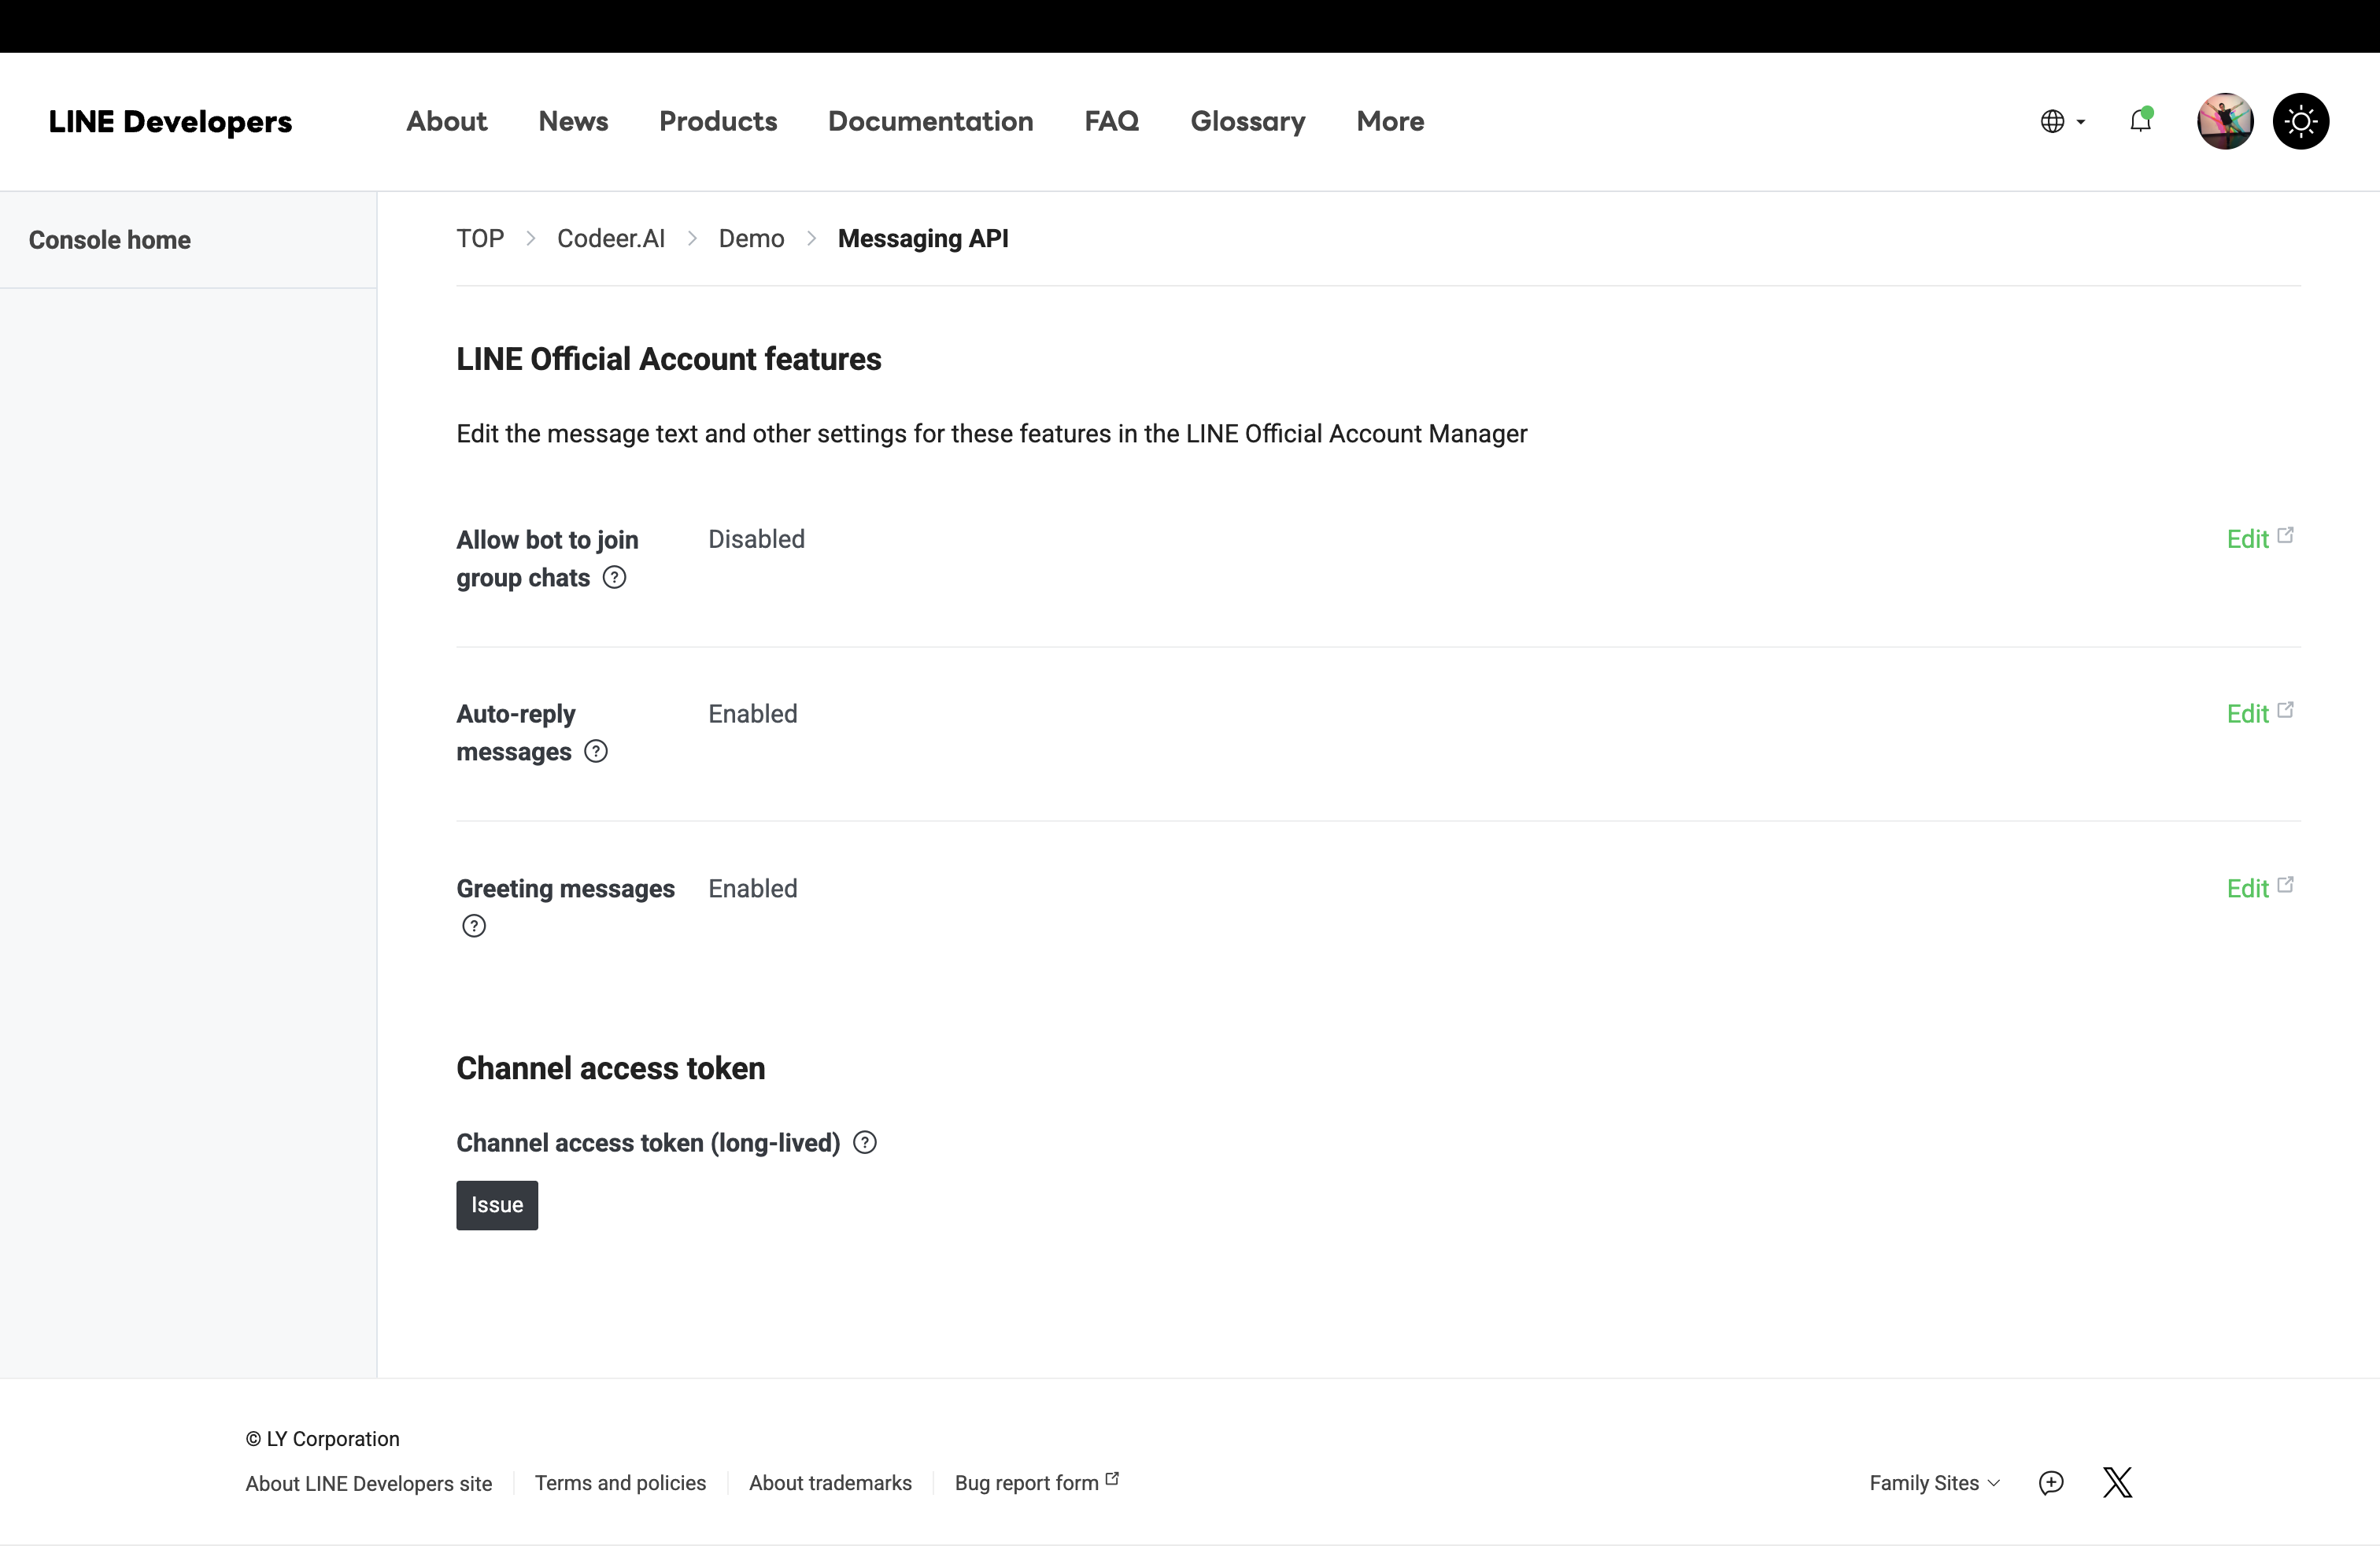
- Issue the long-lived access token
- Scroll down to
Channel access token. - Click
Issuenext toChannel access token (long-lived). - Copy the issued token and keep it ready for Codeer.
- Scroll down to
Turn off
Auto-reply messagesso Codeer answers cleanlyIn LINE Official Account Manager, disable
Auto-reply messages. Otherwise LINE's built-in replies will compete with the agent's answers and users will see duplicate messages.Use
Greeting messagesto onboard new friendsUnlike
Auto-reply messages,Greeting messagesare worth keeping — but rewrite them. Tell new friends that this account is an AI agent, what it can help with, and how to get started (for example,Hi, I'm an AI assistant for <team>. Ask me anything about <scope>, or type "human" to reach a real agent.). This gives a much better first impression than LINE's default greeting. - Open the
-
Create the LINE Login channel on the same Provider
Only needed for LINE login or form flows
This step is only needed when you want users to log in inside LINE to collect email, or when the agent uses
Request Form. Those flows rely onLINE Loginplus LIFF. If email verification is off and the agent does not useRequest Form,LIFF IDandLINE Login Channel IDare optional — you can skip this entire step.- Go back to the Provider channel list
- Open the same Provider again in LINE Developers Console.
- On the
Channelstab, clickCreate a new channel.
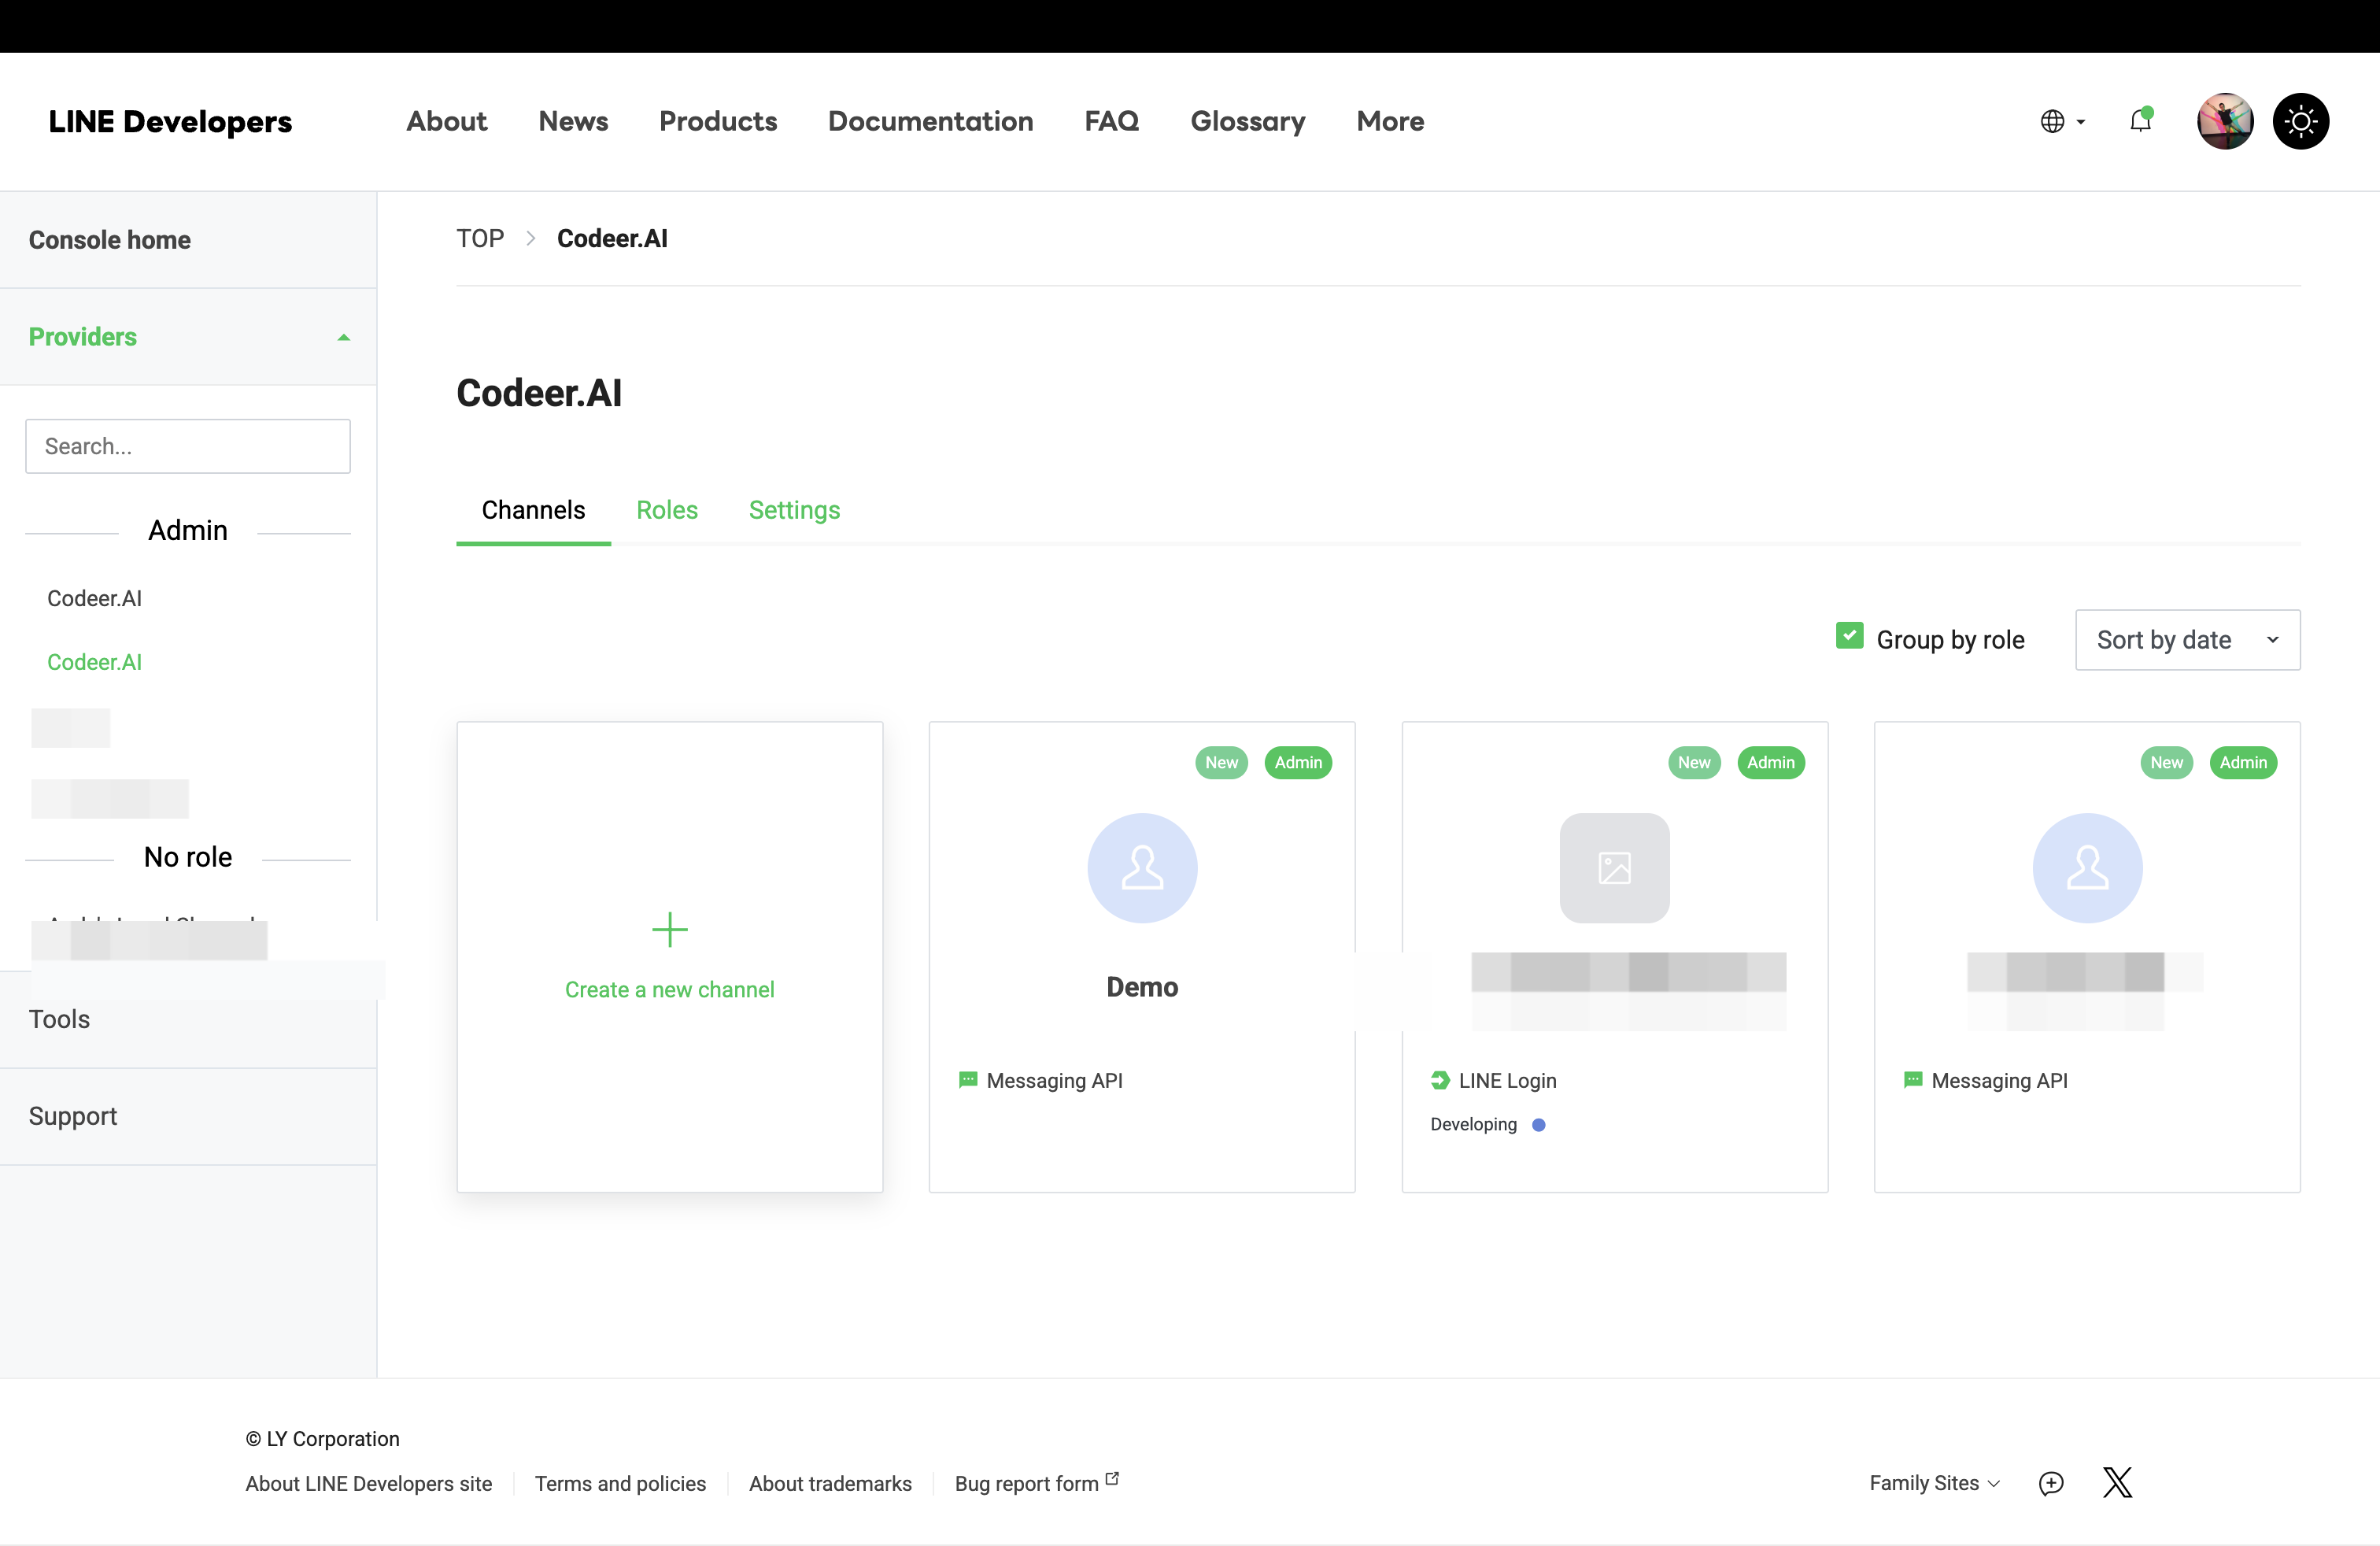
- Choose
LINE Login- In the channel type dialog, select
LINE Login.
- In the channel type dialog, select
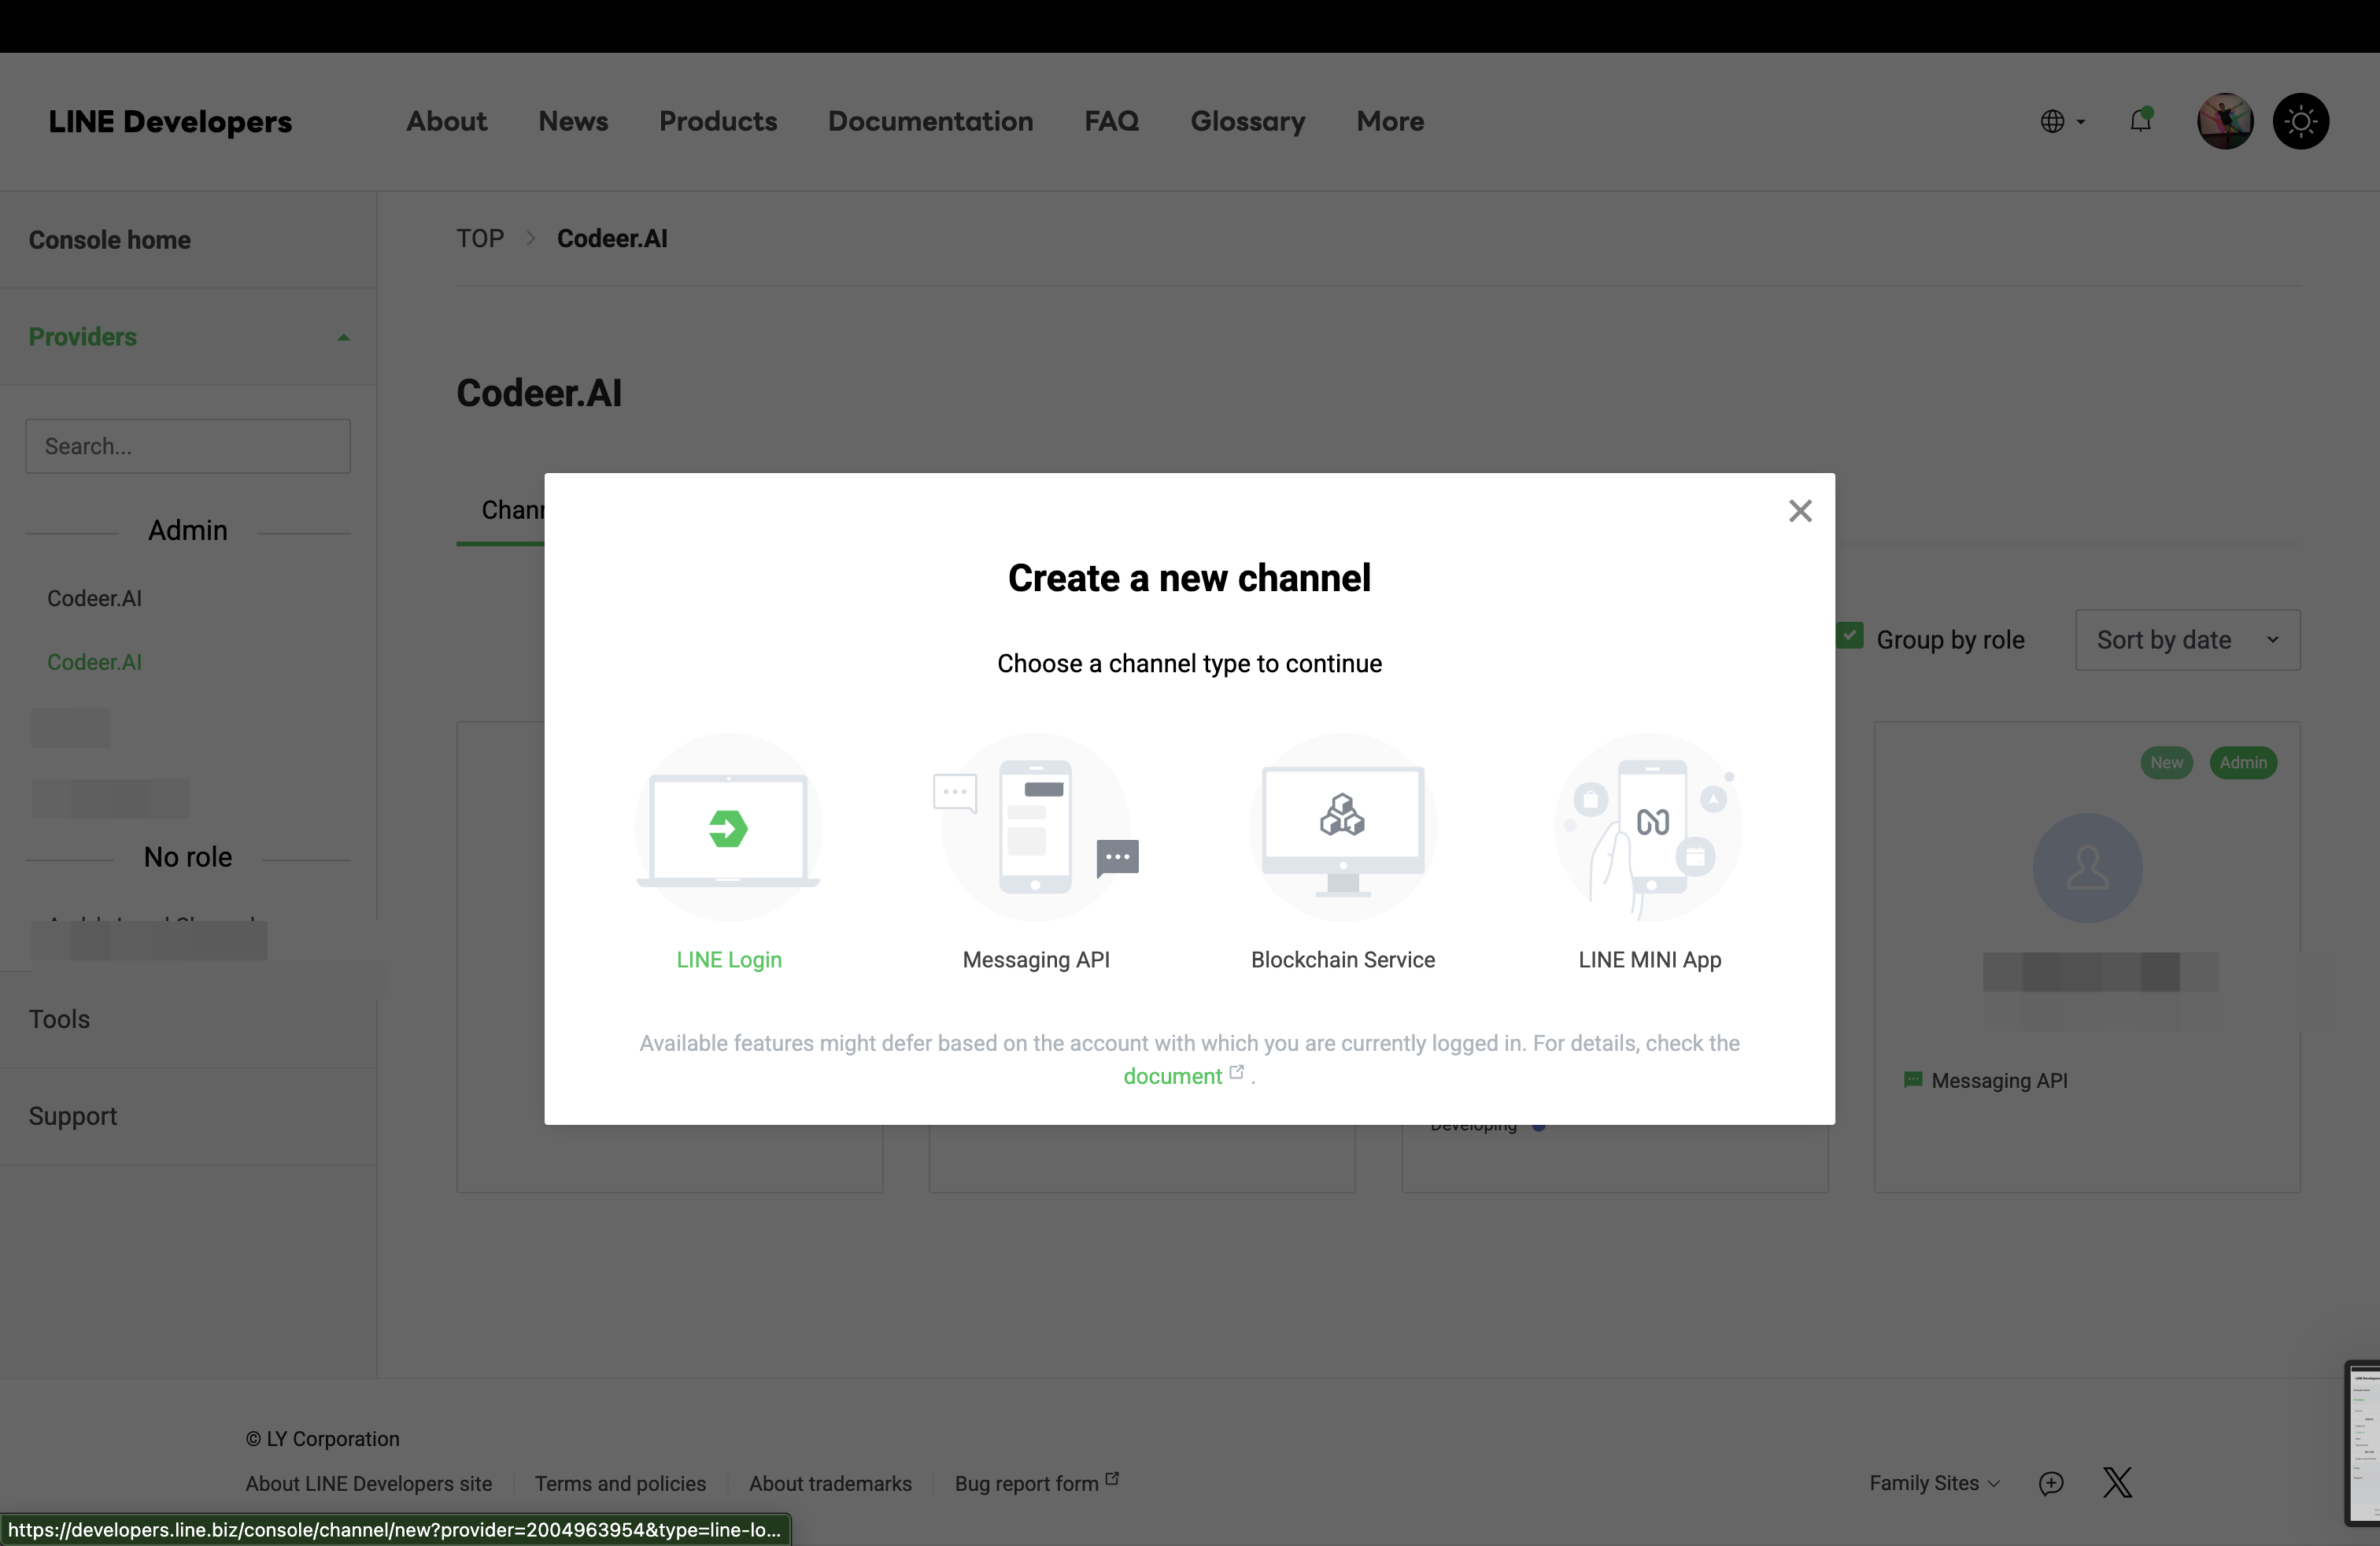
- Create the LINE Login channel
- LINE opens the channel creation form.
- Use a name that clearly ties this channel to the same bot, for example
<Official Account Name> LIFF. - Set
App typesto includeWeb app. - Finish the required fields and create the channel.
- After creation, open
Basic settingsand copy itsChannel ID. You will paste this into Codeer later asLINE Login Channel ID.
Publish the LINE Login channel before real users test
A new LINE Login channel starts in
Developingstatus. In that state, only admins and testers can use it. If you want normal end users to finish the LIFF verification flow, change the LINE Login channel toPublished. - Go back to the Provider channel list
-
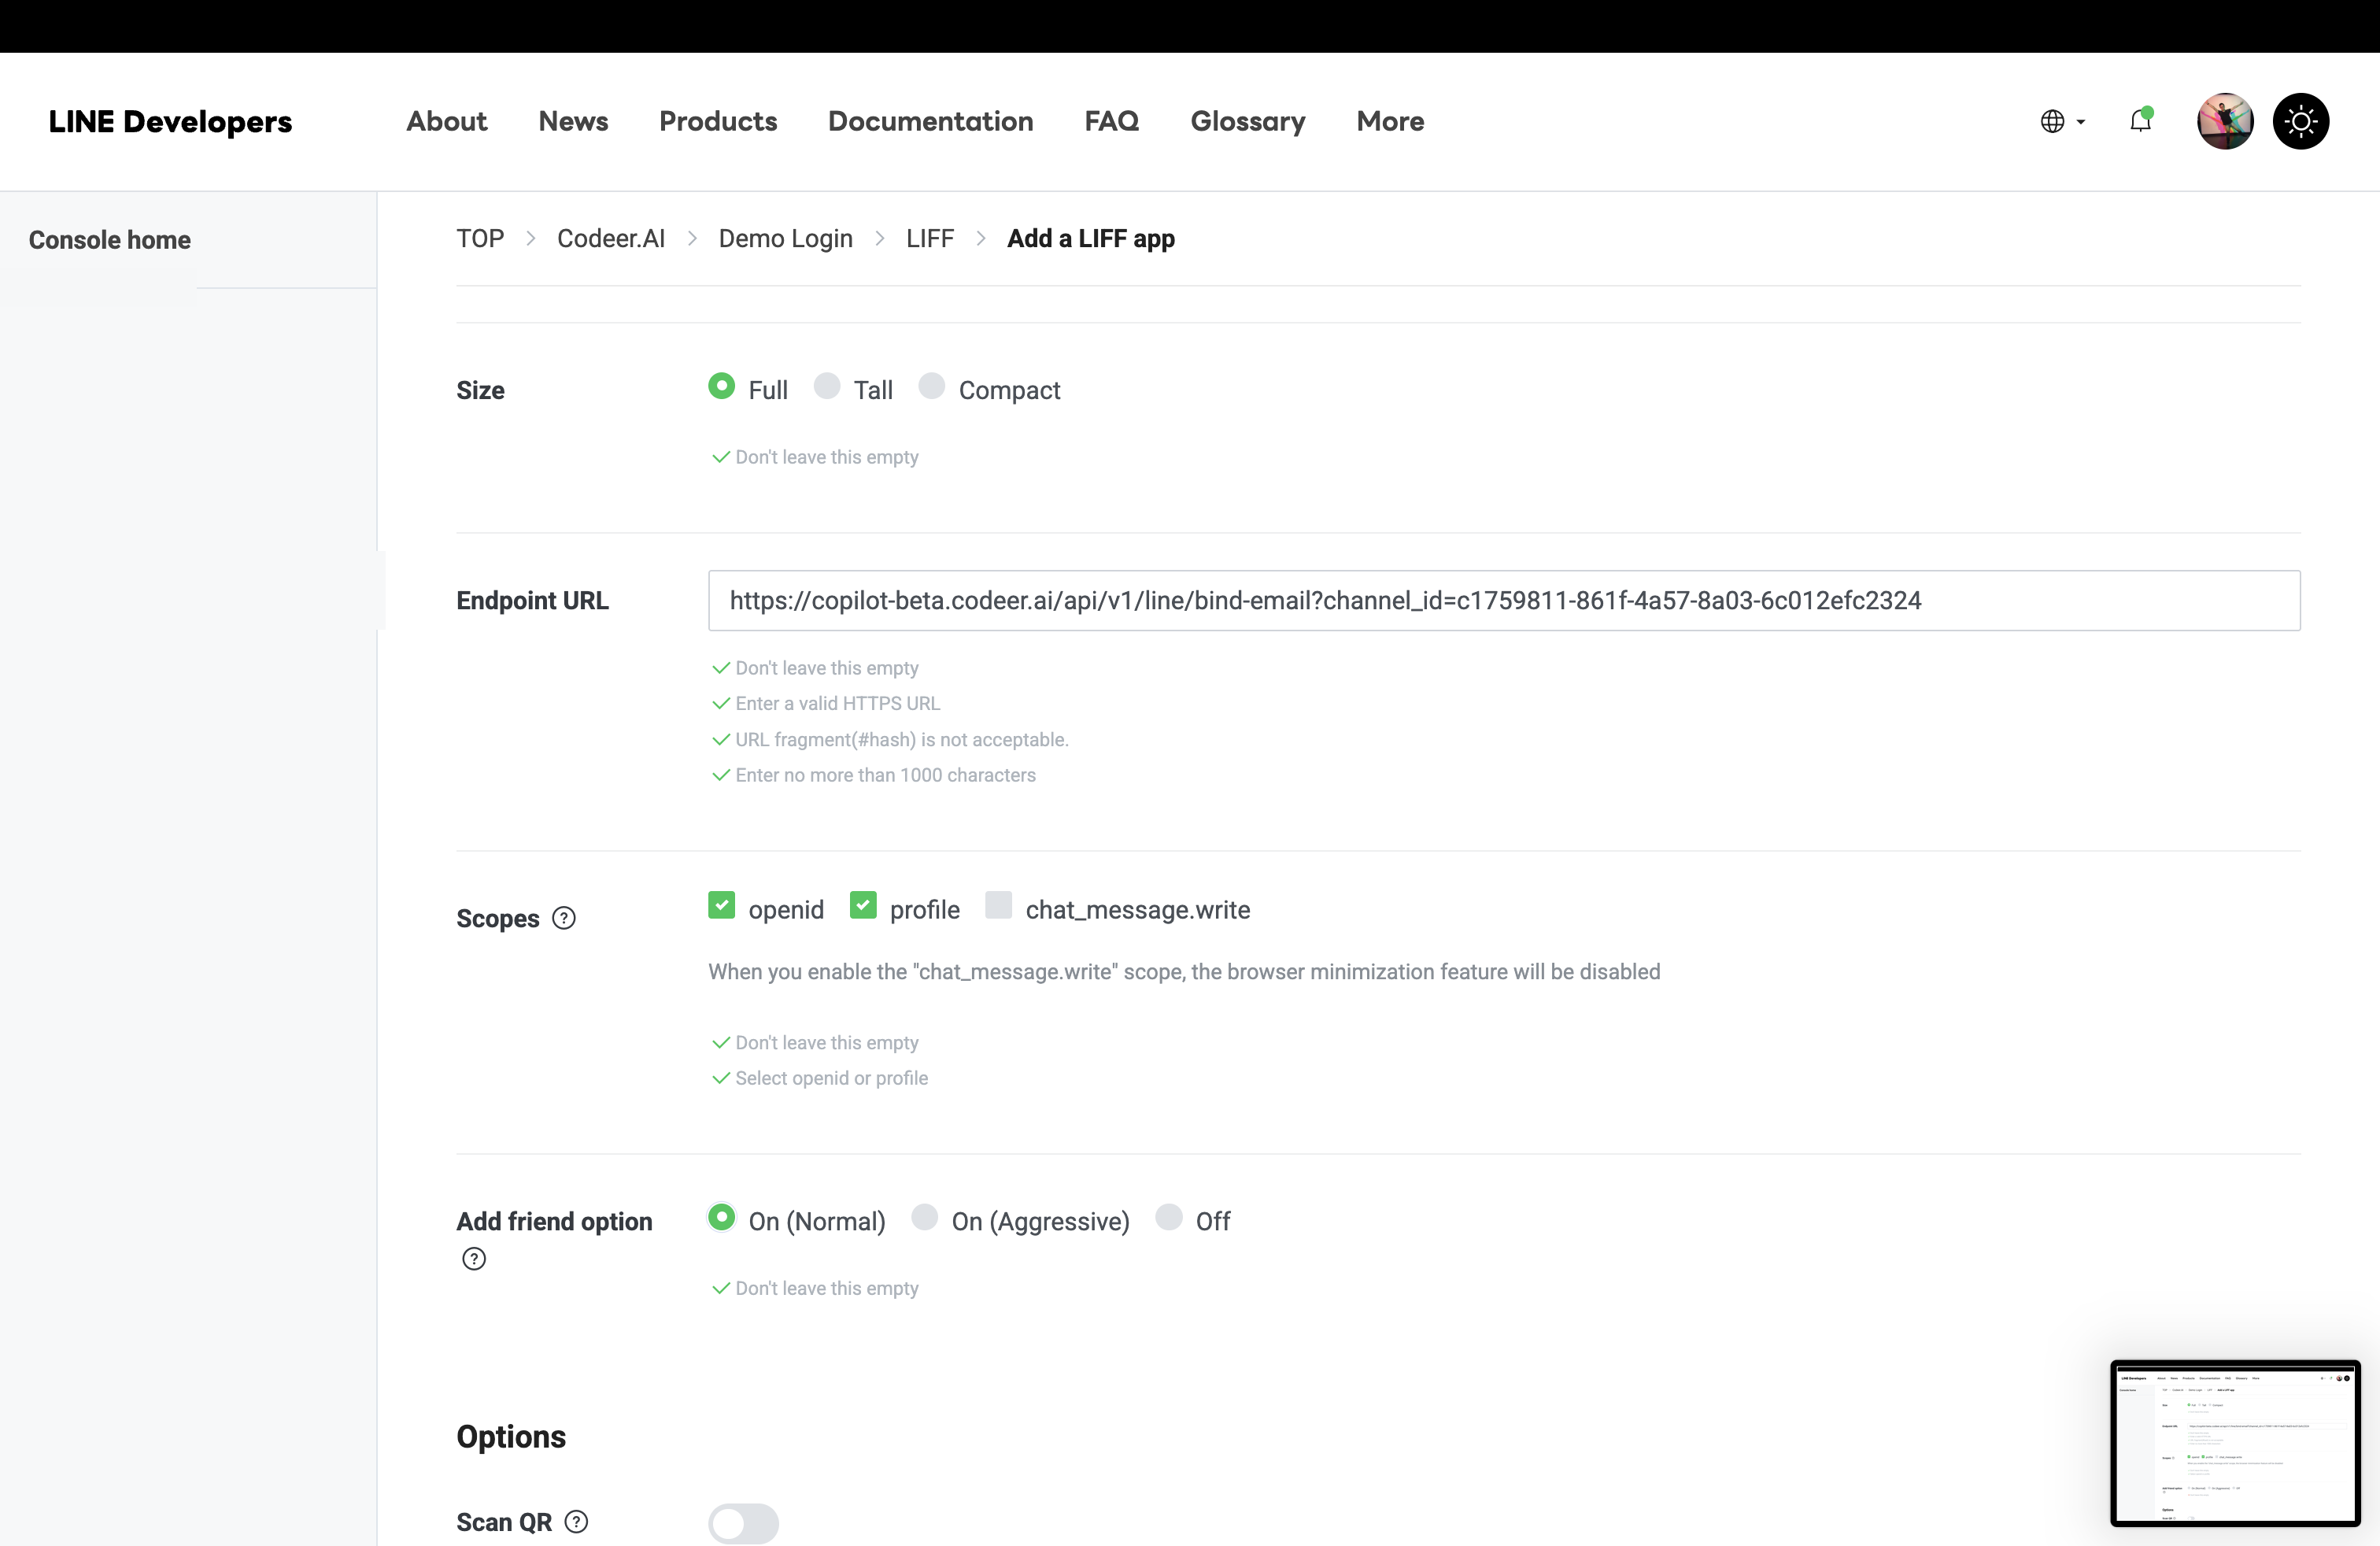
Create the LIFF app on the LINE Login channel
-
Open the
LIFFtab and add a LIFF app- In the LINE Login channel, open the
LIFFtab. - Click
Add.
- In the LINE Login channel, open the
-
Fill the LIFF app basics
- Set
LIFF app nameto something recognizable, such as<Official Account Name> LIFF. - Set
SizetoFull. - Paste Codeer's
LIFF Entry URLintoEndpoint URL.
- Set
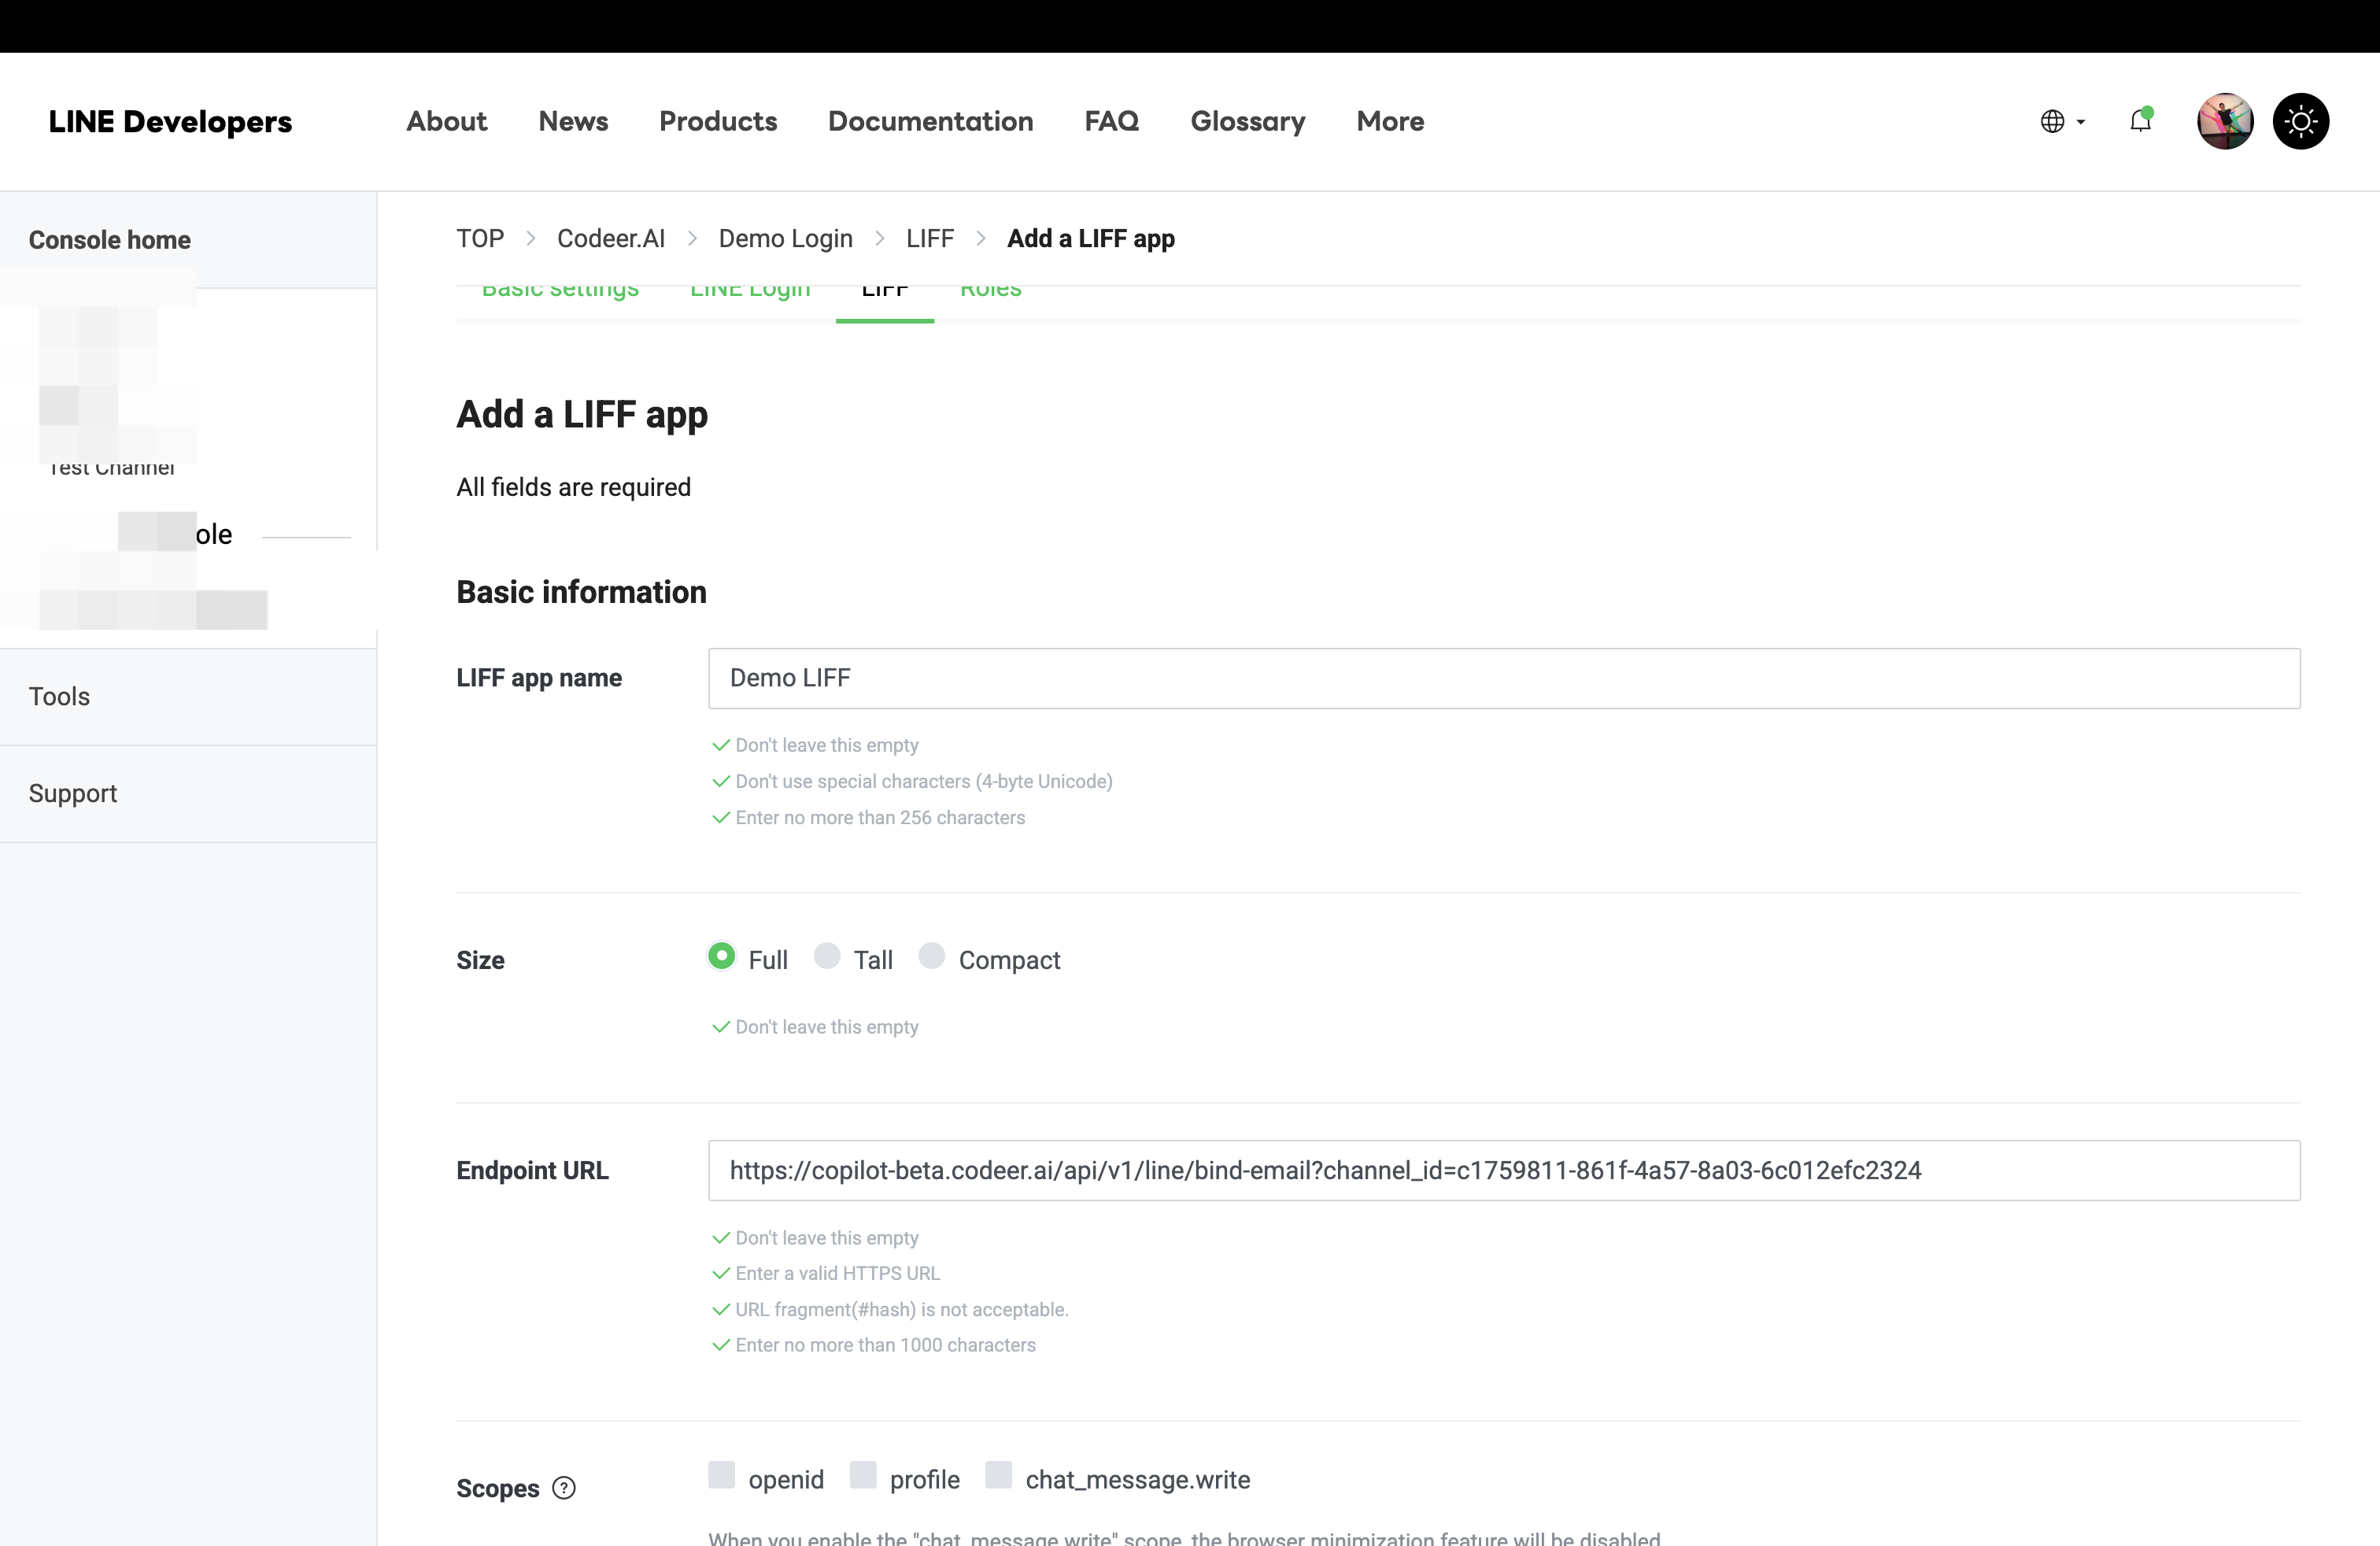
- Choose scopes and add-friend behavior
- Turn on
openid. - Turn on
profile. - Leave other scopes off unless you explicitly need them.
- Set
Add friend optiontoOn (Normal). - Create the LIFF app.
- Turn on
- Copy the LIFF ID
- After the LIFF app is created, copy the
LIFF IDfrom the LIFF app list. - The
LIFF IDlives underLINE Login channel>LIFF. It is what Codeer uses as the shared LINE LIFF entry page.
- After the LIFF app is created, copy the

- Publish the LIFF app
- A newly created LIFF app starts in a non-public state and only testers on the LINE Login channel can open it.
- In the LIFF app list, change the status to
Publishedso any LINE user who reaches the bot can open the LIFF page.
LIFF app must be published for real users
Both the
LINE Login channeland theLIFF appmust be inPublishedstatus. Admins and testers can open an unpublished LIFF during testing, but regular end users cannot. If the LIFF page fails to open for non-testers, this is the first thing to check.What LIFF is doing in this setup
LIFF is the in-LINE web surface Codeer uses for email verification and for request-form flows. If LIFF is missing or points to the wrong endpoint, users can add the bot but cannot complete the in-LINE verification flow.
-
-
Finish the LINE configuration in Codeer
- Paste the LINE values back into Codeer
- Return to the Codeer LINE form.
- Paste these values into Codeer:
Channel SecretChannel Access Token
- If you created LINE Login plus LIFF for LINE-side login/email collection or
Request Form, also paste:LIFF IDLINE Login Channel ID
- Choose the published agent that should answer LINE messages.
- Set
Conversation Session Timeoutif you want inactivity to start a fresh conversation. The default is24hours, and the allowed range is1to720hours. - Save the configuration.
Only published agents appear in the selector
If the agent is missing, go back to
Editor, publish it, and then return to the LINE channel page. - Paste the LINE values back into Codeer
-
Publish the Codeer LINE channel
- Publish the channel after the webhook, LIFF app, credentials, and agent binding are all ready.
- Unpublish it when you want to stop accepting new LINE events.
First live test
Run one full end-to-end test with a real LINE account before sharing the bot widely.
-
Add the LINE Official Account as a friend.
-
Confirm the user receives the email verification card.
-
Send one real text message.
-
Open the LIFF page inside LINE.
-
Enter an email address and submit the 6-digit code from the email.
-
Send another message and confirm the correct agent replies.
-
Confirm the conversation appears in
Histories.
The first AI reply comes after verification
Before email verification finishes, the user sees the onboarding card instead of a normal agent answer. If the first card was skipped, the same verification card appears again on later unverified messages.
Form requests inside LINE
If the agent uses Request Form, Codeer reuses the same LIFF app.
The expected flow is:
- the user receives a form card in LINE
- the card opens the requested form inside LIFF
- the user submits or rejects the form
- the conversation resumes in the same LINE thread
Important behavior
- A LINE channel must be published in Codeer before the webhook accepts events.
- Future LINE replies use the current published version of the bound agent.
- If a LINE user is inactive longer than the channel's
Conversation Session Timeout, the next message starts a fresh conversation and the agent does not carry over the earlier context. - Saving LINE credentials or changing the bound agent updates the live configuration immediately.
Publishis mainly the switch that allows LINE events in. - If you rotate the Messaging API access token in LINE, update the same token in Codeer right away.
Anyone who can message the bot can start the verification flow
Once the LINE channel is published, any LINE user who can reach that bot can open the LIFF verification flow. Use a separate test bot if you need a tighter pilot.
Troubleshooting
-
The webhook
Verifybutton fails or the bot never responds- Confirm the Codeer
Webhook URLis public HTTPS. - Confirm
Use webhookis enabled. - Confirm
Channel SecretandChannel Access Tokencome from the same Messaging API channel. - Confirm the Codeer LINE channel itself is published.
- Confirm the Codeer
-
The LIFF page works for admins but not for normal users
- Confirm the LINE Login channel is
Published, notDeveloping. - Confirm the LIFF app itself is also
Published— a newly created LIFF app stays non-public until you publish it. - Confirm the LIFF app belongs to that same LINE Login channel.
- Confirm the LINE Login channel is
-
LIFF opens but email verification fails
- Confirm the LIFF app endpoint is exactly the Codeer
LIFF Entry URL. - Confirm
LINE Login Channel IDin Codeer matches theChannel IDof the LINE Login channel that owns the LIFF app. - Reopen the page from inside LINE if the page says the LINE ID token is missing or expired.
- Confirm the LIFF app endpoint is exactly the Codeer
-
Users receive unexpected duplicate messages
- Disable
Auto-reply messagesin LINE Official Account Manager so only the agent replies. - Leave
Greeting messageson, but rewrite them to introduce the AI agent and how to use it. - Re-test after saving the Official Account settings.
- Disable
-
The user gets a code but cannot finish verification
- Verification codes expire after 10 minutes.
- Resending is throttled for 60 seconds.
- One email cannot be bound to a different LINE identity in the same workspace.
-
The bot says no published agent is configured or answers with the wrong behavior
- Publish the bound agent in
Editor. - Recheck which agent is selected in the Codeer LINE configuration.
- Publish the bound agent in